Showing posts with label plastic fantastic. Show all posts

Wednesday, February 18, 2015

New Construction, Old Camera - Kodak Brownie Reflex Synchro

The Washington DC Metro has finally come to Northern Virginia. Not yet all the way to where I live, but it is now in Reston. Below, you'll see a few pictures of the construction going on around the new Wiehle Avenue Station on the Metro's Silver Line.
As in my previous two posts, these were made with the Kodak Brownie Reflex camera. (Click Here) to read a little about that camera. I picked mine up for $10 in dirty, but good working order.
 
Wiehle Station Construction, by Reed A. George
Kodak Brownie Reflex Synchro Camera, Efke 100 Film (127 size)
 
 
DMC-365.blogspot.com
 

Tuesday, February 17, 2015

More From the Brownie Reflex - The Corn Crib

A while back, I posted a slideshow of images of an old corn crib on the property where I work. (Click Here) to see those, shot with Nikon SLRs (both a 50 year old Nikon F and a brand new Nikon Df).
Here are two more shots of the same building, photographed with my $10 Kodak Brownie Reflex, on 127 Efke 100 film.
 
 
Rather dark and moody. I like them.
 
DMC-365.blogspot.com


Monday, February 16, 2015

Brownie Reflex 127 - Some Results

Remember when I posted the question pondering why cheap old cameras are so much fun? (Click Here) if you don't remember, or want to see what the Brownie Reflex looks like.
 
Here are a couple of results from my first roll of Efke 127 (I bought it a couple of years back), developed by Dwayne's. The first is just an odd perspective of the new Metro station in Reston, Virginia. I actually like the way the film exposure numbers show up at the top (who knows why?).
 
Metro, by Reed A. George, Kodak Brownie Reflex Camera
And here's a scene you may have seen before, as I shot it with both the Brownie and my new Nikon Df. (Click Here) to see the Df version.
End of the Season, by Reed A. George, Kodak Brownie Reflex Camera
 
I like the randomness of shooting with very basic old cameras. They're cheap, and I think at least as much fun as shooting with a Holga. Once you've loaded film, the only variable in your control is composition. Exposure and focus are fixed.

This Brownie Reflex was $10, and cleaned up very nicely. However, getting 127 film is not easy, and it's expensive ($11-$12 per roll, twelve exposures). The only place I know to get it reliably is The Frugal Photographer (frugalphotographer.com). I bought a few rolls last time, including some black and white and some color.
 
You can still get 127 developed with no problem. This time, I used Dwayne's. But, I'm not as happy with their work as I am with The Darkroom (thedarkroom.com). Just my opinion. It's good to have them both as options.
I've got a few more images to share from this first roll, so stay tuned!
 
DMC-365.blogspot.com

Saturday, January 10, 2015

Why Are These Old Cameras So Much Fun?

I recently picked up a Brownie Reflex Synchro model camera in an antique shop. I paid $10, which is about $6 more than it originally cost.
 
It is a TLR design, but with fixed focusing only. So that really only means that it has a waist level finder. Anything >5 feet away will be in focus.
 
The camera was extremely dirty, but was easy to disassemble and clean; now it looks great. Another challenge: it shoots 127 film. Nearly extinct, 127 film can still be purchased at Frugal Photographer. (Click Here) to go to their website. It's pretty expensive, but at least it's available. You can get 127 film processed at The Darkroom.
 
I am guessing the fixed shutter speed to be about 1/50-1/100 second, and the aperture to be about f8. That means that iso 100 film should work in daylight situations. I have shot 10/12 frames of my first roll of Efke black and white 100 film. I look forward to seeing and sharing the results.
 
DMC-365.blogspot.com


Saturday, September 6, 2014

Low Tech Wonders - A Little Fun with the FPP Debonair

Sometimes I just want to have a little photographic fun. I want to drop all pretense and concern about the technical aspects of photography, and shoot. I suppose I still (kind of) think about composition, but that's about all I control when I shoot my "Debonair" 6x4.5 medium format toy camera from the Film Photography Project (FPP).
 
(Click Here) to check out the awesome Debonair, a <$20 real film real toy camera on the FPP website.
 
Here are some shots I took on an outing to a local farm to pick strawberries with my family last year (it took a while to finish the roll and send it off to The Darkroom).
 
All of these were shot on expired Konica Centurian film, which judging by the name should be good for 100 years, right? I love the vignetting you get with the cheap plastic lens. It's actually kind of sharp in the center, but that falls away very quickly. Theses are pretty much out-of-camera scans, with only cropping in Lightroom.
 
DMC-365.blogspot.com
 

Tuesday, June 24, 2014

Holga 25mm f8 Lens on Lumix Micro 4/3 - Down by the Riverside

I attended the Shenandoah Riverside Festival in Brunswick, Maryland last weekend.
 
(Click Here) to read a little about the festival, and hosting organization, Earth Korps.
 
In addition to my Nikon D700 kit, I brought along the tiny Panasonic Lumix DMC-GX1 and a couple of specialty lenses, including a plastic toy lens, the Holga 25mm f8. I had some fun with that, and here are the results.


And here's my favorite:
 
Fun with the Holga 25mm f8 Lens for Micro 4/3, by Reed A. George
All Images Made with Panasonic Lumix DMC-GX1
 
For $20, the Holga lens is worth a try. See below for a link to yours on Amazon.
 
Recently, I've been having fun with low tech. Not only cameras that were once state-of-the-art but happen to be from the age of film, but also things that started out low tech, like the Holga lens and my pinhole camera.
 
I've got an exhibit in mind along these lines. Just a concept, I need to work through writing an artist's statement and see if it holds up. It's time for a new project.
 
DMC-365.blogspot.com


Friday, June 7, 2013

Low Tech Wonder - the Debonair from the Film Photography Project

 
The Plastic Filmtastic Debonair from the Film Photography Project
Image Source: http://filmphotographyproject.com/store/fpp-plastic-filmtastic-120-debonair-camera
 
I've gotten hooked on a podcast from the Film Photography Project (FPP). It's a regular audio podcast put together by a group of friends in Findlay, Ohio. Part comedy, part film photography infocast, these guys keep it light and interesting.
 
(Click Here) for information on the podcast.
 
They also have an online store, with great pricing and availability on film. In fact, their Kodak film prices match the big New York warehouses. I like to support FPP.
 
(Click Here) to go to the FPP store.
 
While you're looking through the store, you may notice the "Plastic Filmtastic Debonair." An all-plastic medium format (120 film) camera, the Debonair is reminiscent of a Holga. With its fixed "Super lens," which is a 60mm f8 (no f-stop adjustment available), the Debonair shoots vertical (portrait) orientation 6x4.5 cm images. You get 16 images per roll of 120. Shot spacing is accomplished through a red window in the camera back, so you'll need to put some black tape over that if you use high speed film. The shutter speed is fixed somewhere around 1/100 sec on the sunny setting. There's also a cloudy setting that seems to be close to the same, maybe 1/60 sec. The lens has three focus settings - close, medium, far.
 
This camera allows you (forces you) to put your mind on seeing images, rather than technical settings. Composition becomes king. Sharpness is out the window, of course.
 
Most importantly, the Debonair costs $19.99. It's worth at least $19.99, maybe even $20.00.
 
Here are some images from my first roll of film through the Debonair, shot on Konica Centuria 100 print film, which expired in 2006.


Plastic Filmtastic Debonair Images, by Reed A. George
 
Obviously, I didn't spend any time post-processing these. I did increase the exposure a little after scanning them, but that's it. I think iso 200 film would be better for daylight pictures.
 
As usual, I used my favorite processing house for these, The Darkroom.
 
(Click Here) to check out The Darkroom. They process 35mm and 120 film for $10 per roll, including putting scans online for you. I'm a dedicated customer. You can print out a prepaid mailing label, or they'll send you a prepaid envelope if you contact them. I have sent them a lot of film, and always been happy with the results.
 
So, spend $20 with the good people at FPP and get yourself a Debonair. See what forgetting about f-stops, shutter speeds, and focusing points can do for your creative side!
 
DMC-365.blogspot.com


Sunday, May 19, 2013

Low Tech Wonders - Kodak Brownie Bullet Comes Back To Life!

I can already hear the questions: "Why, Reed, why? Why would you mess with a junk store camera that shoots film you can't even buy any more?" Well, maybe I'll be able to convince you that it's because it lies right at this interface of technology and art that I love to be in. Even if the tech is low...
Kodak Brownie Bullet Camera
 
Okay. I bought this little Bakelite Kodak camera at an antique store. I paid too much (anything over $2 is too much). But, I'm still happy I did. Read to the end to see the special (hopeful) feature that really convinced me to buy it.
 
The Brownie Bullet was made from 1957-1964. It's final year of production was my birth year. It was designated as a "premium" model, which meant that you had to save up Campbell's soup labels to get one (no joke). It features a plastic Dakon lens, fixed aperture, fixed shutter speed.
 
(Click Here) to read a little more about the Bullet.
 
The Bullet is designed to shoot 127 roll film, which is essentially no longer available. Efke was making it until recently, but they've shut down. You can still buy Efke (iso 100) at Freestyle (Click Here), but it's just running down their stock. There is another company that still advertises 127 film, but they're out of stock.
 
Well, I just couldn't stand to let the Bullet sit without shooting something in it. After an hour or two of turning it different ways and thinking, I found a way to load 35mm film into it. The 35mm film cassette won't fit in the back. I had to unroll the film in the dark, roll it back up more tightly, and insert it into a modified film canister, cut down to fit inside. It worked!
 
But, there was one problem. The Bullet is designed with a curved film plane, which means that the 127 film doesn't lay flat in the camera; it's curved to match the curvature of the image produced by the Dakon lens. So, while I got images from the first roll (which pulled the film flat), they were unfocused in the center. A bonus, though, is that because the 127 film is wider than 35mm, the images were panoramic, and the sprocket holes were exposed. Cool.
 
So, a little more modification was in order. I got some thin plastic material, and through trial and error cut it to the perfect size to fit inside the camera back, under where the film plane should be. It was important that it support the film from under the film plane, to put the film in the right place. Then, I cut a window into the plastic to serve as the image space. Finally, I covered the plastic in black electrical tape, both to reduce light bounce, and to smooth out the rough cut plastic surface.
 
Here's what the mod looks like:
35mm Mask for the Bullet, by Reed A. George
 
This time, I loaded up some iso 800 print film (I noticed that 400 was underexposed, even in daylight outdoors), and tried again.
 
Success! Here are the results. All are shot with the Bullet, all the same (only) aperture and shutter speed.
 
 
Here are some vertical orientation shots:
 
As you can see, I wasn't completely successful in eliminating scratches on the film. But, I'm pretty impressed by what this cheap old camera can do.
 
The hardest part? After finishing a roll, I have to once again open it in the dark, remove the 127 spool that it's now wrapped around, tape it to a leader sticking out of the original 35mm film cassette and wind it back in. Then I just take it to Walgreens, and remember to ask them to not cut the negatives.
 
So, I got my money's worth out of this experience. But, I still don't have an answer for a friend of mine who says "Hey, Reed, if you paid $20 more, could you get a camera that already works?" Yeah, yeah, I could.
 
I don't really understand the exposure. How can it take iso 800 to shoot in the daylight with this camera? 800 speed film sure wasn't there when this camera was made. It has no way to trigger a flash. And I doubt the shutter is faster now than when it was new.
 
I did order some iso 100 film in 127 size from Freestyle, but I honestly don't know how I'll use it. It will be too slow, even in broad daylight.
So, here's a true piece of history that still works.
 
Brownie Bullet
 
Oh, yeah. That hopeful secret? There was still a roll of 127 film in the camera when I opened it up. It was near the end. So, I'm hoping to get a glimpse into the last pictures this camera took before it got stuffed away into a closet or attic. Who knows how long ago that was? Fingers crossed - I'll be sending that roll off to The Darkroom for processing soon.
 
DMC-365.blogspot.com


Monday, February 11, 2013

Low Tech Wonder - Lomography Sprocket Rocket and Nikon Flash at an Indoor Event!

 
Making the Mochi (Rice Cakes), by Reed A. George
Lomography Sprocket Rocket, Nikon SB-30 Flash
iso400 Color Print Film
 
I've mentioned in the past that I find myself only using my film cameras in easy shooting situations. This post takes me out of that limitation a little. My family and I attended a Japanese New Year celebration in Washington, DC. Having been to this event before, I knew that the lighting was weak in the hotel meeting rooms. Weak and kind of yellow - you know, like attending a convention at any other hotel.
 
I wanted to take my new Lomography Sprocket Rocket and give it a try. But, with a maximum aperture of f10.8, how could I pull it off? Simple! Use the hot shoe on top to mount a flash. I used an old Nikon SB-30, a tiny little flash unit. I knew I'd get huge light dropoff with distance, using a small flash like that. But, I decided that was what I wanted.
 
Nikon SB-30 Flash
Image Source: http://reallyrightstuff.com/mmrrs/Others/Newsletter/newsletter4.html
 
I loaded up a roll of iso400 film in the Sprocket Rocket, set the SB-30 to the automatic setting for f11 at iso 400 (third row down in the little table on the back of the flash shown above), and went to town, literally.
 
Another Form of Mochi Maker (Automatic), by Reed A. George
Lomography Sprocket Rocket, Nikon SB-30 Flash
iso400 Color Print Film
 
 
Outgoing Vendors, by Reed A. George
Lomography Sprocket Rocket, Nikon SB-30 Flash
iso400 Color Print Film
Parallax Correction? Well, Not So Much, by Reed A. George
Lomography Sprocket Rocket, Nikon SB-30 Flash
iso400 Color Print Film
 
When you shoot up close with the Sprocket Rocket, parallax can be a real problem. I thought I had this young man's face almost in the middle of the rangefinder in the vertical direction. As it is, he ended up with a sprocket hole over one eye. Sorry about that, kid.
 
I had a blast walking around the event with the Sprocket Rocket and flash. With these types of toy cameras, the normal "no-no"s, like using a tiny flash and small aperture almost add to the images. I am thoroughly enjoying dropping all pretense and shooting for pure fun with this camera. More low tech wonders to come!
 
DMC-365.blogspot.com


Thursday, February 7, 2013

Low Tech Wonders - A New Series on DMC-365 - The Lomography Sprocket Rocket

Optically Flawed, Visually Interesting, by Reed A. George
Lomography Sprocket Rocket Camera, iso400 Film
 
I've been enjoying a few plastic "toy" cameras recently. This post will be the first of a series on the results. If you're not familiar, just do a google search for the word "Holga." There's an entire counter-culture of photographers using these things. They take all of the technical work out of photography, allowing you to focus on composition. The lenses are typically low quality, sometimes even plastic. There are light leaks. These are not high end or expensive cameras.
 
My parents sent me a new toy for Christmas - the Lomography Sprocket Rocket. Here's what it looks like (buy yours at my link to Amazon at the bottom of this post):
 
Lomography Sprocket Rocket Superpop! Blue Camera
Image Source: www.amazon.com
 
Mine is black.
 
What's cool about this camera? Well, first off, the sprockets. It's designed to expose all the way to the edges of the 35mm film, including the sprockets. It also shoots in a wide panorama format, as you can see above.
 
Keep in mind that this is a toy camera from the same folks that sell Holgas. It has a fixed focus wide angle lens (actually, it also has a "macro" setting for subjects less than 1 meter away), and the depth of field is so large, focus is not really an issue. There is one shutter speed (~1/100 of a second). There are two aperture sizes: if you set the camera for daylight exposure, it's about f16, for cloudy, it's about f10.8. Film advance is manual, and you have to look down into a squinty little window to see when to stop turning the film crank. It does have a working hotshoe for flash (more on that in a future post).
 
In order to scan the film, I use another Lomography product, called the Digitaliza, on my Epson scanner. The Digitaliza holds the film by the very edges, exposing the sprocket holes to be scanned.
 
I think this thing is very cool. It really does bring down all pretense of photography being serious business, and lets you play. I recently carried mine, along with a little Nikon flash, to an indoor event. I had a blast with it. I'll be posting pictures from that soon.
 
By the way, there are cheaper plastic cameras to play with that accomplish many of the same things. I'll be posting about at least one of those in the near future as well.
 
In the meantime, if you want to have some fun, pick up a Sprocket Rocket from the link below.
 
DMC-365.blogspot.com


Friday, January 18, 2013

The Creative Process, or How I Got the Shot

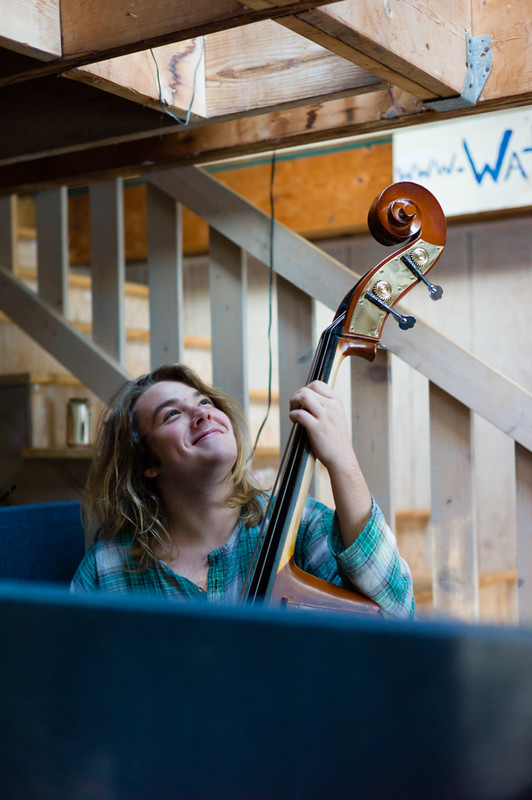
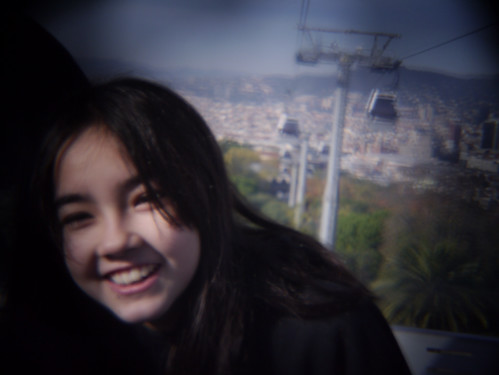
First off, I want to let you know that I'm very proud of the first picture below. I understand that it's not going to win the Pulitzer, but it's exactly the type of image that I strive for, and is pretty elusive. For me, it brings together a lot about my project in the local music scene and why I enjoy it. It was taken during a recording session for the local band "Jake and the Burtones," at Shepherd's Ford studio in Berryville, Virginia.
Jack Pugh of Jake and the Burtones, by Reed A. George
Leica M9, Carl Zeiss C Sonnar 50mm f1.5 Lens
 
Now, I want to analyze what went into the process for me, and how I ended up getting this shot. There were many preparations that allowed this to happen, including a lot of getting to know people and being around at music events, which eventually allowed me to get an invitation to the recording session. Let's leave that important part aside for now, and focus on the photographic approach that I took.
 
The first thing that struck me when I walked into Shepherd's Ford was how the musicians were walled off from each other, in separate little cubes. The second thing, which probably should have been first, was the light. It was a beautiful, promising challenge. Dynamic range was surely going to be part of it. At the north side of the room were big, un-cluttered windows, with dramatic sunlight pouring in at the low angle of winter. Diffused by snow on the ground, it made an enormous, gorgeous warm softbox to light the scene. The first five feet of the room were bathed in this awesome light. Ten feet in, the shadows took over - long, dramatic, every scene full of contrast. But, shooting while facing those windows required overexposing the outdoor light, in order to get any detail on the darker side, like in peoples' faces. This exposure adjustment was a technique learned from the books - sometimes you must compromise exposure in peripheral areas to get it right on your main subject. One approach is to spot meter your main subject, and make exposure decisions from there. The Leica M9 that I was shooting doesn't have a spot meter, so I just metered a characteristically-lit portion of the floor, took a few test shots, and adjusted from there.
 
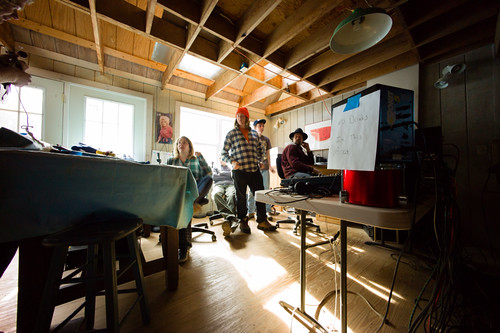
In trying to capture the true feel of the whole scene, I started with an ultra wide angle lens, the Voigtlander 12mm f5.6 Heliar, and shot to include the cube walls separating the musicians. This is a lens that I don't use often, as it's just amazingly wide, I find composition to be very challenging. The ultra-wide approach was only moderately successful. However, I found that the lens allowed me to include a lot of details from the studio, including the Dolly Parton pin-up on the back wall. I also really liked how the lines of the rafters reached out from the distance to this lens. So, I used the ultra-wide lens and exposure compensation technique to capture the whole band, including lots of information about the studio setting. This was critical for me. I get to shoot these musicians under excellent stage lighting all the time. Just portraits, without environment, could be shot anywhere, at any show. I wanted images that could only be shot here, in the studio, which is a unique and priveleged situation.
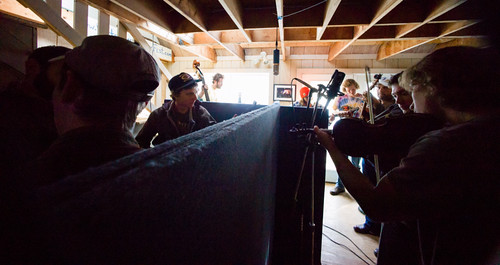
Studio Walls, by Reed A. George

Leica M9, Voigtlander 12mm f5.6 LTM Lens

Jake and the Burtones in the Studio, by Reed A. George
Leica M9, Voigtlander 12mm f5.6 LTM Lens
 
Once I had these shots, I could then begin to work on individuals. I would say that I need more work on this type of shooting. The subject photo of this piece (the first picture above) was my one "aha" interaction. Once again using the huge softbox effect of the external windows, I'm sure that it was the light that attracted me to shoot from this particular angle, in front of the bass player, Jack Pugh. I chose the Carl Zeiss 50mm f1.5 C Sonnar lens, both because I needed the wide aperture for the low light shots, and because it has just the right balance of character and sharpness to produce the look I wanted.
 
This was when the magic happened. At first, Jack played it cool, like I wasn't bothering him standing there shooting away while he played. Then I saw him start to sniff and move his face in a funny way. Smirking from behind the camera,I guessed that his nose was itching. Making a series of expressions I chose not to capture out of courtesy, he started to smile. We both cracked up. I thought maybe it was over, time to move on, but decided to hang in and keep shooting. Then I saw the shot develop. We had just been through a tiny shared moment together. His urge to sneeze now abated and he really relaxed, with me still there. It was not the moment of connection when we laughed together that turned out to be the best shot, but the moment after, when it felt like normal again, even with my lens pointed at him. Magic.
 
While I typically shoot my Nikon D700 at live music shows, mainly due to its supreme handling of low light situations, I can honestly say I don't think I could've pulled this shot off with a DSLR. The Leica is just a less threatening thing to have pointed at you.
 
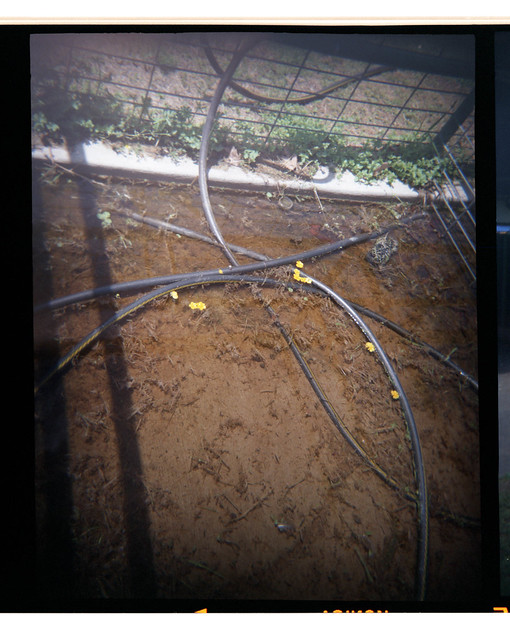
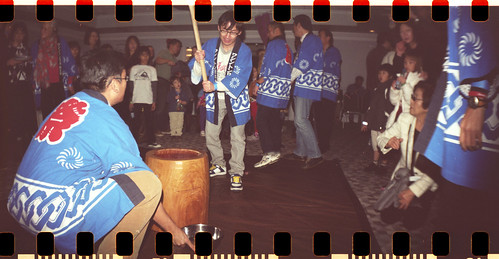
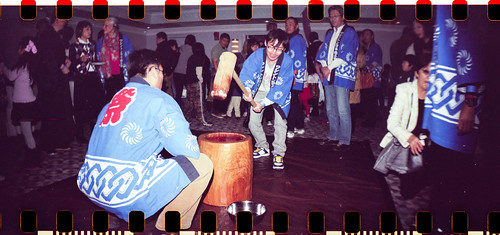
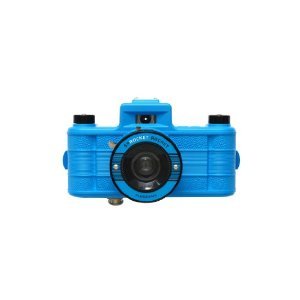
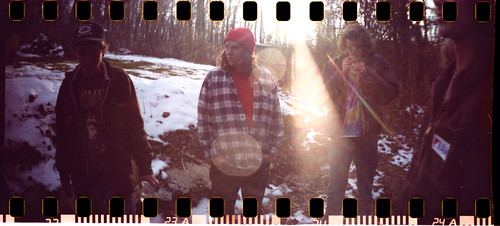
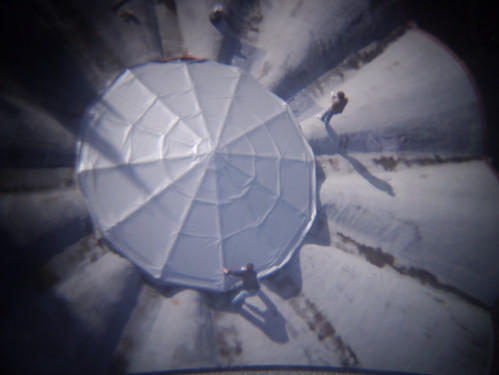
Once the pressure was really off, I shoot a couple of really risky images, using a new toy plastic camera I got for Christmas, the Sprocket Rocket (!) camera by Lomography. This beast shoots 35mm film panoramas, with the image going out and over the sprocket holes in the film.
Break Time, by Reed A. George
Lomography Sprocket Rocket Camera, Lomography iso800 Color Print Film
 
If you're interested in the Sprocket Rocket, click on my Amazon link at the bottom of this post to learn more, and maybe even buy one.
 
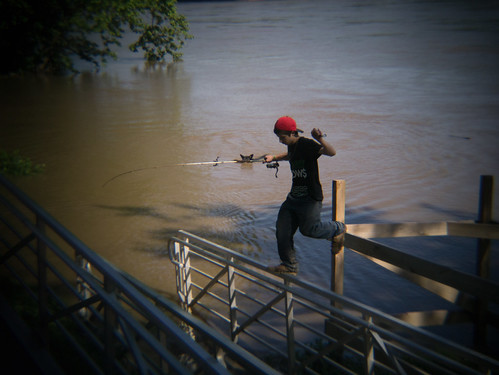
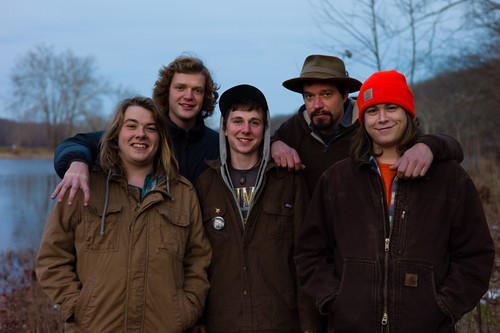
Finally, to round out my coverage of the day, I walked with the band down to the banks of the Shenandoah River and got a quick group shot.
 
 
Jake and the Burtones (and Brian), by Reed A. George

Leica M9, Carl Zeiss C Sonnar 50mm f1.5 Lens

I had a great time at this shoot. The Leica M9 was a great choice for shooting in the studio. I also enjoyed playing around with the Sprocket Rocket.
 
Oh yeah. If you want to hear Jake and the Burtones (Click Here)! I can tell you from first hand experience - their new album is going to be great!
 
DMC-365.blogspot.com


Friday, December 21, 2012

Diptych - Barcelona

 
Barcelona Couple, by Reed A. George
Panasonic Lumix DMC-G3, Holga 25mm f8 Plastic Lens
iso 400, f8, 1/100 sec
 
You may have already seen my previous post of shots taken with the Holga plastic lens for Micro 4/3 cameras. The two above give me fond memories of walking "La Rambla," a major pedestrian thoroughfare in Barcelona. I shot these two shots seconds apart, as I walked past this couple at the subway station.
 
I pay attention to the pace of my shooting. Sometimes, I really enjoy taking a lot of time, setting up a shot, attempting perfection. I find that style of shooting relaxing and rewarding. On the opposite end, another of my favorite styles is street shooting, where I typically set the camera up with manual range focusing (no autofocus), preset exposure (sometimes I'll use Aperture priority, but use Manual more often than not), and use the camera to capture extremely brief little moments. This is a real challenge, and there's no time for fiddling with the camera. The result is just that - captured moments. Imperfect, spontaneous. Sometimes the imperfections add to the image, sometimes not.
 
In the case above, the imperfections are clear - thanks to using a $20 plastic lens with fixed f-stop and only very rough focus control. Personally, I love the result. It is very close to the level of detail in my memories of that morning, walking down La Rambla.
 
Thanks again to Andrea Costa for pointing me towards this great creative tool (the Holga lens).
 
DMC-365.blogspot.com
 
 
DMC-365.blogspot.com
 

Wednesday, December 5, 2012

Why Is This So Bloody Fun? Holga Plastic Lens on Micro 4/3.

So, on a whim and a suggestion (from Andrea Costa, one of my readers), I recently picked up a Holga plastic lens for my Lumix DMC-G3 Micro 4/3 camera. Total cost? $22 including shipping, and a couple of weeks waiting for shipment from Hong Kong.
 
(Click Here) to go to Holga Direct if you want one.
 
I used mine on our last day in Barcelona. I can't really explain why, but it's sort of freeing to not worry about the technical quality of your images. It's a blast to just snap whatever comes in front of your eyes. One very rough focus knob is all there is. The f-stop is always f8. I used aperture priority sometimes, manual shutter speed settings, other times. Most of the time I used iso 400, but went up to 3200 in dark places.
 
This shot was taken from the cable car going up to Montjuic Castle. These guys were working on the roof of a building in the part.
Roof Repairs, by Reed A. George
Panasonic Lumix DMC-G3, Holga 25mm f8 for Micro 4/3
Going Up, by Reed A. George
Panasonic Lumix DMC-G3, Holga 25mm f8 for Micro 4/3

I find that this lens works best with bold shapes and colors. Maybe that's one of the things I like about using it. It just kind of captures blurry little memories of what you're experiencing. I really, really like using it.
Vines, by Reed A. George
Panasonic Lumix DMC-G3, Holga 25mm f8 for Micro 4/3

Montjuic Castle Arches, by Reed A. George

Panasonic Lumix DMC-G3, Holga 25mm f8 for Micro 4/3

 
Lamps, by Reed A. George
Panasonic Lumix DMC-G3, Holga 25mm f8 for Micro 4/3
Tomatoes, by Reed A. George
Panasonic Lumix DMC-G3, Holga 25mm f8 for Micro 4/3

I highly recommend that you get one of these. I can feel it being a great solution for creative block, when I just can't think of anything to shoot, or what to say with my photography. I wondered about whether I'd regret using it on a trip to Barcelona - didn't I want all nice, sharp images? The answer is no. The Holga lens really added to my trip, and the shots here will be part of my memories of the trip.

DMC-365.blogspot.com


DMC-365.blogspot.com