I was reading a blog post on Digital Photography School that discusses how to shoot people pictures in harsh, midday light. Many photographers really believe that the "golden hours" around sunrise and sunset are the only time to get great outdoor images. While these are certainly the best times, especially for landscapes (yes, you landscape shooters who are up a 4AM can go to sleep again about 9 AM), I refuse to limit my hobby to those hours.
The blog entry is written by guest contributor, Oded Wagenstein. (Click Here) to read the post on Digital Photography School.
I'll summarize the most important points for you. First, the problem. Shooting in harsh daylight produces high contrast, unflattering images. Either the highlights are blown (saturated), the shadows are pure black, or both. This is caused by lack of dynamic range, either in your sensor or your film. No adjustment of exposure will allow you to go past that limit, but there are solutions. I'll list them in the order Oded presents them, with my own comments, of course:
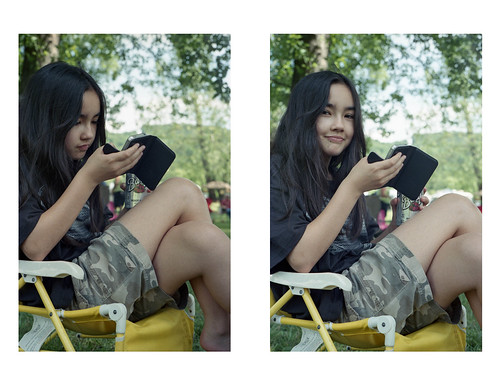
1. Go into the shade. If you can get your subject into the shade, the demands on dynamic range are significantly reduced. Here's a shot I made in the shade on a sunny day:
2. Shoot silhouettes. This is the "if you can't beat 'em, join 'em" approach. Silhouettes are easy to shoot, and can be very dramatic. However, you're going to get tired of looking at hundreds of silhouettes if that's your general approach to shooting in harsh daylight.
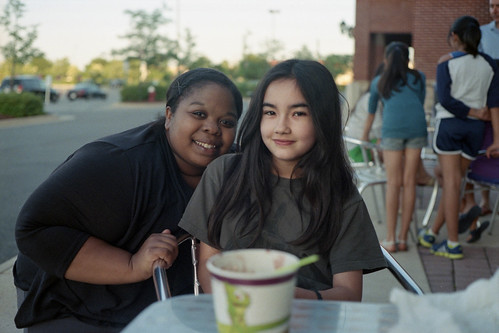
3. Blow out the background. In the shot below, I knew that I did not have enough dynamic range, even on film, to capture detail in the dark areas (see the black shirt, for example) and the bright white sky. So, I decided to use my available dynamic range on the part of the picture I was interested in, the faces. This sounds technical; all I really did was spot meter on their faces to select the best exposure, knowing that the sky behind would be overexposed. That's ok. The sky clearly was not my subject here. A good tip - meter your own hand to get the right exposure settings in a situation like this.
4. Use a reflector. This is a great tip. I usually don't have enough hands to position a reflector and shoot the camera at the same time. But, if you can get someone to hold one for you, a reflector can very effectively light up those dark shadows. You can use a gold one to bring some warmth back into the color as well.
5. Fill flash. Use a small amount (I mean small amount) of flash to fill in the shadows. This can easily be overdone. But, it can save the day in a pinch. This is one of those few places where your on-camera flash can be useful, if you can dial it down to a very low output level.
6. High dynamic range (HDR). HDR combines multiple exposures at different settings to allow you to select the best exposure for shadows, mid tones, and bright areas. It can be very effective. Like fill flash, it's also very easy to overdo it. I consider HDR a last option for people shots. Mostly because you must shoot at least two, probably three shots at a minimum. This means the person has to freeze while you shoot, shoot, and shoot again. I've never used HDR for people shots.
So, don't give up when the sun rises high overhead. Just think about the light, exposure, and most importantly, dynamic range.
DMC-365.blogspot.com


Great post!
ReplyDelete