Showing posts with label negative. Show all posts

Thursday, October 22, 2015

Halloween's Coming

Pumpkin Time, by Reed A. George
Leica M3, 50mm f2 Summicron Collapsible Lens
Kodak Ultramax 400 Film
Processing and Scanning by The Darkroom (thedarkroom.com)
Manipulated in Snapseed
 
DMC-365.blogspot.com
 

Wednesday, April 29, 2015

Another Birthday Portrait with the Mamiya Universal Press

A few days back, I posted an image I shot of my daughter on her birthday, taken with the Mamiya Universal Press (MUP) and Polaroid back, loaded with Fuji FP100C pack film. I also shared a scan of the color negative I recovered from that shot. (Click Here) to see that post.
 
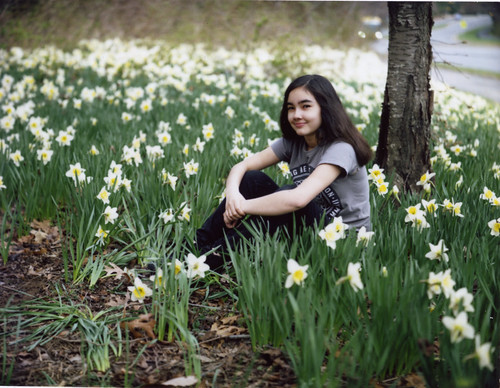
Today, I'll share another shot from the same time and place, only this one was made on Kodak Portra 400 color negative film, using the MUP's 6x9 film back.
 
Birthday Portrait, by Reed A. George
Mamiya Universal Press Camera, 150mm f5.6 Lens
Kodak Portra 400 Color Negative Film
 
I just got the negatives back from The Darkroom (thedarkroom.com). I actually made a mistake with this roll of film, and exposed the Portra 400 at settings for Portra 160. No problem. The Darkroom pulled the processing by 1.5 stops, saving the pictures for me. I'm pleased with the result.
 
I really enjoy shooting the MUP. It's a very large, heavy beast, with matching impressive lenses. But, when you have the time to set it up and think about your shot, it's great fun to use. This is slow photography. I like it.
 
DMC-365.blogspot.com
 

Thursday, April 16, 2015

Polaroid/Fujifilm FP100C Instant Negatives from the Mamiya Universal Press Camera

I'm still having fun with my Mamiya Universal Press (MUP) camera. Today, I used it to shoot some portraits of my daughter on her birthday using Fujifilm FP100C instant film. Note that pack film is larger than the 6x9 image that the MUP lenses are designed for, hence the vignetting in the corners.
Scanned Instant Print, 14th Birthday, by Reed A. George
MUP, Fujifilm FP100C Film, f5.6, 1/125 sec.
 
 
I was so pleased with some of the images that I decided to figure out how to recover the negatives from the film backing, which you usually throw away.
 
(Click Here) to see a video from the Film Photography Podcast describing how to recover a negative from Fujifilm FP100C instant pack film. Beware that the process uses bleach. Wear gloves and keep a fan on while you work.
 
It was actually pretty easy to do, and the results are quite impressive. Here's a scan of the same negative that was used to make the print above:
 
Scanned Instant Negative, 14th Birthday, by Reed A. George
MUP, Fujifilm FP100C Film, f5.6, 1/125 sec.
 
I think I could have done a better job scanning this negative. The highlights are too high, and the colors are washed out compared to the print.
 
Here is a more impressive comparison, showing the scanned print (left) and negative (right) at 100% magnification.
 
100% Crops (Print on Left, Negative on Right)
 
As you can see, the negative has a lot more detail and sharpness, and grain. Pretty interesting. I could make a 5x7 print from the negative just fine.
 
DMC-365.blogspot.com


Friday, September 26, 2014

Tangible Artifacts of the Photographic Process

 
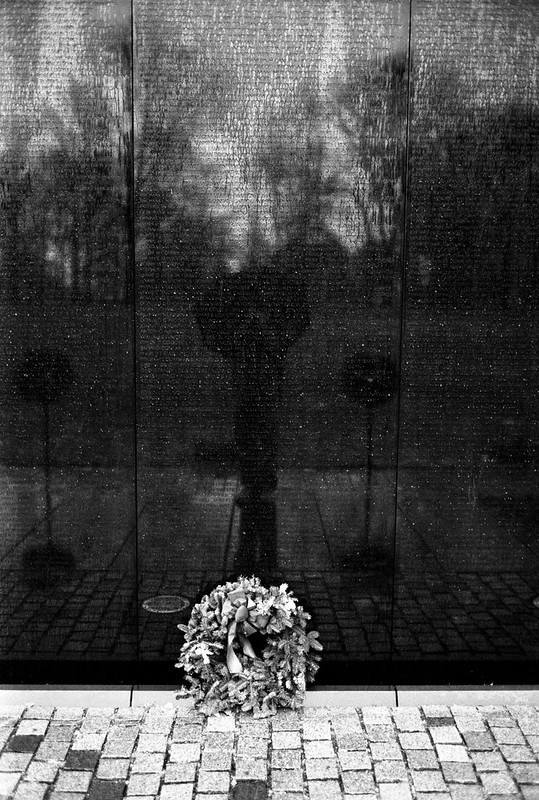
Vietnam Memorial
Leica M4-2, Leica Summicron 35mm f2 v.3 Lens
Kodak TMax 400 Black and White Negative Film
 
One item of some debate at the Magnum workshop was whether or not an image really exists before it is printed on real paper. Magnum legend Costa Manos maintains that the print is a necessary component, that you really don't have an image until you have a print. And his prints are spectacularly made, with such care that you can identify with his point.
 
Not everyone agrees, but no one argues that a fine physical print is a worthy object; it's just a question of whether it's always necessary.
 
Having shot only digital for a full week, I find myself wondering whether one could make the same argument about the negative (or transparency) being a necessary artifact. In fact, this did come up during one of the public talks, where there was some disagreement about whether you'd grab your hard drive on the way out in the event of your house catching fire, as people have done with their family pictures and negatives for many years. I think I would. Or, to argue against the need for a physical negative, perhaps having all of my images backed up to the cloud obviates the need to grab anything on the way out.
 
A final thought is that I have actually lost images in a most unfortunate simultaneous crash of two hard disks (copies of each other). But, I suppose I have also lost most of my earliest negatives, which were shot before I got smart and developed an organized filing system. Those negatives were really lost in the carelessness of youth, not as a result of the medium on which they were stored.
 
So, what do you think? Must it exist in physical form to be a real photograph?
 
DMC-365.blogspot.com


Thursday, September 25, 2014

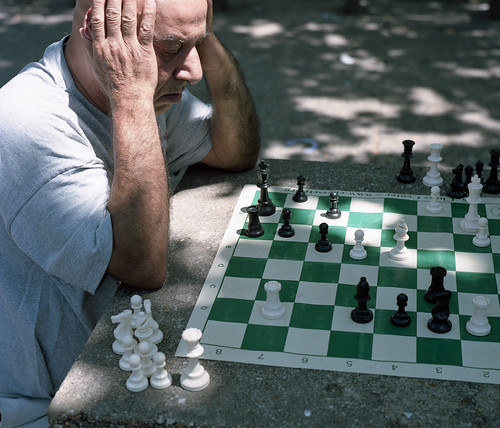
Next Move, Mamiya Universal Press

I photographed this example of intense concentration at DuPont Circle in Washington, DC.
 
Next Move, by Reed A. George
Mamiya Universal Press Camera, Mamiya Sekor 100mm f3.5 Lens
Kodak Portra 160 Color Negative Film
 
I just returned today from the Magnum workshop in Provincetown, Massachussetts. I've fallen behind in writing blog posts, but not to fear. I will catch back up with no break in daily posts. I have a lot to write about from the experience, but it will take some time to get my digital files and thoughts together.
 
And, I have four rolls of film either back or on their way back from The Darkroom (thedarkroom.com), so there's some new image material on the way from that as well. I must say I missed shooting film amongst all that digital photography last week.
 
DMC-365.blogspot.com
 

Tuesday, August 19, 2014

Fuji Instant Pack Film FP3000B, Negative and Positive,and Mamiya Press Universal

My very good friend Dennis recently sold me his Mamiya Universal kit. Initially, I was not interested, as the Universal is an enormous and heavy medium format kit. More on that later. I'll post some images of the kit and why I now really find that I like it.
Well, one of the things that came with the kit was a Polaroid back. Unfortunately, it is designed for Polaroid 80 series film, which is no longer available. About a week of trolling ebay yielded a very nice replacement, which allows use of Fuji pack film. Currently there are two film options in this format - color at iso 100, and black and white (FP3000B) at iso 3000. How's that for a range?
Unfortunately, the FP3000B film has been discontinued. There are still stocks of it around, but at 2.5-3X the original cost. I have a few packs, but probably won't be able to buy more.
Here's a shot of my wife, made with the Universal, 150mm f5.6 lens, and FP3000B:
Scanned from Print
I was quite pleased when I saw this appear as I peeled the backing paper away. It's quite interesting to get a really sharp image with great optics on instant film. My old Polaroid camera just doesn't stand comparison.
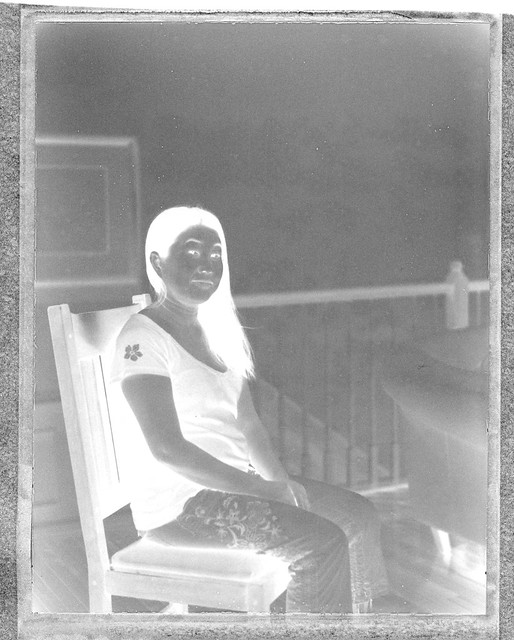
Both types of pack film produce negatives in the process, but of very different types. The 100 speed color film negatives must be removed from the backing and bleached, producing a transparent negative. FP3000B produces a paper negative, which you simply have to protect and allow to dry in the dark (or near dark). Here's what the negative from the print above looks like:
Paper Negative, Fuji FP3000B Instant Pack Film
 
If you take the dry negative and scan it on a flatbed scanner (I use an Epson V750), you get something like the image above. Invert the tones and flip the image horizontally in Photoshop, and you get this:
 
Positive from Scanned Negative
 
Pretty cool, huh? The scan from the negative is sharper than the original print, but also shows grain. I love the slightly uncontrollable factors like the edge patterns and occasional black dots. This feels like real photography to me.
 
One note - you'll notice lens vignetting on instant prints from the Mamiya Universal. It's designed for maximum size images of 6x9 on 120 film. The pack film image is larger than that. Reportedly, the Mamiya 75mm and 127mm lenses don't vignette on pack film. I don't have either, so can't say for sure.
 
Having shot a few rolls of film in the Universal, I'm anxiously awaiting an email from The Darkroom, notifying me that the film I sent in last week is processed and scans are posted. Based on the instant results, I'm expecting some amazing image quality from the normal medium format film I've shot.
 
More to come from the Mamiya Universal!
 
DMC-365.blogspot.com
 
Need great film processing? (Click Here) to visit The Darkroom. They're the best in the business.

Saturday, May 31, 2014

Brain Science Demonstration From the Photography Blog THEME

http://www.the.me/the-human-brain-sort-of-a-virtual-darkroom/

I work in brain science. I love it when I find overlaps between my chosen career and my chosen hobby. This one is great.

Here's the experiment that you should perform: Make the image above as large as possible on whatever device you're reading from (an iPad worked well for me). Stare at the red dot on the model's nose for 30 seconds. Now, look at a blank light surface (like a white wall) and blink several times. You'll see the negative image above turn into a positive image. Amazing.

(Click Here) to read the original post on THEME.

So, what's going on here? It's called a negative afterimage. Basically, what happens is that by staring at the negative image long enough, you are saturating some of the photoreceptors (cone receptors, to be exact, those that detect color), but not others. The receptors specifically tuned to the colors in the negative image become saturated, and when that happens, they become less sensitive. Receptors for colors not in the image are not affected. So, when you look at a blank surface, the saturated receptors give you a sense of very low levels of the color you saw in the negative, while colors that are absent appear relatively stronger, giving you the sense of an image with colors opposite to what you looked at.

(Click Here) for a more thorough explanation.

Pretty cool, huh?

DMC-365.blogspot.com


Sunday, May 4, 2014

And on the Color Front, CineStill Film - Not Working Out For Me

I wrote some time back about a new film stock (CineStill) that I wanted to try for my low light concert photography.
 
(Click Here) to read more about the film. Originally made for motion pictures, it's advertised as iso 800 nominal, pushable to 3200, and suitable for standard C-41 processing. I did not find this to be the case in my situation.
 
Now, let me start by saying that my opinion here is of how this film does not fit my specific shooting style and needs. That includes many variables: actual lighting characteristics of the subject I was shooting, camera, lens, exposure, film, processing, and I'm sure many others. Let me also say, however, that most of those variables (besides the film) are well-controlled. For example, I have shot the exact same camera and lens many times in low light situations like this. My processing (now consistently done through The Darkroom, at a rate of about 50-100 rolls per year) is bulletproof; I've never had bad results in any roll other than the two rolls of CineStill used in this test.
 
I shot CineStill at a house concert (my friends The Green Boys) in Washington, DC. Tough lighting, to be sure. Tungsten bulbs (which should have been exactly the right test case for CineStill, since it's tungsten balanced), all coming straight down from recessed lighting in the ceiling, which made for horrid shadows, and overall pretty low light levels. So, it was admittedly a tough test.
 
CineStill is apparently about iso 500 natively, but is marketed as having wide exposure latitude, with the ability to go to 1600 without pushing, even higher with pushing. In this case, I shot it at iso 1600, and deciding to give it the best chance of sufficient exposure, did have The Darkroom push the processing by one stop. For reference, I also shot a roll of Ilford Delta 3200 at 1600 with much better results. I'll share some of those images in a subsequent post.
 
Here's the best of what I got (initial color balance was way off; Lightroom helped with that):
 
And here's some of the worst:
 
In this second shot, you can see a lot of what I didn't like. First, total loss of details in the shadows. I've brought them up in Lightroom, but at great cost of noise/grain. Look at the shadows under Sean's eyes on right. Terrible. My conclusion is that shooting this film at 1600, even if you do push process, is not such a great idea.
 
Now notice the bright blue spot in the center - I found this, and to much worse extent, in several pictures. Inexplicable in terms of actual lights in the room.
 
Finally, and this is the worst part, the line of spots that go from Ryan's cheek (on left) horizontally across the image. These are places where the film emulsion is permanently marked with flow marks. I say permanent, because the folks at The Darkroom were nice enough to try cleaning them up for me, largely to no avail. In some of the shots, these liquid marks are just terrible. Again, they were processed in standard C-41 chemistry, pushed one stop as I requested.
 
In general, I found that the negatives had these liquid marks, and were absolute magnets for dust and particles. Sort of like the emulsion remained sticky or something. I could not get clean scans. Again, I've never had a problem near this extent with any other film stock.
 
Here are some more of my disappointing results with CineStill:
 
Lost shadows.


Liquid tracks. Notice the strange blue spots on the drummer's leg above.
 
And these were the most useful images selected from two 36 exposure rolls. Really.
 
So, at $10 per roll, I certainly won't be doing any more experiments with this film.
 
VERY IMPORTANT NOTE: I bought my CineStill from Freestyle (Click Here). They were more than fair in dealing with my situation, which I appreciate very much. Buy from them with confidence.
 
I do know that others have gotten some gorgeous results with this film. While I'd like to know how, or how I messed up, I'm not willing to risk the cost of dollars and lost time and photo opportunity to do it.
 
Oh well, not all experiments yield positive results. My next set of experiments in hopes of finding a nice low light color film look will be with Fuji Natura 1600 that I picked up in Japan.
 
DMC-365.blogspot.com
 

Sunday, April 27, 2014

Continuing the Quest for a High Speed Color Film - Fuji Natura 1600 is Next

I recently tried a new film, CineStill, which lists the ability to push it to very high iso levels as one of its features.
 
(Click Here) to read a little about CineStill. I bought mine from Freestyle.
 
I shot two rolls of CineStill at a house concert, which should have been the perfect test location. I shot it at iso 1600, and asked The Darkroom (thedarkroom.com) to push it one stop in processing. I'm not ready to enter a verdict on CineStill yet, and will write more about that later. Suffice it to say, I don't think I'm done looking for a great color film for low light concert shooting. Once I find one, I will do my best to replicate the look in Lightroom, exactly as I've done for Ilford Delta 3200 for black and white images.
 
On my way to the flight home from Japan, I found five rolls of Fuji Natura 1600 color print film.
 
Fujifilm Natura 1600 Color Print Film
 
At a little less than $10 per roll here in the Tokyo Narita Airport, it's about the same price as CineStill. I'm looking forward to giving Natura a try.
 
If it works well, I'll have a good basis for defining a new color look in Lightroom. That's the possible upside. The possible downside is that I'll fall in love with the film's look; it's essentially not available in the USA at all, as far as I can tell. I saw a couple of questionable-looking ads, at about $20 per roll. I won't be doing that.
 
Anyway, once I've thoroughly evaluated CineStill, I'll post the results. Of course, I'll also post any results I get with Natura. More film fun!
 
Surprisingly, this is the only photographic product I purchased on my trip to Japan. I saw a few interesting products, but nothing good enough to part with my cash.
 
DMC-365.blogspot.com
 

Wednesday, September 18, 2013

Recovering Polaroid (Fuji Pack Film) Negatives - I Must Try This

Image Source: http://delvauxkoen.blogspot.be/2013/08/creating-negatives-from-fuji-fp-100c.html?utm_source=buffer&utm_campaign=Buffer&utm_content=buffer882a7&utm_medium=twitter
 
You may have seen my Low Tech Wonders post about the Polaroid 103 camera that my parents sent me. I really enjoy shooting it, and the results are pretty impressive. Using modern Fuji pack film that is still easily available (see Amazon link below), the 103 just needed a simple modification to run on AAA batteries to be once again functional.
 
(Click Here) to read my post about the camera.
 
I had heard somewhere that in addition to the instant print you get from the Fuji film, you could recover the negative image for scanning. I found a post by Koen Delvaux about how to do this.
 
(Click Here) to read Koen's instructions on recovering instant negatives.
 
Koen demonstrates that the negatives are actually much sharper than the instant prints. While the process for recovering them involves straight bleach (fairly dangerous stuff), I think it's worth a try. I don't know what to expect in terms of being able to store these negatives long-term, but if I can get a good scan of them, that's probably good enough. My Epson scanner does a much better job on negatives than on prints as well.
 
Thanks, Koen, for the clear explanation of how to do this!
 
DMC-365.blogspot.com