Showing posts with label Lightroom. Show all posts

Sunday, September 20, 2015

Choosing Tools for Digital Black and White Conversion

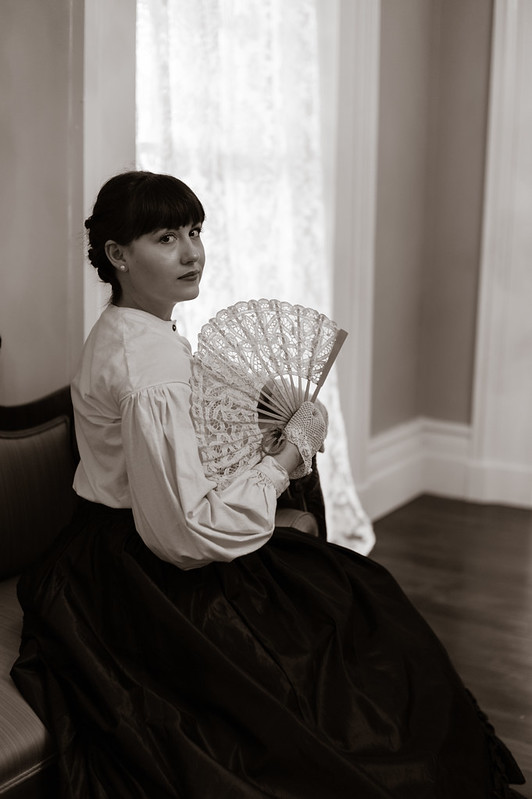
Belle of the Plantation, by Reed A. George
Leica M9, Summicron 35mm f2 v.3 Lens
iso 400, f2, 1/60 sec.
 
I like to shoot in black and white. I quite often convert my color digital images to monochrome, to get the look I want.
 
I do have Nik's Silver Efex, which I use as a plug-in for Adobe Lightroom. It has a lot of flexibility, and works very well. More often than not, though, I do the conversion directly in Lightroom.
 
(Click Here) to read a post on Digital Photography School, where they present and compare five different plug-ins: Silver Efex Pro 2, Exposure, Perfect Black and White, B&W Effects 2, and DxO FilmPack. Lots of information to help you decide which plug-in may be best for you, if any.
 
DMC-365.blogspot.com

Tuesday, November 11, 2014

Nikon Df - Amazing Exposure Recovery

Okay, so here's a jpeg of an image I shot with the Nikon Df inside a restaurant on a sunny day last weekend. This one is straight from the camera.
Jpeg, straight from the camera (underexposed)
 
Even though I used +1 stop compensation with aperture priority metering, clearly it wasn't enough. If I'd done it properly, I would have used spot metering, and metered from the guy's face.
 
Here's the amazing part. Working with the raw file from the same image in Lightroom, I was able to transform it to this:
 
After treatment in Lightroom
 
I brought the exposure up over two full stops. Usually, with other cameras, I've found that there's just not enough information in the shadows to pull this off. I think it worked exceedingly well in this case. I'm very impressed with the images that the Df can produce, even when I screw up the exposure.
 
Now, rest assured, I'll still try to make the very best exposure possible when I'm shooting. But, it's really nice to know just how much you can recover if things go wrong.
 
Impressive camera, this Nikon Df.
 
DMC-365.blogspot.com
 

Tuesday, July 1, 2014

Lightroom Bogging Down My Computer - THE FIX!!!

Wow. I just have to share this.
 
I've been having a lot of problems with my computer as it relates to using Lightroom. It seems that every time I make even a minor change to an image, or switch from Library to Develop modules, etc., the computer takes off on a disk-writing spree. I mean, it writes non-stop for minutes at a time.
 
Looking for anything that could help, short of buying a new computer (literally), I decided to try a naive google search. Here's what I found. There's a process on Windows computers called wmpnetwk.exe
which enables network sharing for Windows Media Player. Every time I made a change in Lightroom, this process would go crazy, accessing my hard disk.
 
Now, I'm no computer expert. Far from it. But, the link I found was able to guide me through actually seeing this happen with the Windows Resource Monitor. Then, it showed me how to disable the process.
 
(Click Here) to see the original post I found. Be aware that it's from 2008, so I had to sort of find my way around in my later version of Windows.
 
Basically, after confirming that it was the wmpnetwk.exe process that was accessing my disk excessively, I was able to start up a Windows function by pressing the Window Key + r (which gives you a command prompt), then entering Services.msc and hitting go. Within the windwo that came up, I right-clicked the offending process (wmpnetwk.exe) and disabled it.
 
The problem is GONE. Not just minimized, GONE. I'm so impressed. The author of that link deserves a beer.
 
Disclaimer: I can't guarantee that I (or you) won't need that process back sometime in the future. I rarely use Windows Media Player, so I doubt it. But, do this at your own risk.
 
DMC-365.blogspot.com
 

Sunday, April 27, 2014

Continuing the Quest for a High Speed Color Film - Fuji Natura 1600 is Next

I recently tried a new film, CineStill, which lists the ability to push it to very high iso levels as one of its features.
 
(Click Here) to read a little about CineStill. I bought mine from Freestyle.
 
I shot two rolls of CineStill at a house concert, which should have been the perfect test location. I shot it at iso 1600, and asked The Darkroom (thedarkroom.com) to push it one stop in processing. I'm not ready to enter a verdict on CineStill yet, and will write more about that later. Suffice it to say, I don't think I'm done looking for a great color film for low light concert shooting. Once I find one, I will do my best to replicate the look in Lightroom, exactly as I've done for Ilford Delta 3200 for black and white images.
 
On my way to the flight home from Japan, I found five rolls of Fuji Natura 1600 color print film.
 
Fujifilm Natura 1600 Color Print Film
 
At a little less than $10 per roll here in the Tokyo Narita Airport, it's about the same price as CineStill. I'm looking forward to giving Natura a try.
 
If it works well, I'll have a good basis for defining a new color look in Lightroom. That's the possible upside. The possible downside is that I'll fall in love with the film's look; it's essentially not available in the USA at all, as far as I can tell. I saw a couple of questionable-looking ads, at about $20 per roll. I won't be doing that.
 
Anyway, once I've thoroughly evaluated CineStill, I'll post the results. Of course, I'll also post any results I get with Natura. More film fun!
 
Surprisingly, this is the only photographic product I purchased on my trip to Japan. I saw a few interesting products, but nothing good enough to part with my cash.
 
DMC-365.blogspot.com
 

Saturday, March 22, 2014

The Plank Stompers - Leica M9, Summilux 35mm, Emulating Ilford Delta 3200

 
The Plank Stompers, by Reed A. George
Leica M9, Leica Summilux 35mm f1.4 v.3 Lens
iso 1600, f2, 1/125 sec.
 
I think this shot of my friends' band, The Plank Stompers, really shows the character of the older 35mm Summilux lens. It's simultaneously sharp (look at the eyeglasses) and dreamy.
 
I shot this with my digital Leica M9, and emulated the look of Ilford Delta 3200 film as described (here).
 
I am really enjoying this look to my live music images.
 
DMC-365.blogspot.com


Tuesday, March 18, 2014

CineStill iso 800 Tungsten Balanced Color Film - Something Else to Try

Image Source: http://aphotocontributor.typepad.com/aphotocontributor/2014/03/pretty-palate.html

I read a very interesting post on the blog "APhotoContributor," about a type of film I've never used before, known as "CineStill." It's an iso 800 film, color balanced for tungsten light sources. Not something I'd want to use every day. In fact, I think I've only used tungsten-balanced film once or twice, and it was film that a friend gave to me. The author used a conversion filter (85B) when shooting the film in daylight.

(Click Here) to see the post on APhotoContributor. There are lots of examples shot on this film, in many different lighting situations.

So why would I be interested in trying this film? I think it could be a very interesting way to shoot low light concerts in color. Granted, many modern music venues use the dreaded LED light sources, which are impossible to balance for. The issue is that they only emit a very narrow wavelength range, so you get full saturation in one color channel, nothing in the others. But, for those beloved stages still lit with filtered tungsten lights, this could be very interesting.

The CineStill film is available from Freestyle, but for quite a high price ($9 per roll). I'm going to assume these are 36 exposure rolls, but don't know that for sure. CineStill can be processed in normal C41 chemistry (what your few remaining drugstores who develop film use). I would send mine to The Darkroom (thedarkroom.com).

What makes the film even more interesting is that you can push it to iso 3200. That would definitely come in handy for some low light music clubs.

(Click Here) to see CineStill on Freestyle's site.

What I may do is try a roll or two, then see if I can replicate the look using my Leica M9 and adjustments in Lightroom, similar to what I've already done with Ilford Delta 3200.

I'm discovering new things to try, working between film and digital. What I've come to realize is that I should not try to make the same image style with my Leica M9 at iso 1600 as I would at iso 200. Once I understand that, it opens some doors. If I'm emulating Delta 3200, with its high grain and contrast, shooting the M9 at iso 1600 is no problem whatsoever. The grain added in Lightroom works just fine with the CCD noise generated in the M9 at such a high iso setting.
 
I feel like I'm leaving a plateau in learning over the past couple of months, and things are getting more interesting again.
 
DMC-365.blogspot.com


Sunday, March 16, 2014

Emulating Delta 3200 Film Look in Lightroom

I've been shooting real Ilford Delta 3200 film in my Leica M4-2 recently. I've been using it at live music events, and really like the look, especially shooting it at iso 1600 and developing it normally (at thedarkroom.com).
 
I've been interested in emulating that look with digital files, specifically with shots from my Leica M9, shot at iso 1600. Now that my M9 is back from Leica Service, I will likely carry the M9 and M4-2 together to some shows.
 
First, I decided to try the preset in Nik software's SilverEfex Pro. I didn't find it to be particularly comparable to my film results. So, I decided to work through adjustments in Lightroom 5 until I got something closer and save them as presets. I've now done that. Here's an example of a shot made with the M9 (at iso 200 in this case). The first version is what I would normally do to process this type of image from the M9 in black and white. The second is done using my Delta 3200 presets.
 
Charlie - "Normal" versus "Delta 3200" Versions, by Reed A. George
Leica M9, Leica Summilux 35mm f1.4 v.3 Lens
iso 200, f1.4, 1/125 sec.
 
For this particular shot, I strongly prefer the "Delta 3200" version.
 
I made two separate presets. Here are the adjustments I made in each.
 
Preset #1 - Delta 3200 Contrast Settings 
Contrast = +38
Clarity = +18

Preset #2 - Delta 3200 Grain and Sharpening Settings

Sharpening Amount +2
Sharpening Radius 0.7
Sharpening Detail 25
Sharpening Masking 0

NR Luminance 26
NR Detail 50
NR Contrast 0

Grain Amount 60
Grain Size 17
Roughness 94
 
 
I find it very interesting that adding this amount of grain and removing gray levels (in the form of increased contrast) can actually improve some images.
 
I hope others find the settings useful.
 
DMC-365.blogspot.com


Wednesday, January 8, 2014

DIYPhotography Shows Great Photo Setups With Granite Tile

Still in the process of trying to recover my hard drive after the failed "within Lightroom" transfer process, I'm having to resort to cross-posting a little more than normal. No to worry, I'll be back post some of my own work very soon.
 
(Click Here) to read what happened to me in my file-transfer nightmare; maybe it'll help you avoid the same issues.
 
I saw a great post on DIYPhotography today, about how to use a granite tile as a base for cool product-style photography. Here's the shot that caught my eye:


Image Source: http://www.diyphotography.net/granite-tile
 
(Click Here) to read the full post on diyphotography.net
 
There are lots of good examples in this post, including how to integrate light painting with this style of shooting. Not exactly what you'd want to use for selling products on ebay, but certainly cool. There's another image of a Rolleiflex that I really love.
 
So, if you're bored on a cold winter day, there are certainly some ideas at the link above for you to play around with.
 
DMC-365.blogspot.com
 

Sunday, December 29, 2013

Moving Files in Lightroom? Don't Fall Into This Trap!

 
One of My "Lost" Files
 
Well, I decided to use the holidays to migrate my photos from two nearly-full drives to a new 4Tb external beast. Having had issues in the past, I am careful to keep backups, but that doesn't make every recovery simple, as you'll soon see.
 
So, when you use Adobe Lightroom for photo editing and indexing, one great attribute is that edits don't actually change the source files. That will end up helping me a lot in the end. But, it means that when you move files, you also have to keep them associated correctly within the Lightroom catalog. If you mess this up, you'll lose everything attached to that file - edits of any type, keywords, etc.
 
There are basically two ways to move files in an attempt to maintain the associations - literally moving them (not copying them) from within Lightroom, or copying and moving them outside of Lightroom (for example in Windows Explorer). Here are the pluses and minuses:
 
  • Moving within Lightroom ensures that the associations are all preserved (plus). However, since it's a move and not a copy, there is increased risk of losing files (minus).
  • Moving outside Lightroom means that you'll have to help Lightroom once again find the source files and associate them (minus). Outside Lightroom, you can copy the files, preserving an additional copy, in the original directory structure (big plus).
Well, I chose to go from within Lightroom. I figured, hey, I've got a backup on a separate disk, and I don't want to spend a bunch of time reassociating files.
 
Here's what happened. I set up the transfer, 160,000 files, and it ran for about 20 hours. When I got up this morning to check on it, the computer had an error message. The process had been interrupted. Now, I have 38,000 files missing (not present on either disk)! I figured that there was probably a way to recover those files from my backup. Unfortunately, the missing files seem to be randomly distributed, from essentially any and all directories! And, to top it off, my backup has a slightly different organization than my source disk. And I do mean slightly. You see, my backup routine adds a single extra layer of folder to the directory, with the date of transfer in the name. This means that if I do decide to recover from the backup, I'll have to go into each and every directory and tell the system where the files are! And, I'm not 100% sure that I can get the associations right.
 
So, for now, my plan is to take my original source disk (the one that's now empty, since Lightroom moves the files off to the new disk) and see if I can recover the original files. If so, I'll simply start over, and move the files outside of Lightroom in smaller time chunks to make sure I don't lose so many files at once.
 
BOTTOM LINE: I'll never trust the Lightroom MOVE function again! Don't do it! Also, make sure your back-up system copies your file structure exactly!
 
In any case, I'm in for a lot more work than I had planned, and the Christmas holiday time is drawing to a close.
 
Bah, humbug!
 
DMC-365.blogspot.com

Friday, October 25, 2013

A Shot From Last Autumn

I am noticing that I tend to miss some nice images by reviewing them too soon after I capture them. As I mentioned before, my expectations are tough to meet, and images that don't do it tend to be ignored. However, looking back later, I often find some that are not so bad.
 
Here's an example:
Sunset, Whitefield, New Hampshire, by Reed A. George
Panasonic Lumix DMC-G3, Lumix 14-140mm f4-5.8 Lens
iso 200, f8, 1/15 sec.
 
 
I did some post-processing on this shot. Most notably, I changed the white balance from Auto to Fluorescent. Believe it or not, that best replicates the color I remember from the scene. I also adjust the color of the reflection on the water surface, making it more like the sky. Finally, I added a brush stroke of increased clarity along the mountain ridges and tree silhouettes on the water. I hope none of that is too obtrusive, as I really feel that it now looks like I remember.
 
I have been neglecting my Micro 4/3 gear this year, in favor of other systems. This shot reminds me that I need to get back to it sometime soon.
 
DMC-365.blogspot.com


Thursday, November 29, 2012

Not Quite Ready for Photography Back-up Perfection - the iPad

Apple iPad 2
Image Source: http://www.apple.com/ipad/compare/
 
So, I've been using an Apple iPad for so many things in life recently. I really love the device, and it goes everywhere with me - mainly for work, but at home and on travel as well.
 
My meeting notes and plans are so much better organized than in the past, and always with me. The app Evernote has made that happen for me. But, you're here to read about photography...
 
I've been using the iPad for photo backup on travel. The Apple Camera Connect Kit ($29) allows me to transfer fiiles from an SD card (from the camera) to the iPad. That's great. Here are the current limitations:
 
  1. Limited storage (64 Gb total) on the iPad.
  2. The iPad will only upload photos into its own photo app.
  3. No way to export to a hard drive to have a second copy of the files.
  4. Limited capability in apps to organize, rate, and store photos.
On the positive side, if you have access to the internet, with LOTS of bandwidth (more than most hotels offer), you can use the iPad to upload photos for backup. One great solution for this is flickr, which allows you to upload (and hide if you wish) unlimited jpegs for $25 per year. The only drawback there is that you can't backup your raw files. But, it's sure a nice way to have at least your jpegs safely copied online.
If you don't have internet access, options are quite limited. What I've been doing is copying files from my SD cards to the iPad, AND keeping them on the SD card as well. This is not a bad solution, as SD cards are quite inexpensive now, and it's easy to carry a lot of memory in a very small volume. But, once I reach 64 Mb (which includes all of my applications and documents on the iPad), I'm kind of stuck.
 
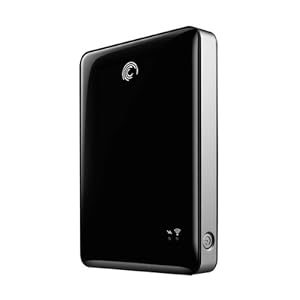
I thought I had a fix recently. I purchased a book specifically about the iPad for photographers. I won't list it here, because the fact that it's already out of date is causing me problems. I can't recommend the book to my readers. Anyway, at one point in time, the photo app PhotoSmith (www.photosmithapp.com) had the capability of sending photos to a compact wireless hard disk from Seagate.
 
Seagate Go Flex 500 Gb Wireless Hard Disk
Image Source: http://www.amazon.com/Seagate-Satellite-Wireless-External-STBF500101/dp/B004Z0S7K6/ref=sr_1_1?ie=UTF8&qid=1354106017&sr=8-1&keywords=seagate+goflex
 
This drive is on sale for the reasonable price of $99 right now. So, I bought one. Guess what? It no longer connects with PhotoSmith. According to PhotoSmith Technical Support, that's because of some issues on the Seagate side, and they hope to fix it soon. But for now, it won't allow me to move photos from the iPad to the Go Flex.
 
Now, about the Go Flex. It's pretty cool. If you want to load up an enormous amount of video, photos, music, etc. for a trip (loading from a PC with USB), you can share all of that wirelessly to up to three devices (including iPads). So, you can keep the whole family happy with movies for a long drive. But, you can't move anything from the iPad to the Go Flex at this point. So, it doesn't solve my backup problem.
 
Another exciting development is the Kingston solid state wireless drive. That's a topic for a later post, as I haven't fully investigated it yet. However, at this time, I believe it has the same issue with transferring files from the iPad. Once this is solved, either device will be a killer solution.
 
A quick note on the PhotoSmith app. It's pretty good in most ways. It allows me to import photos from the Apple photo app to PhotoSmith (both on the iPad). Once I've done that, I can sort, rank, and flag my files, just like I do in Lightroom at home. And, there's a publish plug-in for Lightroom that allows me to transfer those files wirelessly once I get home, directly into Lightroom on my desktop machine, ratings and all. Now, this is not seamless. It has limitations. I've had a hard time getting ALL of my photos to transfer, and you don't have much flexibility in deciding where they transfer to on your desktop (they go in a PhotoSmith directory in MyPhotos on the PC, which is not where I want them). Overall, I give PhotoSmith 3 out of 5 stars. I'm sure it will improve.
 
I really love the iPad, and think the iPad Mini could be the right solution for travel photography backup, once it can send files to an external drive (by the way, that doesn't need to be wireless for me; a wired drive would be fine).
 
So, all of this leaves me thinking - what about just going to the Apple MacBook Air? I could carry a 256 Gb Air and a normal USB drive, and instantly have two copies of my photos, and free up my SD cards to be reformatted. And, if I have internet connectivity, it's even better. The Air is more expensive. It also lacks the nice touch screen interface of the iPad. I'd much rather solve the few remaining issues with the iPad and maybe go to the mini.
 
So, there's a quick update on the status of the iPad for photographers, as I see it. If others have found nice solutions, please let me know.
 
DMC-365.blogspot.com


Thursday, November 15, 2012

Streetshooter's Street Presets - For Lightroom 4 and/or Nik Silver Effects 2


This is a first for me. Streetshooters is selling premade presets to give your photos a classic street photography look.
 
(Click Here) to read about it at streetpresets.com.
 
Presets are saved sets of parameters. In Lightroom 4, for example, you can make all of the settings that make your pictures look exactly how you want them, then save all of those adjustments as a preset. In this case, you're buying presets that some experienced street photographers have made for you.
 
I must admit that they look pretty darned good in the online samples. I'm not sure how I feel about paying for them. I suppose it's not unreasonable to pay $20 to have an expert give me their favorite settings, which I can reuse as many times as I like, or even customize a little further to my own liking, and save as my own preset.
 
Hmm. Something to consider. I'll let you know if I do it.
 
DMC-365.blogspot.com


Friday, May 18, 2012

Nice Post on Natural Light from Digital Photography School

 
Image Source: http://digital-photography-school.com/are-you-practicing-these-5-natural-lighting-tips

The Digital Photography School has a nice post on how to think about, observe, and capture natural light. They give the following five tips:
  1. Be aware of the characteristics of light. Learn to think about how that scene you're observing now would look at a different time of day (or night). The differences can be dramatic.
  2. There is no "good" or "bad" light. Yes, the golden hour is great for beautiful images. Sometimes, you want to communicate something other than just "beautiful." Sometimes the harsh light of mid-day is exactly right for communicating your story.
  3. Obsess about observing light. Even when you don't have a camera. Look at contrast, how the shadows are illuminated. I find it useful to think about how many stops difference I think there are between the shadows and highlights, and about how I would expose an image, if I were taking it.
  4. Give it a try, experiment. To me, this point follows on the one above. Why ever be without a camera? If you see it, shoot it. It's digital, right? You can simply delete it later, with no cost, and with the potential of learning something.
  5. Don't forget that you can post-process. Learn to shoot challenging scenes with a plan in mind for post-processing. Want to capture that person's face, but also want the sky correctly exposed? See if you can capture the sky and bring the face exposure up a little in post-processing.
And most importantly, the article reminds us to get out an make photos. That's the thing we're interested in, right?
 
(Click Here) to read the whole article on digital-photography-school.com.
 
DMC-365.blogspot.com


Saturday, May 12, 2012

Useful Article on Printing Resolution at digitalphotopro.com

 
Table Source: http://www.digitalphotopro.com/technique/workflow/the-right-resolution.html

How do you decide what print resolution to use when printing your digital files? Do you always just set it to 300 dpi and forget it? Just use the native resolution of the image? I have known that you can get by with lower resolution printing for larger images, but didn't really know how to calibrate that. I have also learned the trick of increasing resolution to 360 dpi when I make large prints of smaller resolution images.

(Click Here) to read the whole article, which leads me to somewhat different conclusions.

First off, the table above. This table reinforces the idea that you can get by with lower print resolutions for larger prints. For example, a 3.5" x 5" print is normally viewed from 10-12" distance, meaning about 300 dpi is correct.

However, this article finds that there is benefit in printing to 360 dpi resolution with Epson printers (mine is Epson), 300 dpi for Canon, regardless of final print size. So, conclusion 1 is that you should print at 360 dpi for any print size, even if your file isn't that high in resolution. The article explains how to do this from Lightroom.

The second conclusion is that if your original file is even higher resolution than the Epson native resolution of 360 dpi at the size you want to print, you should NOT decrease the resolution. In fact, you may benefit from increasing the resolution to 720 dpi, if you have an Epson Pro printer, which has a maximum detail resolution of 720 dpi.

This article goes far in demonstrating the differences, yet results in simple conclusions. Very helpful.

DMC-365.blogspot.com