Showing posts with label scanning. Show all posts

Monday, November 30, 2015

Fun with Nikon Film SLR - the Venerable FM

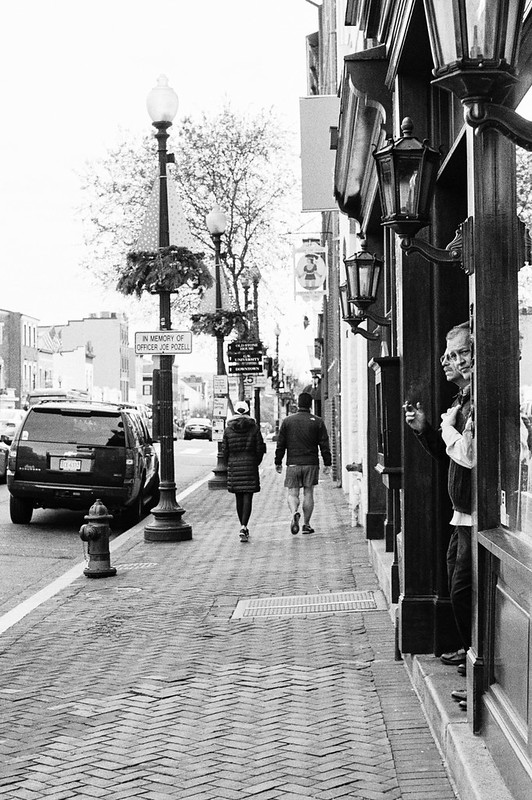
My Nikon film SLR collection is nearly complete, I've had my eye out for one I didn't have - the original FM. I finally found one in essentially mint condition, used, on Amazon. I took the chance and was rewarded with this great little camera. One of the best things about the FM is that it can mount and use both AI and non-AI lenses, making it the perfect film companion to my digital Nikon Df.
 
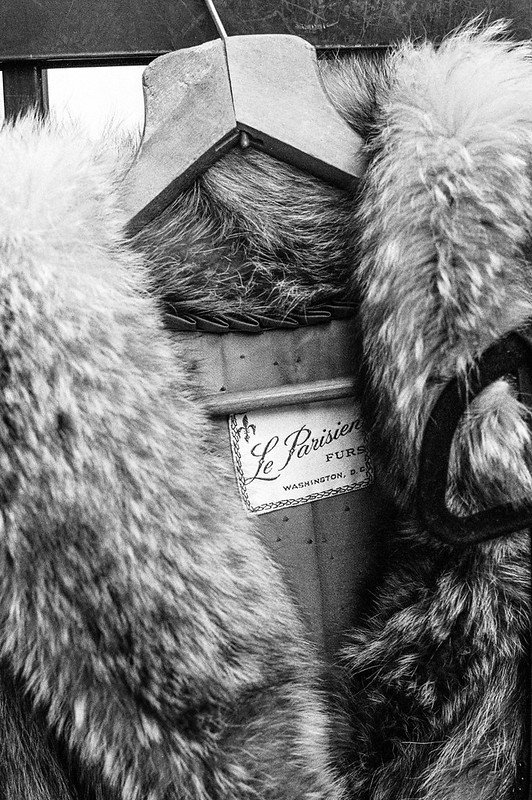
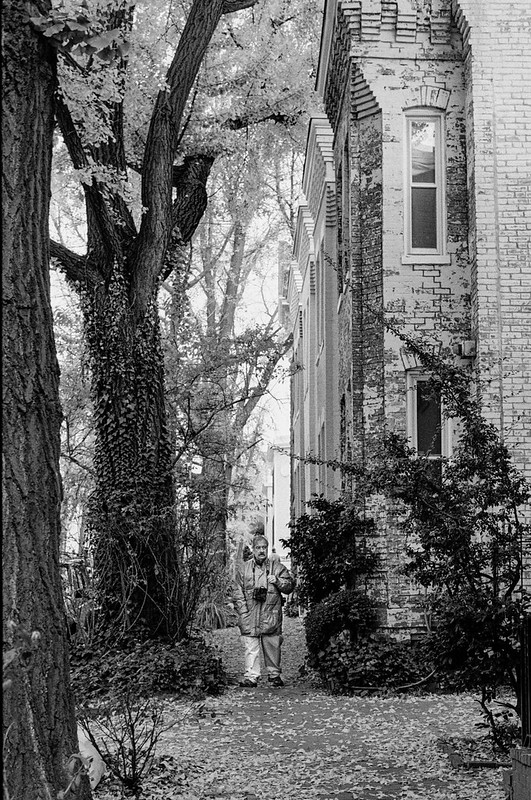
Here are some shots from the test roll of Ilford HP5 that I put through the FM.
 
 
Saying that I'm pleased is an understatement.
 
By the way, I scanned these on a new dedicated film scanner, the Pacific Image XA. While all of the autoloading on this scanner is a bit oversold, the image quality is outstanding. I can actually see film grain in my scans, something that has been elusive on flatbed scanners, even the Epson V750. If you're serious about scanning 35mm films, I suggest you give the XA a try.
 
DMC-365.blogspot.com
 

Thursday, April 16, 2015

Polaroid/Fujifilm FP100C Instant Negatives from the Mamiya Universal Press Camera

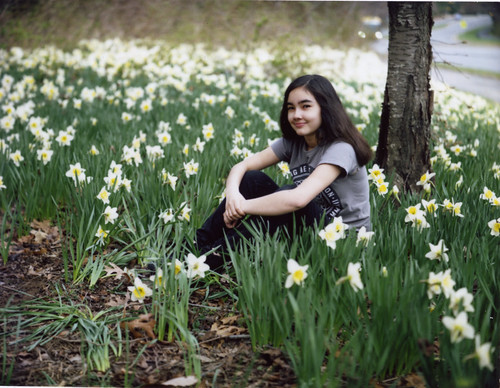
I'm still having fun with my Mamiya Universal Press (MUP) camera. Today, I used it to shoot some portraits of my daughter on her birthday using Fujifilm FP100C instant film. Note that pack film is larger than the 6x9 image that the MUP lenses are designed for, hence the vignetting in the corners.
Scanned Instant Print, 14th Birthday, by Reed A. George
MUP, Fujifilm FP100C Film, f5.6, 1/125 sec.
 
 
I was so pleased with some of the images that I decided to figure out how to recover the negatives from the film backing, which you usually throw away.
 
(Click Here) to see a video from the Film Photography Podcast describing how to recover a negative from Fujifilm FP100C instant pack film. Beware that the process uses bleach. Wear gloves and keep a fan on while you work.
 
It was actually pretty easy to do, and the results are quite impressive. Here's a scan of the same negative that was used to make the print above:
 
Scanned Instant Negative, 14th Birthday, by Reed A. George
MUP, Fujifilm FP100C Film, f5.6, 1/125 sec.
 
I think I could have done a better job scanning this negative. The highlights are too high, and the colors are washed out compared to the print.
 
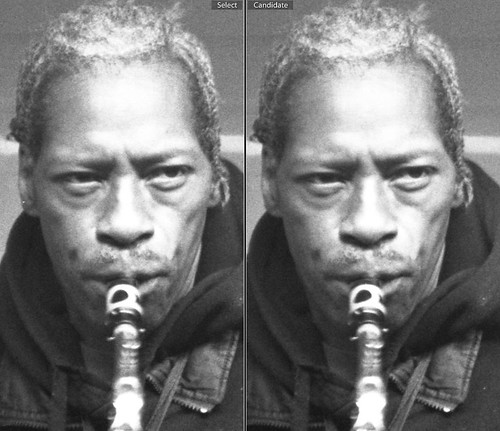
Here is a more impressive comparison, showing the scanned print (left) and negative (right) at 100% magnification.
 
100% Crops (Print on Left, Negative on Right)
 
As you can see, the negative has a lot more detail and sharpness, and grain. Pretty interesting. I could make a 5x7 print from the negative just fine.
 
DMC-365.blogspot.com


Monday, December 22, 2014

Scanning Test - Anti-Newton Ring (ANR) Glass

I've been talking with my friend, Charlie Arnhold, lately about film scanning. I think I've gotten lazy in my scanning with my Epson V750 flatbed. I've gotten my workflow down so routine that I stopped thinking about it. Almost always scanning 35mm at 2400 dpi, just enough for an 8x12 print without resizing things, using the Epson Scan software and the standard holder, because it's easy.
 
Well, in chatting with Charlie, I decided that I should try scanning at 6400 dpi, then resizing after the scan. Then I remembered that I have one of the anti-Newton ring (ANR) glass pieces from Better Scanning.
 
(Click Here) to see the ANR insert offered by Better Scanning.
 
I've tried it in the past, but was not convinced that it made a difference. But, I didn't test it at this resolution.
 
So, with a recent roll of TMax 400 that I'd shot in my Leica IIIG in NYC, I gave it a try. Here is an image scanned twice - Epson film holder on left, Epson film holder with ANR glass on the right, at 1:1 magnification:
 
 
I can see some difference here. The detail in the subject's hair is more clear on the right, in my opinion.
 
But take a look at this one:
 
 
I can see a significant increase in sharpness on the right. Look at the difference in detail in her shirt on her left arm. Pretty striking. I can also see what looks like film grain on the right, which I don't see on the left. That could be an artifact of the texture of the ANR glass, but I don't think so. Being able to see defined grain means that I've reached the necessary limit in scanning accuracy; now resolution is limited by the film instead of the scanner.
 
So, I'll be continuing to use the ANR glass. In fact, I should probably order more, so that I can scan four strips at a time, as I did with the normal Epson film holder.
 
DMC-365.blogspot.com


Tuesday, August 19, 2014

Fuji Instant Pack Film FP3000B, Negative and Positive,and Mamiya Press Universal

My very good friend Dennis recently sold me his Mamiya Universal kit. Initially, I was not interested, as the Universal is an enormous and heavy medium format kit. More on that later. I'll post some images of the kit and why I now really find that I like it.
Well, one of the things that came with the kit was a Polaroid back. Unfortunately, it is designed for Polaroid 80 series film, which is no longer available. About a week of trolling ebay yielded a very nice replacement, which allows use of Fuji pack film. Currently there are two film options in this format - color at iso 100, and black and white (FP3000B) at iso 3000. How's that for a range?
Unfortunately, the FP3000B film has been discontinued. There are still stocks of it around, but at 2.5-3X the original cost. I have a few packs, but probably won't be able to buy more.
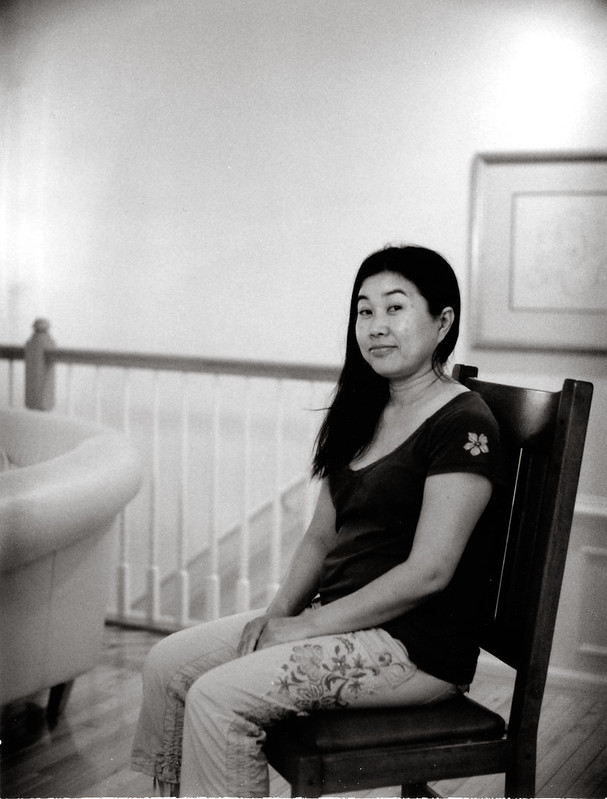
Here's a shot of my wife, made with the Universal, 150mm f5.6 lens, and FP3000B:
Scanned from Print
I was quite pleased when I saw this appear as I peeled the backing paper away. It's quite interesting to get a really sharp image with great optics on instant film. My old Polaroid camera just doesn't stand comparison.
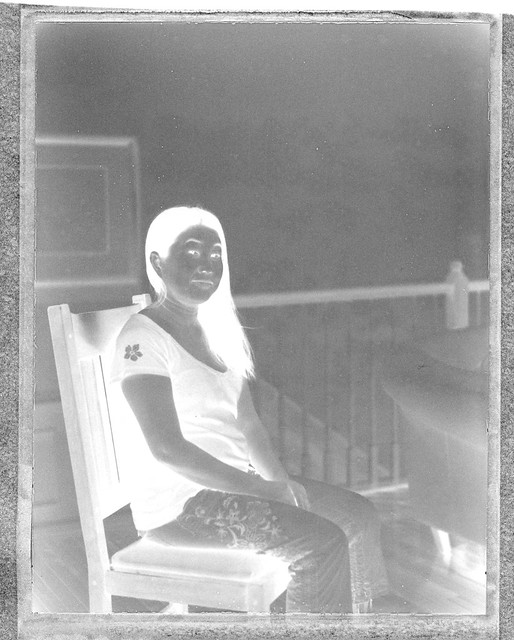
Both types of pack film produce negatives in the process, but of very different types. The 100 speed color film negatives must be removed from the backing and bleached, producing a transparent negative. FP3000B produces a paper negative, which you simply have to protect and allow to dry in the dark (or near dark). Here's what the negative from the print above looks like:
Paper Negative, Fuji FP3000B Instant Pack Film
 
If you take the dry negative and scan it on a flatbed scanner (I use an Epson V750), you get something like the image above. Invert the tones and flip the image horizontally in Photoshop, and you get this:
 
Positive from Scanned Negative
 
Pretty cool, huh? The scan from the negative is sharper than the original print, but also shows grain. I love the slightly uncontrollable factors like the edge patterns and occasional black dots. This feels like real photography to me.
 
One note - you'll notice lens vignetting on instant prints from the Mamiya Universal. It's designed for maximum size images of 6x9 on 120 film. The pack film image is larger than that. Reportedly, the Mamiya 75mm and 127mm lenses don't vignette on pack film. I don't have either, so can't say for sure.
 
Having shot a few rolls of film in the Universal, I'm anxiously awaiting an email from The Darkroom, notifying me that the film I sent in last week is processed and scans are posted. Based on the instant results, I'm expecting some amazing image quality from the normal medium format film I've shot.
 
More to come from the Mamiya Universal!
 
DMC-365.blogspot.com
 
Need great film processing? (Click Here) to visit The Darkroom. They're the best in the business.

Thursday, February 6, 2014

Dante Stella on the Transition from Film to Digital

 
A Different Spin, by Reed A. George
Leica M9, Zeiss Sonnar 50mm f1.5 Lens
iso 640, f4, 1/180 sec
 
Dante Stella recently wrote an interesting piece about the world's transition from film to digital photography.
 
(Click Here) to read it on The Machine Planet.
 
In the post, Dante refers to the loss of the analog world's science and research - volumes of data on the specifics of light interacting with various components and chemicals, instructions to allow the home enthusiast to develop their own film (with potential for poisoning themselves with color developing). One of his strongest points is that while there is some maintenance level production of film going on, we've lost any hint of further development, of creation, that companies like Kodak were so good at back in the day.
 
Dante also mentions how even those of us who still shoot film mostly use a hybrid analog/digital process. I certainly do. My negatives are never printed in an enlarger any more (and if they were, most processors now use laser printing anyway). I scan them, and from there it's completely digital.
 
I found the piece very insightful, and successful at not covering the same old ground and arguments about film versus digital.
 
Dante's piece ends with a quote:
"Se vogliamo che tutto rimanga com’è, bisogna che tutto cambi."
 
Using the best digital technology at hand (Google Translate), I found that this means:
"If we want to keep it this way, everything must change."
 
I find that pretty appropriate. I would not have stood a chance at translating it without digital technology.
 
DMC-365.blogspot.com


Tuesday, July 16, 2013

Time For a Shot I Love

 
The Kid, by Reed A. George
Leica IIIC (ca. 1946), Leica Summitar 5.0cm f2 Lens (ca. 1951)
 
Sometimes I get a shot that helps me remember why I do all of this photography stuff. Not perfectly sharp, a grab shot. But, this is why. I didn't even bother to crop the scan.
 
And, I simply love shooting an old Barnack-style Leica. I couldn't care less that it has no meter, separate windows for focus and framing, and dim ones at that. It simply works.
 
Thanks for putting up with a little self-indulgence on my part.
 
DMC-365.blogspot.com


Saturday, May 25, 2013

"Scanning" Negatives and Slides with the Leica M9 - Lars-Goran Hedstrom Shares His Approach

Leica M9 and BEEON Copy Stand
 
Here's an example of one of the benefits of being in the International Leica Society (LHSA). Today on our Google+ community page, one of the members posted a question about film scanning. Among several good answers, I found Lars-Goran Hedstrom's approach - using a Leica M9 on a Leica BEEON copy stand! Lars' blog is called Sculpting With Light.
 
(Click Here) to read the full post on Sculpting With Light
 
Lars started off using a flatbed scanner, but wasn't pleased with the resulting sharpness. So, he decided to try using a Leica Visoflex III, which essentially turns a Leica rangefinder into an SLR by adding a mirror box, which allows for through the lens focusing. While this worked well for him, the challenge of getting the negative that he was "scanning" and the M9 sensor in paralle was very challenging. Even at f16, using either a 50mm lens (giving 1:1 reproduction) or a 35mm lens (2:1), he often found part of the image to be just out of focus.
 
Next, Lars moved on to using a Leica copy stand made many years ago. Called the BEEON in Leica terminology, this stand allows you to use a magnifiying loupe to focus, then attach your camera to the stand. This is necessary, since Leica rangefinders don't allow for close focus. This works very well for Lars.
 
I've played around with this concept, using my Nikon D700 and Micro-Nikkor 60mm lens. It works well, but I've never taken it to the level of reproducibility that Lars did.
 
One of the best things is that by photographing your negatives or slides with a digital camera, you get raw files, which are easily adjusted in Lightrooom or other software. This is a big benefit. And, if you are set up properly, it can be very fast. I'm sure it's faster than flatbed scanning.
 
So, I may give this another try. I'll use my Nikon again, and put my effort into standardizing a setup (both arranging the camera and film planes to always be parrallel, and getting the backlighting right). I could even connect the D700 to my computer and have the files write directly to my hard drive.
 
Beyond this single concept, I'm happy to have found Lars' blog, Sculpting With Light. There's a lot of great information there.
 
Finally, I love this Ansel Adams quote that I found there:
 
"I have often thought that if photography were difficult in the true sense of the term -meaning that the creation of a simple photograph would entail as much time and effort as the production of a good watercolor or etching - there would be a vast improvement in total output. The sheer ease with which we can produce a superficial image often leads to creative disaster".
- Ansel Adams - "A Personal Credo," in American Annual of Photography, vol. 58 (1944; repr. in Photographers on Photography, ed. By Nathan Lyons, 1966), Photographers on Photography : A Critical Anthology by Nathan Lyons (Editor)

If you're interested in joining the International Leica Society (LHSA), please (Click Here). We'd love to have you. If you're a member, and want to join the LHSA Google+ community, drop me an email. I can help.

DMC-365.blogspot.com


Thursday, March 28, 2013

Low Tech Wonders - Polaroid Is Back!

My parents recently sent me an old Polaroid 103 camera. Mom found it in an antique store and gave me a call. I quickly looked up the model (103), and found a post about how to convert it to modern batteries. For ~$25, I said yeah, send it on over!
 
(Click Here) to read how to do that.
 
In my case, I decided to use a mini battery box from Radio Shack, which uses two AAA batteries. It (barely) fits inside the old battery compartment.
 
Next challenge - film. Not really a challenge at all. It turns out that Fuji still sells pack film, and at a very reasonable price (~$1 per shot). I bought a pack of iso3000 (!) black and white film on Amazon and gave it a try. Wow! It works!
 
Here's my camera:
 
My Polaroid 103, by Reed A. George
 
I find that my Polaroid underexposes in general, so I've put a filter over the "electronic eye," which is the light meter sensor (that little circle next to the taking lens in the picture above). This allows me to get within the exposure adjustment range, though I still have it pegged at "Lighter."
 
It is great fun to pull out the film after exposing, count 20 or 25 seconds, and rip it open! Even my daughter, born well into the digital age, thinks it's pretty cool.
 
I've scanned a few images on my Epson scanner, but not with good results. I tried it quickly, and need to spend more time. I found that it showed every little piece of dust in a bad way. I'm sure I can perfect my technique.
 
I also bought a pack of iso100 color film. I'll wait until spring to give that a try.
 
In the meantime, here's a gorgeous Polaroid shot by photographer Konstantin Mihov:
 
 
(Click Here) to go to Konstantin's blog.
 
 
I'm looking forward to some low tech photography with this beautiful old camera!
 
Dig out your old Polaroid camera (I'm sure someone in your family has one). And buy your film through my link to Amazon below!
 
DMC-365.blogspot.com


Friday, November 16, 2012

Manassas National Battlefield Revisited - Bronica ETRS Medium Format Camera

 
Cannon, Manassas Battlefield, by Reed A. George
Bronica ETRS, Fuji Provia film, exposure unrecorded
 
I live very close to the Manassas National Battlefield, site of two of the deadliest battles of the American Civil War, exactly 150 years ago. I recently decided to take out my Bronica ETRS medium format camera, and Manassas was where I ended up. I've shot this site many times. While there's not really much there in terms of clear photographic subjects, the place has real feeling. It's a little difficult to take a shot of cannons that hasn't been taken before. I don't think I really succeeded with that here, but I do like how the barrels are aligned, with the one in the distance just a little out of focus. That was my goal.
 
Henry House, Manassas Battlefield, by Reed A. George
Bronica ETRS, Fuji Reala film, exposure unrecorded
 
 
One of the few remaining structures from the Civil War era is Henry House. You may remember that I have shot this house before, and won 2nd place in a contest, resulting in the shot being used in the Civil War Trust's 2012 calendar. That image, shot with a Panasonic Lumix DMC-G1, is shown below. The shot above is from the other side of the house.
 
Henry House, Manassas Battlefield, by Reed A. George
Panasonic Lumix DMC-G1, Leica Elmar 5.0cm f3.5 Lens
High Dynamic Range (HDR) Composite of Multiple Exposures
 
Finally, on my Bronica outing, I shot the old foundation of a house owned by a free mixed-race person during the Civil War. His name was James Robinson, and his mother was a black woman, and his father was reportedly a member of a prominent white family in the area. In any case, Mr. Robinson was very enterprising, and worked in many different ways to procure himself a piece of land and a house. As you can tell by visiting the remains of the old house, it was quite small. Judging only from memory, I would estimate the foundation to be about 400 square feet. Reportedly, it was a 1 1/2 story building, with the living quarters on the first floor.
 
Remains of James Robinson's House, Manassas Battlefield, by Reed A. George
Bronica ETRS, Fuji Reala film, exposure unrecorded
 
Mr. Robinson married an enslaved black woman, which meant by law at the time that there children were also slaves; they had eight together. While Mr. Robinson was able to arrange for some of his children to stay in the Manassas area, at least two of his sons were sold to distant plantations, including one in Louisiana.
 
For a short biography of Mr. Robinson, (Click Here).
 
During the first battle at Manassas (also known as "Bull Run") in summer 1861, after hiding under a bridge for the duration of the fight, Mr. Robinson came home to find 13 Confederate dead in his yard. His property had been in the direct path of the retreat from overwhelming Union forces. The Confederates would later push back, inspired by the arrival of Thomas Jackson's forces, routing the Union army and winning an important battle early in the war. This was the battle that earned Jackson his nickname, "Stonewall." Just 13 months later, the house served as a field hospital for the Union army in Second Manassas.
 
The house burnt down (due to arson) in 1993. While the National Park Service was dismantling the remains, they found an incredible cache of documents from the Robinson family, dating back as far as the 1830s.
 
I thoroughly enjoyed using the Bronica again. It has been a long time since I took it out. The camera and lenses are large, heavy, and noisy to use. This is no stealth camera. But, the optical performance is very nice. It certainly promotes slow, thoughtful composition. I hope you enjoyed seeing the result.
 
DMC-365.blogspot.com
 
I find Fuji Reala (iso 100) film to be very nice for scanning. It is a relatively low contrast color print film. Order yours here:


Wednesday, August 15, 2012

Ryan Lussier Reports On Three Months of Shooting Film On Steve Huff's Site

 
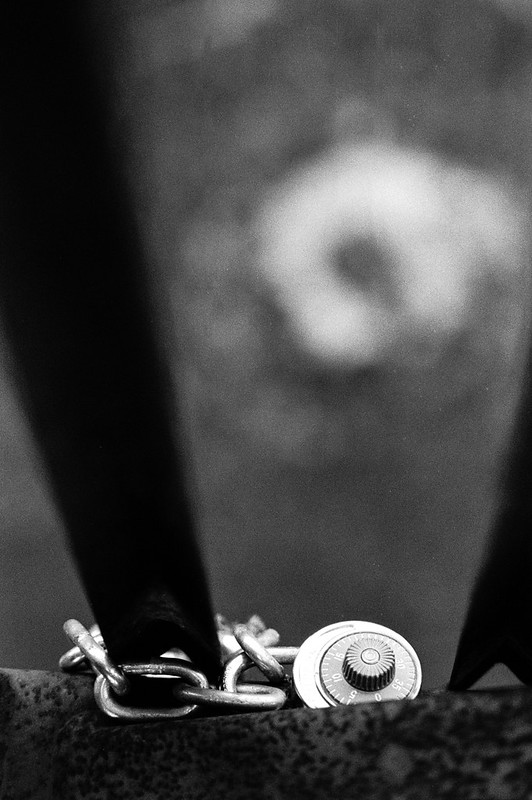
Ryan Lussier's Film Work, Contax G2
Kodak Porta 400, Zeiss 50 f/2
Image Source: http://www.stevehuffphoto.com/2012/08/02/three-months-of-shooting-film-and-here-is-what-i-learned-by-ryan-lussier/
 
Ryan Lussier has posted a nice article about using film over the past few month on Steve Huff Photo.
 
(Click Here) to read Ryan's post on stevehuffphoto.com
 
First off, this is no story to restart a controversy over film versus digital. Ryan admits that he likes digital as well. Raised on digital, Ryan is also no old man going back to his youth.
 
Ryan gives some details of how he processes and scans his films, basically the same as I do. Get the negatives developed at the drug store, then take on the scanning at home. He uses a Plustek scanner; I use an Epson V750. One thing I learned from Ryan is a product by Ilford called Antistaticum. It is a cloth for removing dust from negatives. I'll be ordering one today.
 
I also saw another interesting post this morning on GetDpi, from a person who put away their digital camera, grabbed an old 8x10 (really large format!) camera, and some Polaroid film. The results are very cool.
 
(Click Here) to see what old analog technology can do.
 
DMC-365.blogspot.com
 
Do me a favor - buy your Antistaticum, film, or whatever else through my blog's links to Amazon: