Showing posts with label exposure. Show all posts

Tuesday, November 11, 2014

Nikon Df - Amazing Exposure Recovery

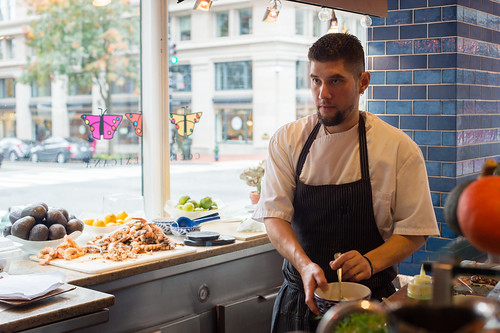
Okay, so here's a jpeg of an image I shot with the Nikon Df inside a restaurant on a sunny day last weekend. This one is straight from the camera.
Jpeg, straight from the camera (underexposed)
 
Even though I used +1 stop compensation with aperture priority metering, clearly it wasn't enough. If I'd done it properly, I would have used spot metering, and metered from the guy's face.
 
Here's the amazing part. Working with the raw file from the same image in Lightroom, I was able to transform it to this:
 
After treatment in Lightroom
 
I brought the exposure up over two full stops. Usually, with other cameras, I've found that there's just not enough information in the shadows to pull this off. I think it worked exceedingly well in this case. I'm very impressed with the images that the Df can produce, even when I screw up the exposure.
 
Now, rest assured, I'll still try to make the very best exposure possible when I'm shooting. But, it's really nice to know just how much you can recover if things go wrong.
 
Impressive camera, this Nikon Df.
 
DMC-365.blogspot.com
 

Monday, September 29, 2014

Watermelon Park Fest 2014 - Mandolin Players Extraordinaire!

It's Sunday, and I just returned home at 2:30 AM from my favorite music festival of this and every year, Watermelon Park. I've been attending for several years now, and it's a big party with so many of my friends, I look forward to it all year long.
 
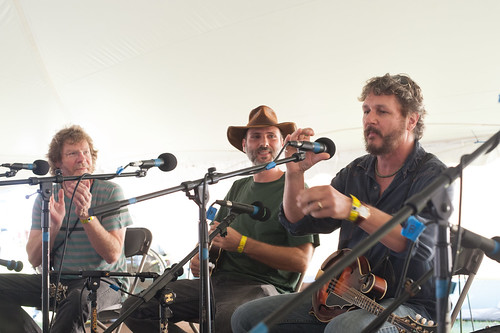
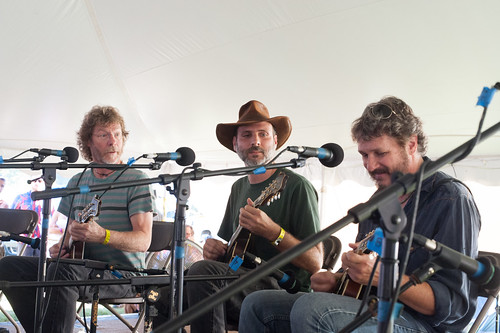
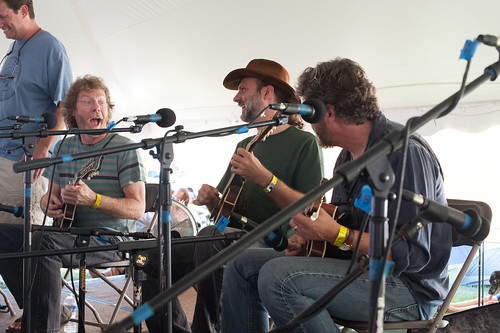
I'm pretty wiped out today, but thought I'd share a few images of a workshop of three of the world's best mandolin players - (left to right) Sam Bush (Sam Bush Band), Danny Knicely (Furnace Mountain Band), and Drew Emmitt (Leftover Salmon). Check them out.
 
 
These guys were great, sharing several tunes and lots of funny stories, like how Sam was accosted by several "locals" back in the early seventies while attending the festival. The nicest thing they had to say to him was that they were going to cut off his hair. Luckily, Sam escaped unharmed and came back some 40 years later.
 
I was right at the edge of the stage, shooting with my Nikon D700 and 50mm f1.4 AF-D lens. Being held in a big white tent, the background light was much brighter than that on Sam, Danny, and Drew's faces. I simply used the spot meter setting in the D700 to get the exposure right, and then it was a matter of catching a few moments and interactions. What a blast!
 
DMC-365.blogspot.com
 

Monday, September 1, 2014

Travel Photography Tip - Capture Details

When you travel to a new place, it's sometimes tempting to try and capture everything, to try and give the feel of the entire place in one or two shots. That approach usually fails, in my experience. It's much better to make multiple images, with varying sense of scale and focus, from sweeping landscapes to tiny details.
 
In a recent post on Digital Photography School's blog, Dylan Goldby explains how to capture details in your travel photography.
 
(Click Here) to read the post on DPS.
 
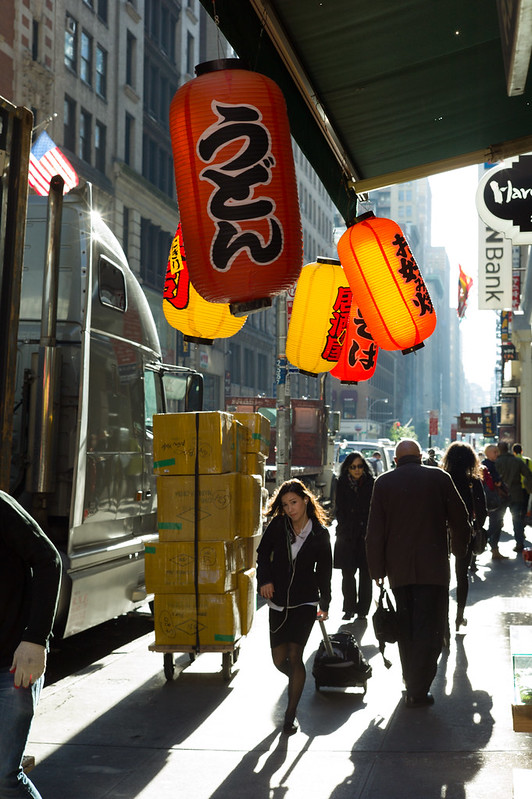
Goldby suggests including details in wide angle shots. You don't always have to focus only on the detail. You can emphasize details within a wider context in your image.
 
Lanterns, Korea Town, NYC, by Reed A. George
 
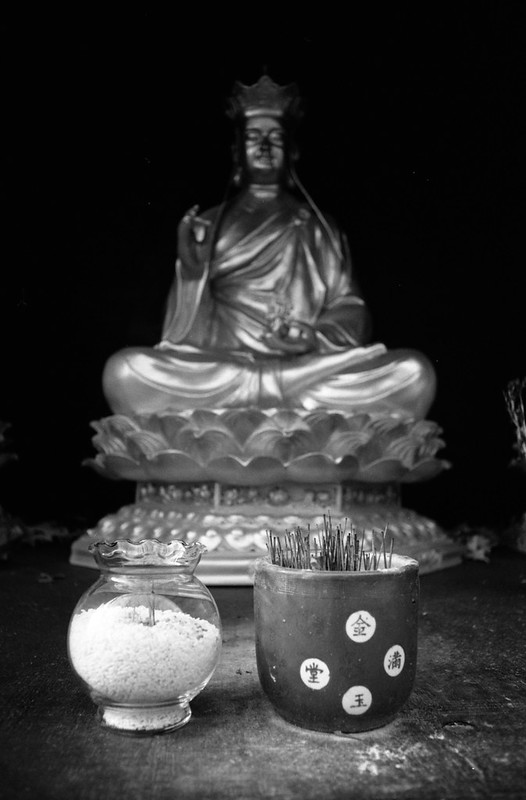
He also suggests paying attention to the lighting on the details themselves to emphasize a feeling. Of course, light always matters. In the post, Goldsby quotes Joe McNally as saying that you can make something more interesting by only lighting part of it.
 
Mystery Through Light and Dark, by Reed A. George
 
The third tip is closely related to the second, suggesting that you expose for the highlights in the image, letting the shadows go dark if necessary.
 
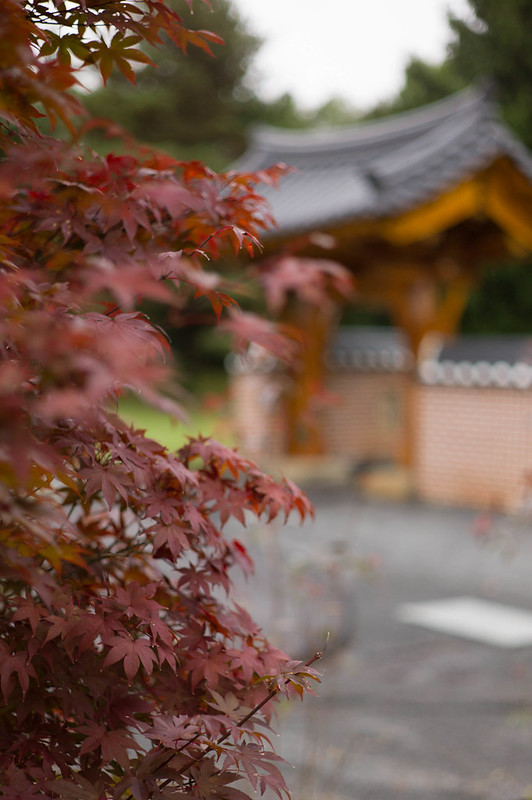
Finally, Goldsby suggests using selective focus to highlight details within a scene.
 
Japanese Maple Leaves, by Reed A. George
 
In the photo above, I was able to focus on the attractive shape and color of the maple leaves, yet still provide some context by showing the structure in the background, albeit in soft detail. This allows you to see some of the surroundings, yet still focus on what I intended - the leaves.
 
All good points to remember in emphasizing details in your travel photography.
 
DMC-365.blogspot.com
 

Friday, May 23, 2014

Film Latitude - Mike B Reports on Overexposing by Seven Stops!

"Humber Light" - Bronica ETRs - Zenzanon 75mm ƒ/2.8 @ ƒ/11 1/8s
Image Source: http://blia-yof.blogspot.com/
 
I found this image and related post on Mike B's "A Year on Film" blog. In this post, Mike writes about the incredible latitude of film, in this case Rollei IR400 IR film. While this shot above was exposed, I would say, perfectly, Mike shares an image that was overexposed by seven full stops, and still rescued. Yes, you can tell it was overexposed, but there's quite a lot of image information there.
 
(Click Here) to read Mike B's post.
 
I like a lot of things about this post. First, I'm intrigued by Mike's blog in that he is part of a "52 Rolls of Film" project, which equates to one roll per week for an entire year. I could do that. So far in 2014, I'm averaging about twice that rate. Second, Mike writes about how his digital cameras are taking the backseat to film cameras. He writes that he no longer buys film cameras, but his collection continues to grow through gifts from others. Having just returned from a trip to Ohio where I won a new Nikkormat FT3 at the Film Photography Project (FPP) Walking Workshop, and received a wonderful Konica FC-1 film SLR from my uncle, I can appreciate that. Finally, I like that Mike is using the Bronica ETRS. I have a full ETRS kit (including the 35mm panoramic back) that has not been out in ages. I must fix that.
 
Be sure to check out the FPP website if you're into film by (Clicking Here).
 
DMC-365.blogspot.com


Thursday, January 9, 2014

Three Approaches to Using a Barnack (Leica Screwmount) Camera - Tips by Khoa Tran on Steve Huff's Site

Yes, It Works as a People Camera!, by Reed A. George
Leica IIIC, 5cm Summitar f2 Lens
 
Well, for those of you following, I may be on a path to recovering most of my files lost in the Lightroom transfer. Until I'm done with that, I'm writing without access to most of my files. The one above is in my flickr account, so I could grab it for the purposes of this post. Fingers crossed, I hope to be back on my main image collection soon.
 
I recently bought a second wartime IIIC, which is currently on its way to see Mr. Youxin Ye, Leica service wizard, in Massachussetts. If you ever need your Barnack camera or lens serviced fast, well, and inexpensively, you should give Youxin a try. You can reach Youxin by email at: wye7@yahoo.com
 
I was reading posts about the IIIC and other Barnack cameras, when I came across a guest post on Steve Huff's site, by Khoa Tran.
 
(Click Here) to read the full post on Steve Huff's site.
 
In it, Khoa suggests three approaches to using a Barnack camera:
 
  1. As a point and shoot camera
  2. As a tool to develop your photographic skills
  3. As a portrait/people camera
By "point and shoot," I think he means to use a small aperture, hyperfocal or zone focusing, and preset exposure. When you do this, you can basically have in your mind as you walk down the street:
 
"Anything X ft or further away is in focus"
I do this all the time. All you have to do at this point is look for the right moment or composition, lift the camera to your eye, frame, and shoot. I totally agree with this being a great way to use one of these cameras.
 
As far as a tool to develop your skills, I think he's talking about the fact that these cameras have no meters. So, you can teach yourself to guesstimate exposure for different lighting situations. Again, I agree. Especially if you stick to a particular film speed (400 is my standard), you'll see that you can guess exposure settings much faster than you may have thought.
 
Finally, yes, the Leicas are great people cameras. I love to shoot photos of people, those I know (as above) and those I don't. The little Barnack Leica screwmount cameras are anything but threatening to people. Great for candid people photography.
 
DMC-365.blogspot.com


Saturday, August 24, 2013

Harsh Light and People Shots - Give Up and Go Home?

I was reading a blog post on Digital Photography School that discusses how to shoot people pictures in harsh, midday light. Many photographers really believe that the "golden hours" around sunrise and sunset are the only time to get great outdoor images. While these are certainly the best times, especially for landscapes (yes, you landscape shooters who are up a 4AM can go to sleep again about 9 AM), I refuse to limit my hobby to those hours.
The blog entry is written by guest contributor, Oded Wagenstein. (Click Here) to read the post on Digital Photography School.
I'll summarize the most important points for you. First, the problem. Shooting in harsh daylight produces high contrast, unflattering images. Either the highlights are blown (saturated), the shadows are pure black, or both. This is caused by lack of dynamic range, either in your sensor or your film. No adjustment of exposure will allow you to go past that limit, but there are solutions. I'll list them in the order Oded presents them, with my own comments, of course:
1. Go into the shade. If you can get your subject into the shade, the demands on dynamic range are significantly reduced. Here's a shot I made in the shade on a sunny day:
2. Shoot silhouettes. This is the "if you can't beat 'em, join 'em" approach. Silhouettes are easy to shoot, and can be very dramatic. However, you're going to get tired of looking at hundreds of silhouettes if that's your general approach to shooting in harsh daylight.
3. Blow out the background. In the shot below, I knew that I did not have enough dynamic range, even on film, to capture detail in the dark areas (see the black shirt, for example) and the bright white sky. So, I decided to use my available dynamic range on the part of the picture I was interested in, the faces. This sounds technical; all I really did was spot meter on their faces to select the best exposure, knowing that the sky behind would be overexposed. That's ok. The sky clearly was not my subject here. A good tip - meter your own hand to get the right exposure settings in a situation like this.
 
4. Use a reflector. This is a great tip. I usually don't have enough hands to position a reflector and shoot the camera at the same time. But, if you can get someone to hold one for you, a reflector can very effectively light up those dark shadows. You can use a gold one to bring some warmth back into the color as well.
 
5. Fill flash. Use a small amount (I mean small amount) of flash to fill in the shadows. This can easily be overdone. But, it can save the day in a pinch. This is one of those few places where your on-camera flash can be useful, if you can dial it down to a very low output level.
 
6. High dynamic range (HDR). HDR combines multiple exposures at different settings to allow you to select the best exposure for shadows, mid tones, and bright areas. It can be very effective. Like fill flash, it's also very easy to overdo it. I consider HDR a last option for people shots. Mostly because you must shoot at least two, probably three shots at a minimum. This means the person has to freeze while you shoot, shoot, and shoot again. I've never used HDR for people shots.
 
So, don't give up when the sun rises high overhead. Just think about the light, exposure, and most importantly, dynamic range.
 
DMC-365.blogspot.com


Friday, March 22, 2013

Whole Lotta Leica - More February Results From the W-Nikkor 3.5cm f2.5 - Musical Benefit for a Friend

 
Furnace Mountain Band - Benefit for a Friend, by Reed A. George
Leica M9, W-Nikkor 3.5cm f2.5
iso 1250, f2.5, 1/45 sec
 
The Furnace Mountain Band recently played a benefit concert for a friend in need. Held at Barns of Rose Hill in Berryville, Virginia, it was a nice family event for young to old. Unfortunately, fiddler extraordinaire David VanDeventer was at home with a sick child that night, but the show did go on.
 
Furnace Mountain Band - Benefit for a Friend, by Reed A. George
Leica M9, W-Nikkor 3.5cm f2.5
iso 1250, f2.5, 1/45 sec
 
 
Furnace Mountain Band - Benefit for a Friend, by Reed A. George
Leica M9, W-Nikkor 3.5cm f2.5
iso 1250, f2.5, 1/45 sec
 
Shooting in the low house lights of this venue without a flash was a stretch for the little f2.5 Nikkor. As you can see, I shot at iso 1250, which barely allowed a fast enough shutter speed for handheld shooting (1/45 sec.) with the lens wide open. Even then, the shots were pretty underexposed and needed a boost in exposure in post-processing. This is a recipe for making digital noise come through, and it did. Converting to black and white helps by eliminating color noise. I also added a little grain in Lightroom, which makes the noise feel a little more like grain from a fast film like TriX. But, again, it was a stretch with this equipment. I wouldn't want to make large prints of these.
 
This reminds me why I love really fast lenses, like March's Whole Lotta Leica selection, the Summilux 35mm f1.4.
 
But, there's nothing wrong with a challenge now and then.
 
DMC-365.blogspot.com
 

Wednesday, September 12, 2012

10 Stop Neutral Density - What For?

 
Dramatic Reflection, by Sam M. on mu-43.com
Image Source: http://www.mu-43.com/f60/dramatic-reflection-32274/
 
This is timely for me. I have been known to use a neutral density (ND) filter occasionally, usually to lengthen my shutter speed to allow a longer expsosure, as was done by Sam M. in the image above. However, I carry a 3-stop ND filter, which allows 8 times the normal shutter opening time.
 
(Click Here) to see Sam M.'s post on mu-43.com
 
ND filters basically block a substantial portion of the incoming light, in a color-balanced way, allowing you to increase exposure in bright situations (either by lengthening the shutter opening time, or by opening up your f-stop for shallow depth of field).
 
In my Leica Akademie class on the M9 recently, our instructor, Justin Stailey, talked about 10-stop NDs. I had trouble imaging where I'd need that much of an effect. Sam M.'s image above answers the question well. Let's say you're shooting in broad daylight at iso200 - using the sunny 16 rule, you would want to shoot at about 1/200 second at f16. What would a 10-stop ND filter do for you? Well, if you wanted to make a long exposure, you could shoot at f16 for four seconds!
 
The shot above was made at 20 seconds exposure. That's what makes the clouds look so cool.
 
By the way, this effect would be very hard (impossible) to replicate in post-processing. The same is true if you use your ND for decreased depth of field.
 
DMC-365.blogspot.com