Showing posts with label tip. Show all posts

Friday, October 24, 2014

Some Tips for Taking Great Images in the Studio

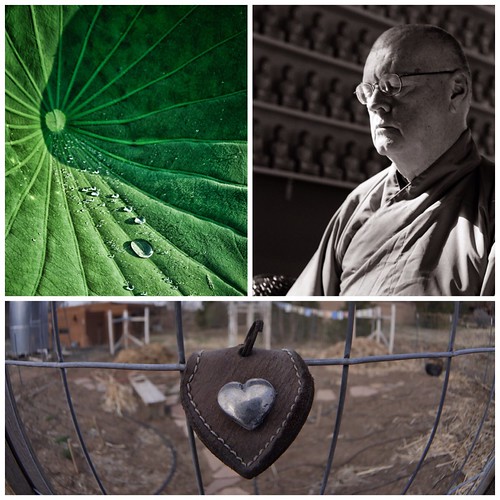
Danny Knicely, by Reed A. George
 
I've been doing some promo images for my musician friends lately. I'm thoroughly enjoying the process, and always looking for new tips. I thought that the studio lighting setup would be one of the challenges, and therefore looked up some common configurations before starting. After a couple of these sessions, I now feel pretty comfortable with the lights. Really, I think it's more important to get them set, stop fiddling with them, and develop trust and interaction with the person being photographed.
 
I recently read a post by Sarah Hipwell on the Digital Photography School website. It has several good tips for getting things to flow:
 
  • Music can help to calm down a tense atmosphere. I use this one every time when I'm shooting musicians. I have not tried bringing recorded music to the session, though. Since my subjects are musicians, and typically want to be photographed with their instruments anyway, I always ask them to play. I get a private concert, and they get to do what they love. Another added benefit is that it brings out the performer in the person; they're not used to being in a photo studio, but they are used to playing in front of people, and even in front of cameras.
  • A tip that Sarah shares is asking the subject to blink ten times. I like this idea very much, as it will give a better catchlight in the eyes if they're wet, and I bet it reduces blinking during exposures.
  • Ask them to wear neutral clothing. The pictures are about them, not their clothes.
  • Sarah mentions that most great images come at the end of a session. I've definitely found this to be true. I think it's when the pressure is off, and everyone is pretty sure you've got some good images, that both the photographer and subject relax. This relaxation shows in the pictures.
  • Get feedback during the session. This is a mixed bag, in my opinion. First, showing them tiny images on the camera LCD generally won't work. Connecting to a larger display requires some technical ability; if you have it, great. If not, don't fiddle with wires, cards, and gear while the studio clock is ticking.
  • Get them to talk. Yes! Except, as mentioned above, I generally get them to sing. This is easy with most musicians.
  • Work fast. Agreed. While I try to work fast, sometimes I rush myself too much, and don't go deep enough with the subject. In other cases, what should be a one hour session easily goes into the second hour, probably too long from the point of view of the person being photographed. So, for me, the challenge is to balance between rushing too much and taking too long.
  • Another practical tip - have them point their legs toward the main light source, and twist their upper body to face the camera.
(Click Here) to read Sarah's full piece on the Digital Photography School site.
 
 
It's harder than it looks, folks. In my opinion, getting the technical stuff out of the way so that you can focus on the person and interaction with them is key.
 
DMC-365.blogspot.com
 

Friday, September 12, 2014

Time to Make My Portfolios

Meditative Photography, by Reed A. George
 
If you're a regular DMC-365 reader, you may know that I've been accepted into a Magnum workshop with David Alan Harvey this September. The workshop is already having a positive effect on my work, even though it won't start for another week. In short, I've been instructed to put together a portfolio of my work in preparation for the workshop.
 
I've known that it's time to update my portfolios, as well as my online presence at my website creativeobjective.com for quite some time. Now I have a deadline, at least for my portfolios.
 
Of course, I started by reading up a little to get some tips on making a powerful portfolio.
 
(Click Here) to read an article on PopPhoto on the subject.
 
In this article, Brian Dilg of the New York Film Academy's photography school offers a lot of insight. Here are the most important tips from my perspective:
 
  1. Don't include multiple images that are too similar or obviously taken in the same session. It can make it look like you're indecisive or incapable of editing your work.
  2. Stick to either landscape or portrait orientation within a series of images. This is a tough one for me.
  3. Don't pad your portfolio with less than the best images, ever.
  4. Every image should evoke a "Wow" from viewers, without the need for explanation.
  5. Your portfolio should focus on a subject; that should be the subject you'd love to be paid to photograph.
  6. Your goal is not to show competency as a photographer; it's to show creativity as an artist.
  7. Use mini-sequences within your portfolio. A simple three image sequence should follow this outline: create an expectation (1st image), establish a pattern (2nd), and provide a surprise or thrill (3rd).
  8. In most cases, a real print still rules. However, in a pinch, an electronic portfolio can be acceptable.
So, it looks like I have my work cut out for me.
 
DMC-365.blogspot.com
 

Monday, September 1, 2014

Travel Photography Tip - Capture Details

When you travel to a new place, it's sometimes tempting to try and capture everything, to try and give the feel of the entire place in one or two shots. That approach usually fails, in my experience. It's much better to make multiple images, with varying sense of scale and focus, from sweeping landscapes to tiny details.
 
In a recent post on Digital Photography School's blog, Dylan Goldby explains how to capture details in your travel photography.
 
(Click Here) to read the post on DPS.
 
Goldby suggests including details in wide angle shots. You don't always have to focus only on the detail. You can emphasize details within a wider context in your image.
 
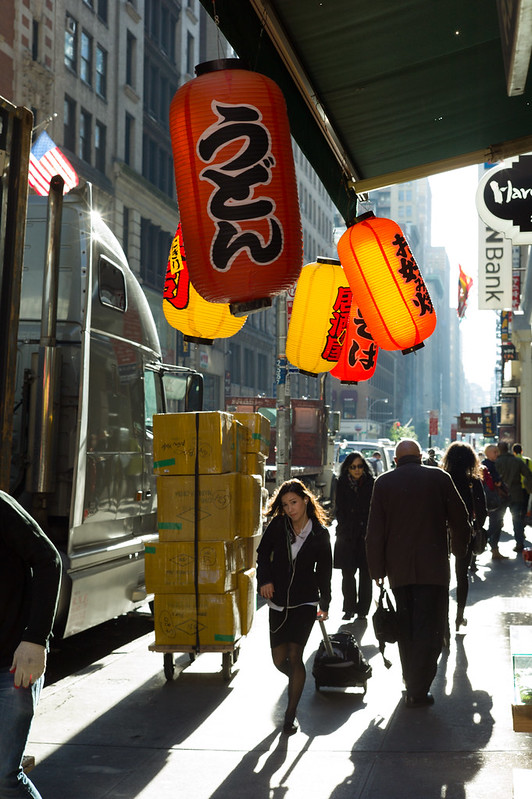
Lanterns, Korea Town, NYC, by Reed A. George
 
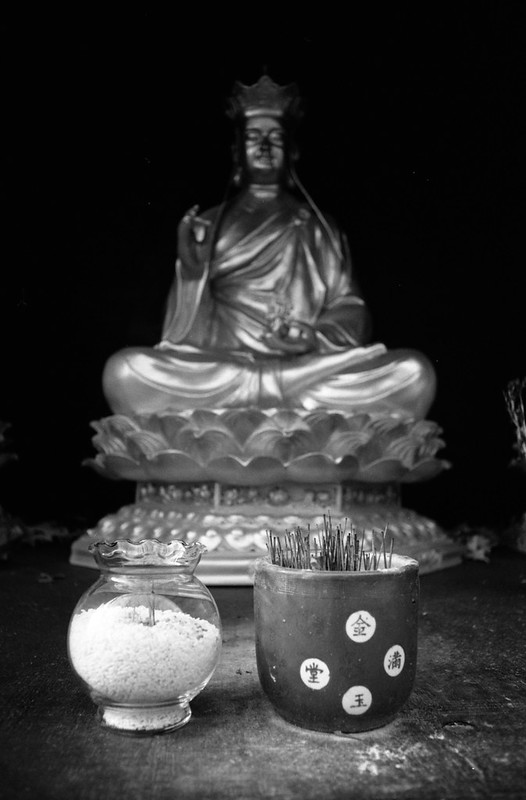
He also suggests paying attention to the lighting on the details themselves to emphasize a feeling. Of course, light always matters. In the post, Goldsby quotes Joe McNally as saying that you can make something more interesting by only lighting part of it.
 
Mystery Through Light and Dark, by Reed A. George
 
The third tip is closely related to the second, suggesting that you expose for the highlights in the image, letting the shadows go dark if necessary.
 
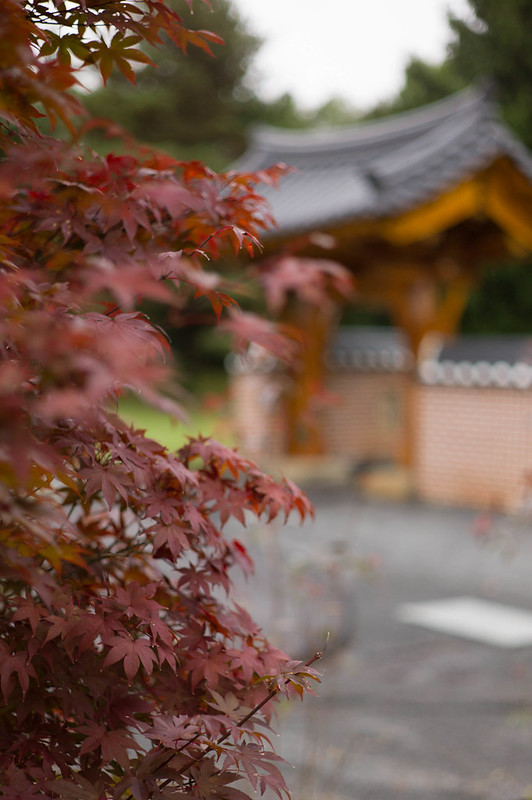
Finally, Goldsby suggests using selective focus to highlight details within a scene.
 
Japanese Maple Leaves, by Reed A. George
 
In the photo above, I was able to focus on the attractive shape and color of the maple leaves, yet still provide some context by showing the structure in the background, albeit in soft detail. This allows you to see some of the surroundings, yet still focus on what I intended - the leaves.
 
All good points to remember in emphasizing details in your travel photography.
 
DMC-365.blogspot.com
 

Sunday, December 22, 2013

Following Up On Tips for Shooting Strangers - Wait For It!

Yesterday, I wrote about a post on Digital Photography School's site which gave 8 tips for photographing strangers.
 
One of the hardest practices for me to learn was to take my time and get the right shot, once I'd gotten over the barrier of talking to someone and getting permission to take their portrait. As I mentioned yesterday, many times I used to walk away thinking "If only I'd move a little to the right (or left)." or "I should've bracketed the exposure."
 
Well, I am learning to take my time and wait for the image I want. Here's a recent example. I was in San Francisco, walking around Chinatown with my Leica M6 and Summicron 50mm f2, when I saw this little girl and the woman I guessed to be her grandmother. I rather bravely walked up to them, and asked the older lady if I could take their picture. She smiled, which I took as a yes. As I put the camera to my eye, the little girl figured out what was happening and did this:
 
Oh, No! Not What I Wanted!, by Reed A. George
Leica M6, Summicron 50mm f2 (v.3) Lens, Kodak iso 400 Color Print Film
 
I felt it right on the spot - what a horrible shot I've just made. This is cheesing for the camera of the very worst type. The forced smile turned this sweet little girl's face into an image of stress and tension for me. But, I WAITED. As soon as she heard the shutter click, the little girl relaxed and gave me this:
 
Here's What I Saw in the First Place, by Reed A. George
Leica M6, Summicron 50mm f2 (v.3) Lens, Kodak iso 400 Color Print Film
 
This is what I saw in the little girl's face that drew me to photograph them in the first place.
 
One more note - on asking versus just shooting. Another thing that really drew me to this pair was how the older lady was looking into the face of the little girl (like in the top shot). I really wanted to catch that interaction between them, but while they were looking natural and not posing for the camera. I think you can probably see that in both pictures, on the right side, there are men watching me, rather protective of what I'm photographing. This prevented me from taking the candid that I hoped to get. So, asking directly at least got me the shot. If the situation didn't have this tension, I would have shot a candid first, and maybe then asked permission for a follow-up shot like I got.
 
DMC-365.blogspot.com


Friday, July 6, 2012

Before and After - Tutorial by Roel on roel.me

Roel on the website roel.me has produced a very nice tutorial entitled "Before and After." In this piece, he presents pairs of images, each explaining a photographic challenge he has encountered ("Before") and his solution ("After").
 
(Click Here) to see the full tutorial on Roel.me


Before, by Roel


Roel's "Before"
Image Source: http://roel.me/before-and-after-improving-your-photography-part-1/?utm_source=feedburner&utm_medium=feed&utm_campaign=Feed%3A+roelme+%28roel.me%29


Roel's After
Roel's "After"
Image Source: http://roel.me/before-and-after-improving-your-photography-part-1/?utm_source=feedburner&utm_medium=feed&utm_campaign=Feed%3A+roelme+%28roel.me%29
 

Roel has done a very nice job here. In the example above, he's making the point that you should consider including context around your subject. Yes, the bike is the subject. Most of us have been trained to focus closely on the subject, removing anything that is not essential from the frame. In this example, Roel shows that the Chinese characters on the wall near the subject really add to the composition, making it easier to understand the setting of the bicycle.
 
In other examples, Roel makes the following points (see the link above to see Roel's pictures for each):
  1. Change your perspective to get a different picture, emphasizing the most interesting part of the scene.
  2. "Shoot what cannot be shot." I find this description a little misleading. What Roel really did in this example was to focus on the interaction of a mother and son, rather than placing them within the context of a market.
  3. Understand your real subject - in this example, Roel focuses on the hands of a worker in a Chinese silk factory. This is a wonderful example.
  4. Focus on finding interesting light first - a good picture will follow.
  5. Frame your subject. This one is striking as well. Roel uses a window frame in his hotel room to make a harbour scene in Hong Kong much more interesting.
  6. Tell a story. We all know this. We must all be reminded of this.
Roel's bicycle example (shown above) reminded me of a shot of my own. In the shot below, it was the way that the plants had overgrown this old scooter that caught my eye. I am fond of this image. However, I am now wondering if there was any context that would have placed it as being taken in Japan. Hmm. I may get the chance to see this one again, as we go to Japan every spring to visit family. Maybe I'll have an "after" shot next year?

"Before" Shot?, by Reed A. George
Panasonic Lumix DMC-G3, Pana-Leica Summilux 25mm f1.4
iso 160, f5.6, 1/160 sec
 
DMC-365.blogspot.com
 
DMC-365.blogspot.com
 

Sunday, June 24, 2012

Quick Notes to Add to my eBook on the DMC-G3 - Manual Focus Tip, and Still Capture During Video

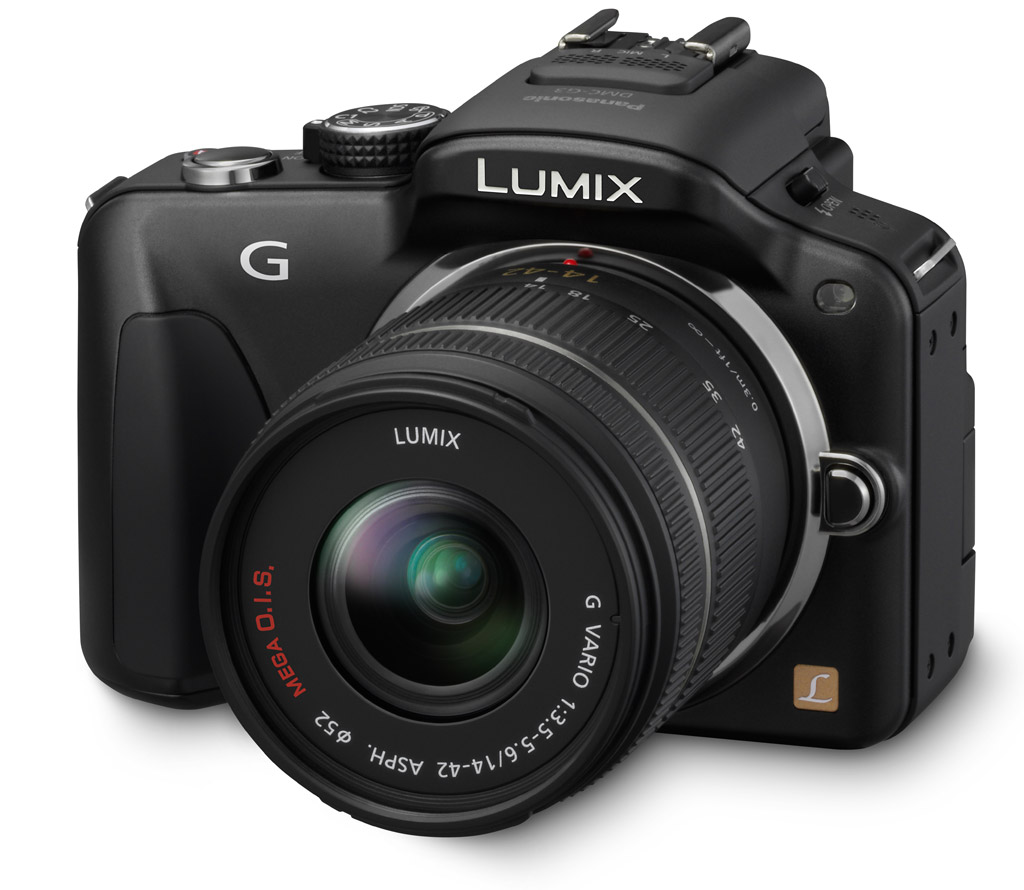
Panasonic Lumix DMC-G3
Image Source: http://shop.panasonic.com/dotAsset/1b37230b-19c7-46ef-8f25-c26c03bdf59d.jpg

Two features of the DMC-G3 have recently come to my attention, and need to be added to my eBook.

The first is related to focusing with manual lenses. In my eBook, I indicate that you have to press the left cursor button followed by the menu button to bring up the magnified focus aid. In fact, a much better alternative is to just push in the rear dial in toward the body of the camera. This really is a better way to do it. Thanks to reader martyvis for reminding me that it was not included in the eBook.

Second, someone asked me if the G3 is capable of capturing full resolution still images while capturing video. As I am only a casual user of the video functions, I did not know the answer. After looking into it, I see that it does have that function. Simply press the shutter release during video capture, and you have yourself a full resolution still!

DMC-365.blogspot.com


Sunday, June 10, 2012

Final Two Chapters of My Free G3 Settings eBook Available For Download! Get the Whole eBook Here, Free!

Lumix DMC-G3 by Reed A. George
Panasonic Lumix DMC-G3 and Nikon Nikkor AIS 28mm f2.8 Lens
by Reed A. George
 
Well, since I'm expecting the announcement of a new Panasonic Lumix Micro 4/3 body (the rumored DMC-G5? DMC-GH3?) any time now, I figured I had better wrap up my ebook on how I use the DMC-G3. In fact, I use two of them.
 
The final installment includes a chapter on setting up custom configurations, and a short chapter on my conclusions on the camera.
 
I learned a lot by working through every detail of how to set up this camera. And the best thing is, now that I've done it, and saved some custom configurations, I can forget about the details of what many of those menu settings actually mean. This camera has so many options, it's amazing. But, I want to set most of them once, and forget them. Custom Modes help a lot, as does the Quick Menu.
 
(Click Here) to download the final two chapters of my ebook, in Adobe pdf format.
 
For ease of navigation, I'm including links to the previous chapters below:
 
(Click Here) for Chapter 1 - Introduction and External Controls
 
(Click Here) for Chapter 2 - Menu Settings
 
(Click Here) for Chapter 3 - Focusing
 
I hope that you'll find them useful.
 
I recommend that you download and save all of them; I will consolidate them into a single file, but cannot guarantee that it will remain available for free forever...

 
DMC-365.blogspot.com
 

Friday, June 1, 2012

Kirk Tuck (of Visual Science Lab) Talks Up The Electronic Viewfinder (EVF)

Kirk Tuck on EVFs
Image Source:
http://theonlinephotographer.typepad.com/the_online_photographer/2012/05/kirks-take-electronic-viewfinders.html?utm_source=feedburner&utm_medium=feed&utm_campaign=Feed%3A+typepad%2FZSjz+%28The+Online+Photographer%29

Kirk Tuck has written a piece on The Online Photographer, with some witty-but-practical thoughts about how electronic viewfinders (EVFs) compare and contrast to optical viewfinders (OVFs).

(Click Here) to read Kirk's post on The Online Photographer.

Kirk talks up the following features of EVFs:
  1. "Pre-chimping" (this term belongs to Kirk :) ). This means being able to see how the camera's settings and electronics will treat an image BEFORE you shoot it. Not possible with an OVF, it can be achieved with live view on an SLR, but not with the camera to your eye.
  2. Focus Peaking - I am not familiar with what Kirk describes, about the camera highlighting items that are in focus in your image. I'm thinking Lumix cameras don't do this? Please comment if you can shed any light on this subject.
  3. The ability to quickly check an exposure in the EVF after it's taken, without having to take the camera away from your eye.
I certainly appreciate number 3, even though it makes people think I'm crazy when I've got the camera to my eye reviewing an image, not necessarily pointing it at my subject any more. My wife has said - "Why are you taking pictures of the sidewalk?"

On the downside, Kirk talks about the delay of the EVF making it more difficult to "lead" a moving subject (or at least different from the OVF), having to turn "Gain Up" (something I think is the default setting in Panasonic cameras) to see your subject in a dark setting, such as when you're planning to use studio flash, and the fact that EVFs typically represent an image in higher contrast than the true image, making the quick-check less effective.

On that final point, Kirk suggests that raw shooters can set their jpeg settings to low contrast, so that the image in the EVF more closely approximates what will be in the raw file. Nice tip.

I agree with Kirk on many points here. I love the "gain up" behavior of the Lumix EVF, which allows me to see what's going on in a dark scene by increasing the gain in the EVF (bringing up the light levels). I would add that this also allows visualization of the depth of field, if you're using a lens that closes the aperture down before the shutter is released. This is the case with legacy lenses on adapters. This is a feature that makes EVFs a major advantage. Basically, even though the aperture is closed way down (reducing the light getting to the sensor), the EVF adjusts the gain to brighten the image going to your eye. So, you get enough light to see what's going on, and the lens is closed down, so you can see the true depth of field.

Contrast this to the old depth of field preview in an SLR (which makes the image in the OVF so dark you can't see anything), or the conventional rangefinder camera (which has no provision for depth of field preview).
That said, I still really love to look through an OVF. It just looks more "real." It makes me feel like I'm still there, present in the scene. The EVF doesn't do that.

I know that even though this is a Lumix blog, I've been referring to Fujifilm quite a lot. I bring it up here because I wonder just how well their hybrid viewfinder (which allows you to switch between EVF and OVF) gives the benefits and minimizes the disadvantages of both finders. I imagine the hybrid design is pretty well-covered by Fujifuilm with patent protection, but I'd sure like to see it appear on other cameras (especially Panasonic).

Thanks again, Kirk, for a thought-provoking piece!

DMC-365.blogspot.com
 
DMC-365.blogspot.com
 

Monday, May 28, 2012

Chapter 3 of My eBook on the G3 Is Now Available For Free Download!

Panasonic Lumix DMC-G3
with Nikon Nikkor 28mm f2.8 Manual Focus Lens

If you've been following the development of my eBook, you may be interested to know that Chapter 3 is now available for free download. Chapter 3 takes on the subject of focusing - both the extensive autofocus (AF) technologies and the superb manual focusing tools resident in the DMC-G3.

(Click Here) to download Chapter 3 - Focusing


As a reminder, here are the links to the posts for the first two chapters:
 
(Click Here) for Chapter 1 - Introduction and External Controls
 
(Click Here) for Chapter 2 - Menu Settings
 
Writing this chapter helped me to work through some questions I had with AF settings. Probably the most important thing I learned is how cool Pinpoint Focus can be when used in conjunction with the Touch Screen. As a regular user of the Electronic View Finder (EVF), I don't use the Touch Screen often. However, after trying out Pinpoint Focus, I now have it in mind should the opportunity present itself.
 
I hope you're enjoying the eBook! Please comment, drop me a line, or even purchase something on Amazon by clicking through the link below. It doesn't cost you anything extra.
 
Enjoy!
 
DMC-365.blogspot.com


Specialty Blogs Are Cool - Check Out Micromotorsport

 
Classic Corvette Interior, by Reed A. George
Panasonic Lumix DMC-G1, Leica Summarit 50mm f1.5 (LTM)
iso 100, 1/800sec

When I started this blog, specifically focused on Panasonic Lumix cameras and my uses of them, I was concerned about it being focused on too small of a subject. However, what I read about blogging indicated that it was better to focus tightly, so I gave it a try. While I do write about things other than purely Lumix topics, there is always a connection to my photography interests, which all include Panasonic in some way, or at some time or another.

Anyway, I found this very focused blog, centered on the use of Micro 4/3 cameras to photograph automobiles and automotive events:

http://micromotorsport.wordpress.com/about/

(Click Here) to check it out.

This intersection of Micro 4/3 gear and automobile interests is clearly focused, but I'm sure still draws quite a number of followers. There are excellent examples of car images throughout, a shooting guide, and interesting writing about techniques and equipment. Bravo!

I love to attend car shows, and used to be seen pretty regularly at the Laguna Seca Antique races in Monterey, California, when I lived near there.

(Click Here) for the Laguna Seca website.
Black Cat, by Reed A. George

I hope those of you who are car and Micro 4/3 enthusiasts will enjoy this site. If cars aren't your bag, you may still want to read the shooting guide's information on motion panning - it works for anything in motion.

DMC-365.blogspot.com

 
DMC-365.blogspot.com
 

Tuesday, May 22, 2012

So That's Why Some of My Pictures Are Rotated The Wrong Way!

Lumix DMC-GF5
Panasonic Lumix DMC-GF5, With In-Body Orientation Sensor
Image Source:
http://www.cameragearguide.com/7612/panasonic-announces-12-1mp-lumix-dmc-gf5-with-improved-ergonomics-touchscreen-and-iso-performance/
 
 
I have noticed that some of my "portrait orientation" pictures on the DMC-G3 are not rotated, while others are. I thought I noticed this occurring as a difference between by two G3 bodies. In fact, it turns out to be caused by the fact that in order to sense the camera orientation during imaging, the Lumix cameras (at least those prior to the DMC-GF5) rely on the sensors for Optical Image Stabilization (OIS) that are in the lens. So, if you're using a lens without OIS, your images won't be correctly oriented.
 
Here's the quote I found regarding this in a dpreview review of the Lumix 7-14mm f4 lens:
 
"One design quirk of the Panasonic G series is that the lens's image stabilization sensors are used to detect the camera's orientation, and mark images for rotation accordingly (as opposed to a conventional sensor mounted in the body). Obviously this can't work with lenses which don't have an OIS unit, such as the 7-14mm. This means that Panasonic owners will find all of their portrait-format pictures shot with this lens resolutely displaying the wrong way round."
 
(Click Here) if you are suffering from GAS (Gear Acquisition Syndrome) as I am, and want to be convinced to buy the 7-14mm lens.


As far as orientation sensing goes, the newly-announced DMC-GF5 reportedly incorporates an orientation sensor into the body, giving you orientation sensing, no matt what lens you are using. This is according to a review on www.cameraguide.com.
 
(Click Here) to read the DMC-GF5 review in its entirety.
 
I was relieved to find that #1, I am not going crazy, and #2, there is not some hidden function setting somewhere on one of my G3s that was different from the other. It comes down to the fact that one camera had an OIS lens mounted, while the other did not.
 

DMC-365.blogspot.com


Sunday, May 20, 2012

Another Jpeg Setting To Try

 
Here Comes the Sun by dixeyk on mu-43.com
Image Source: http://www.mu-43.com/f43/panasonic-color-26171/
 
I have written in the past about my desire to find great jpeg settings for my Lumix DMC-G3. I normally shoot raw files, but would like to get the best jpegs out of my camera, to minimize the need to sit in front of a computer, post-processing images. Especially given my luck with home computers lately (another story).
 
Poster dixeyk on mu-43.com posted this image, and his settings.
 
(Click Here) to see dixeyk's post.
 
dixeyk uses the "My Film" setting on his Panasonic Lumix DMC-GH2, setting Contrast, Sharpness, Saturation, and Noise Reduction all uniformly to a value of -2.
 
From dixeyk's single example, this looks pretty good to me.
 
I previously tried another user's suggested settings and found the result way too contrasty and saturated. So, for now, I just use the normal film setting, but am not totally satisfied with the result.
 
 
(Click Here) for my earlier post on jpeg settings. Note, again however, these didn't work out for me.
 
 
I'm leaving for a short trip this weekend. I'll give dixeyk's settings a try and report back.
DMC-365.blogspot.com


Friday, May 18, 2012

Nice Post on Natural Light from Digital Photography School

 
Image Source: http://digital-photography-school.com/are-you-practicing-these-5-natural-lighting-tips

The Digital Photography School has a nice post on how to think about, observe, and capture natural light. They give the following five tips:
  1. Be aware of the characteristics of light. Learn to think about how that scene you're observing now would look at a different time of day (or night). The differences can be dramatic.
  2. There is no "good" or "bad" light. Yes, the golden hour is great for beautiful images. Sometimes, you want to communicate something other than just "beautiful." Sometimes the harsh light of mid-day is exactly right for communicating your story.
  3. Obsess about observing light. Even when you don't have a camera. Look at contrast, how the shadows are illuminated. I find it useful to think about how many stops difference I think there are between the shadows and highlights, and about how I would expose an image, if I were taking it.
  4. Give it a try, experiment. To me, this point follows on the one above. Why ever be without a camera? If you see it, shoot it. It's digital, right? You can simply delete it later, with no cost, and with the potential of learning something.
  5. Don't forget that you can post-process. Learn to shoot challenging scenes with a plan in mind for post-processing. Want to capture that person's face, but also want the sky correctly exposed? See if you can capture the sky and bring the face exposure up a little in post-processing.
And most importantly, the article reminds us to get out an make photos. That's the thing we're interested in, right?
 
(Click Here) to read the whole article on digital-photography-school.com.
 
DMC-365.blogspot.com


Sunday, May 13, 2012

Free Again! Chapter Two of My eBook for How To Set Up Your DMC-G3 Is Now Available For Download

DMC-G#
Image Source: http://www.imaging-resource.com/PRODS/DMCG3/ZURBE.JPG

My second ebook chapter on how I set up and use my Panasonic Lumix DMC-G3 is now available.

This one took a long while to write. In Chapter Two, I go through all of my settings in the Recording, Custom, Setup and Playback menus. These are the settings that most affect my daily shooting.

(Click Here) to download Chapter Two in Adobe pdf format.

Again, if you appreciate this document, drop me a comment, tell your friends, purchase your Amazon items by clicking through from this blog, etc. Any support is always appreciated.

Most importantly, if you see any mistakes, let me know!

My plan is to follow up these initial two chapters with some information about custom settings, and some real applications with the camera. Chapter Two is purely focused on menu settings, which I am glad to be through, to be honest.

I hope you find this useful. Let me know!

DMC-365.blogspot.com


Saturday, May 12, 2012

Useful Article on Printing Resolution at digitalphotopro.com

 
Table Source: http://www.digitalphotopro.com/technique/workflow/the-right-resolution.html

How do you decide what print resolution to use when printing your digital files? Do you always just set it to 300 dpi and forget it? Just use the native resolution of the image? I have known that you can get by with lower resolution printing for larger images, but didn't really know how to calibrate that. I have also learned the trick of increasing resolution to 360 dpi when I make large prints of smaller resolution images.

(Click Here) to read the whole article, which leads me to somewhat different conclusions.

First off, the table above. This table reinforces the idea that you can get by with lower print resolutions for larger prints. For example, a 3.5" x 5" print is normally viewed from 10-12" distance, meaning about 300 dpi is correct.

However, this article finds that there is benefit in printing to 360 dpi resolution with Epson printers (mine is Epson), 300 dpi for Canon, regardless of final print size. So, conclusion 1 is that you should print at 360 dpi for any print size, even if your file isn't that high in resolution. The article explains how to do this from Lightroom.

The second conclusion is that if your original file is even higher resolution than the Epson native resolution of 360 dpi at the size you want to print, you should NOT decrease the resolution. In fact, you may benefit from increasing the resolution to 720 dpi, if you have an Epson Pro printer, which has a maximum detail resolution of 720 dpi.

This article goes far in demonstrating the differences, yet results in simple conclusions. Very helpful.

DMC-365.blogspot.com


Monday, May 7, 2012

On Culling Your Images - by Guest Contributor Lara White on digitall-photography-school.com

 
dessert table closeup.jpg
 
Image Source:
http://digital-photography-school.com/wp-content/uploads/2012/04/dessert-table-closeup.jpg
 
Guest Contributor Lara White wrote a nice piece on digital-photography-school.com about the merits of not only editing and evaluating your images, but actually selecting the best and deleting the rest.


(Click Here) to read the original article on digital-photography-school.com


Lara suggests that we should "be ruthless" in deciding which images to keep, and which to throw away. She makes several points regarding why this is a good practice, including that making decisions makes us learn what's right and wrong with each image, that it allows our truly great shots to stand out without being surrounded by average ones, and that over time it teaches us which perspectives and compositions work.


I found Lara's examples - a ho-hum shot of a dessert table, and a smashing closeup of a single dessert (image above) useful. I think it reinforces the idea that simple is better, and reminds me of one of my own faults - trying to tell the whole story in one picture. Sometimes that's just not effective, or even possible.


There is one other benefit to ruthlessly deleting everything but our best work, and that is storage space (and associated access time). Not only do hard drives fill up fast, it takes a finite amount of effort to find those best shots again, when they're surrounded by marginal ones in the directory. Yes, Lightroom's flags and selection tools make this easier, but it can never be easier than not having the clutter there in the first place.


The only downside I can see is that we may inadvertently delete images that will become important to us later. I think that's pretty rare.


Something good to consider when thinking about your workflow.


DMC-365.blogspot.com


Sunday, May 6, 2012

Free! My First Installment of an ebook on How to Set Up Your DMC-G3!

Image Source: http://shop.panasonic.com/shop/model/DMC-G3KK
 
Ok, folks, for those of you who are Panasonic Lumix DMC-G3 users, I've embarked on a project to document how I set mine up, and share it with all of you.
 
There is a dizzying array of menus and settings on the G3. I worked through all of them, at least to some extent, and documented not only HOW I set them, but WHY. Now I don't expect you to agree with all of my settings, but at least you'll know what you're disagreeing with, if you decide on a different setting.
 
I have completed the first chapter, which I share here with you now.
 
(Click Here) to download the first installment of my G3 Settings Manual in Adobe pdf format.
 
The second chapter, much more extensive, outlining my settings for the Priority, Shutter, and Aperture Priority and Manual modes, is nearly finished. It will be distributed in the same way.
 
All I ask in return is that you buy your Amazon items by clicking through from my site. That really hasn't paid off yet; I think I'm up to about $15 revenue, total, ever. Of course, if you'd like to contribute directly to this blog, rather than buying things from Amazon (on which I make a very small percentage commission), you can always send me Paypal at rgeorge911@hotmail.com.
 
But, I'm really not in this for the money. It would be great to bring in enough to pay my annual flickr and smugmug bills...
 
I sure hope you find this manual useful. I actually learned some things in the process of writing it.
 
UPDATE 5/13/2012: Chapter Two is now available as well! (Click Here) to get it.
 
DMC-365.blogspot.com


Monday, April 23, 2012

More From Less - Interesting Article by Nick Fleming on Digital Photography School

 
Exclude Unnecessary Elements From Your Compositions
Image Source:
http://www.digital-photography-school.com/wp-content/uploads/2012/02/Field-Training-Boots-Nick-Fleming1.jpg


In an article on the Digital Photography School website, photographer Nick Fleming describes the importance of excluding extraneous elements from our compositions.


(Click Here) to see the article.


There are several great examples of powerful pictures, where more novice photographers would have been tempted to include more. In the image above, just the grass, boots, and drill instructor in the background are needed to communicate what is going on in the scene. No doubt, the recruits' faces would have been interesting elements as well. For this picture, they just weren't necessary.


The article also shows examples where excluded elements are obvious, even though they're not part of the picture. An ox pulling a plow is excluded; we know what was there. One wooden boat in another picture is enough; we don't need to see the one in the immediate foreground to know what it is.


This article reaffirms a commonly-taught point: in photography, simplicity rules. This article goes beyond the normal description by offering several interesting examples that make the point very well.


DMC-365.blogspot.com


Friday, April 20, 2012

On Critical Focus, by Tesselator of GetDPI


Image Source: http://forum.getdpi.com/forum/4-3rds-cameras/35591-achieving-critical-focus.html
Tesselator's DMC-GH1 and Worn Manual Focus Assist Button
Forum member Tesselator on GetDPI posted a recent entry about achieving critical focus. Interestingly, while he uses legacy manual focus lenses almost exclusively, and does not own a single native Micro 4/3 lens, he is a dedicated Lumix DMC-GH1 user. Apparently, he's on his fourth unit.
(Click Here) to see Tesselator's post on Get DPI.
It turns out that Tesselator achieves astonishingly sharp focus not through any tricks or technologies; it seems he's just plain obsessive about careful focus and camera stabilization. The only kind of new tip he shares is using the automatic magnification for assisting manual focus that is available on the Lumix 4/3 cameras. In fact, you can see how he has worn the label on the button away through constant use, in the image above (small button to the left of "Menu/Set").
In this post, Tesselator also describes his extensive use of tripods. This is something we all need to hear again, once in a while. Of course, we all know that tripods are required for ultimate sharpness. But, it sure is easy to leave it at home.
I found it useful to read his experiences, including those with vintage Linhof tripods. I hope you find something useful in his post, as well.
DMC-365.blogspot.com
 
 
DMC-365.blogspot.com
 
DMC-365.blogspot.com
 

Thursday, April 19, 2012

Thoughts On How iso6400 Has Transformed Photography

Virginia Ramblers, by Reed A. George
Nikon D700, iso8000

Rangefinder Forum writer BobYIL recently wrote a post about how enabling the ability to shoot iso6400 on the latest digital cameras is.

(Click Here) to see the original post on Rangefinder Forum.

This was a very lively thread, with plenty of good responses. The first of two links included in the post includes a series of sports images. They are great, and deserve a click to look through.

I know that I used to occasionally shoot Delta 3200 film, but only when there was no other alternative (shooting available light in very low light situations). It was very grainy, though I did perfect shooting it at iso 1600, and adjusting the development time, to get very good results.

Now, I shoot iso 1600 with what I consider to be very nice output with my Lumix DMC-G3. I can shoot iso 3200 on the G3, but it takes some post-processing to control the noise. Not a big deal, especially with the excellent noise reduction now resident in Adobe Lightroom. Rather than miss a shot, I will shoot the G3 at 6400, but it's definitely pushing the noise situation.

My Nikon D700 shoots at iso 3200 with no problems whatsoever. I can reliably shoot at iso 6400 (or even 8000, as shown above).

One reply to the post notes that the results certainly look better in images downsized for posting on the web than they do in printed pictures. While I must agree with that statement, I would also submit that has always been true. That said, I recently printed some iso 3200 images from the DMC-G3 for a band I photographed. I was quite pleased with 8x10s, and think they would have held up well at 13x19.

I love the fact that I can shoot in very dark musical venues and not worry too much about image quality. I have found that it's better to go ahead and crank up the iso and shoot at full exposure, rather than underexposing at lower iso settings and trying to bring the levels up in Lightroom. That's when the noise levels really go crazy.

Anyway, it's a great time to be a photographer. The equipment just gets better and better.

DMC-365.blogspot.com