Showing posts with label raw. Show all posts

Tuesday, November 11, 2014

Nikon Df - Amazing Exposure Recovery

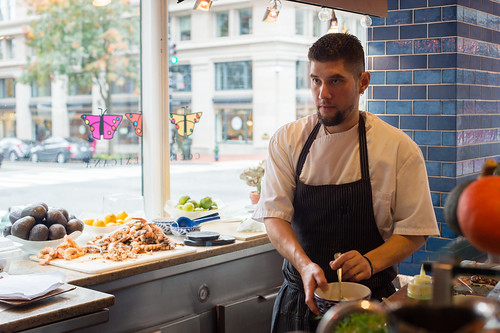
Okay, so here's a jpeg of an image I shot with the Nikon Df inside a restaurant on a sunny day last weekend. This one is straight from the camera.
Jpeg, straight from the camera (underexposed)
 
Even though I used +1 stop compensation with aperture priority metering, clearly it wasn't enough. If I'd done it properly, I would have used spot metering, and metered from the guy's face.
 
Here's the amazing part. Working with the raw file from the same image in Lightroom, I was able to transform it to this:
 
After treatment in Lightroom
 
I brought the exposure up over two full stops. Usually, with other cameras, I've found that there's just not enough information in the shadows to pull this off. I think it worked exceedingly well in this case. I'm very impressed with the images that the Df can produce, even when I screw up the exposure.
 
Now, rest assured, I'll still try to make the very best exposure possible when I'm shooting. But, it's really nice to know just how much you can recover if things go wrong.
 
Impressive camera, this Nikon Df.
 
DMC-365.blogspot.com
 

Monday, December 9, 2013

Backing Up Files on iPad - One Step Closer - My Travel Backup System

 
Pogoplug Series 4 Sharing Device
Image Source: http://www.adorama.com/COCPOGOV4A3.html?EmailPrice=T


I've gone through several devices looking for the best way to backup files during travel with my Apple iPad (not requiring me to carry a laptop computer). I was looking for a way to backup raw files and jpegs, even when I may not have access to the internet. I tried multiple wireless hard disks that were advertised as having the ability to move files from the iPad; none of them worked.
 
What I've been doing in the face of this failure is basically making sure I have two copies of every file in a very basic way. I always carry enough SD cards that I don't have to format them during my travel. After filling one up (or after a day of shooting), I use the Apple Camera Connect kit to plug the SD into the iPad and transfer files. This gives me tens of Gigabytes of backup, and the iPad automatically moves both raw and jpeg files. Then, I put the SD away in a different case, so that I remember it's full. Now I have one copy on the SD, and one on the iPad, without the need for an internet connection.
 
Once I'm connected to the internet again, I can upload files to flickr, but that's pretty darned slow in my experience. That's where this little beauty comes in. The Pogoplug is a network file sharing device that you plug in to your network at home. Then, you connect storage to it - this can be anything from an SD card, to a USB hard drive (USB3 that is), or directly connect a hard drive that has the 2.5" SATA interface. I had a 1Tb Iomega USB drive that I connected for now. It gives you a dedicated connection, which makes it much faster than uploading to flickr.
 
So, once you've got that going, you download the Pogoplug app for the iPad (from the Apple App Store). It's free. You can set it up so that anytime you're connected to the internet and the app is open (yes, it must be open), the system will automatically backup your jpeg files from your iPad Camera Roll to the hard drive at home, no matter where you are. This is handy, especially if you use a wifi-enabled camera (like my Panasonic Lumix DMC-GX7 or Lumix DMC-TS5) to upload to the iPad. Then it's all seamless.
 
Here's the limitation - both Lumix wifi and Pogoplug are limited to only jpegs - they won't upload raw files.
 
So, my workaround (assuming I need to backup raw files) is this - I don't use wifi to transfer from the camera to the iPad, but use the Apple Camera Connect as stated above to get a second copy of my jpegs and raw files onto the iPad. Then, the Pogoplug app requires that I go in and select the images in my Imported folder on the iPad for upload to the disk at home. Easy, and quite fast. It will be even faster when I get a dedicated hard drive directly connected to the Pogoplug.
 
So, what does this give me? Two copies of all files, and a third of the jpegs only:
 
  1. The original raw and jpeg files stored on the SD card I used in the camera.
  2. Second copies of both raw and jpeg files imported to the iPad (using the Apple Camera Connect kit).
  3. Third copies of jpegs only backed up on the Pogoplug hard drive at home. These would save me if I dropped my camera bag and iPad into the ocean or something.
This means I have to carry a lot of SD cards, but they're small, lightweight, highly reliable, and relatively low cost.
 
I don't like that the Pogoplug app will only copy jpegs, but the silver lining is that upload of jpegs is very fast. Maybe they'll add raw capability in a firmware upgrade. Wouldn't that be great?
 
The Pogoplug adapter is very inexpensive. Purchase yours at the link below.
 
DMC-365.blogspot.com


Thursday, December 5, 2013

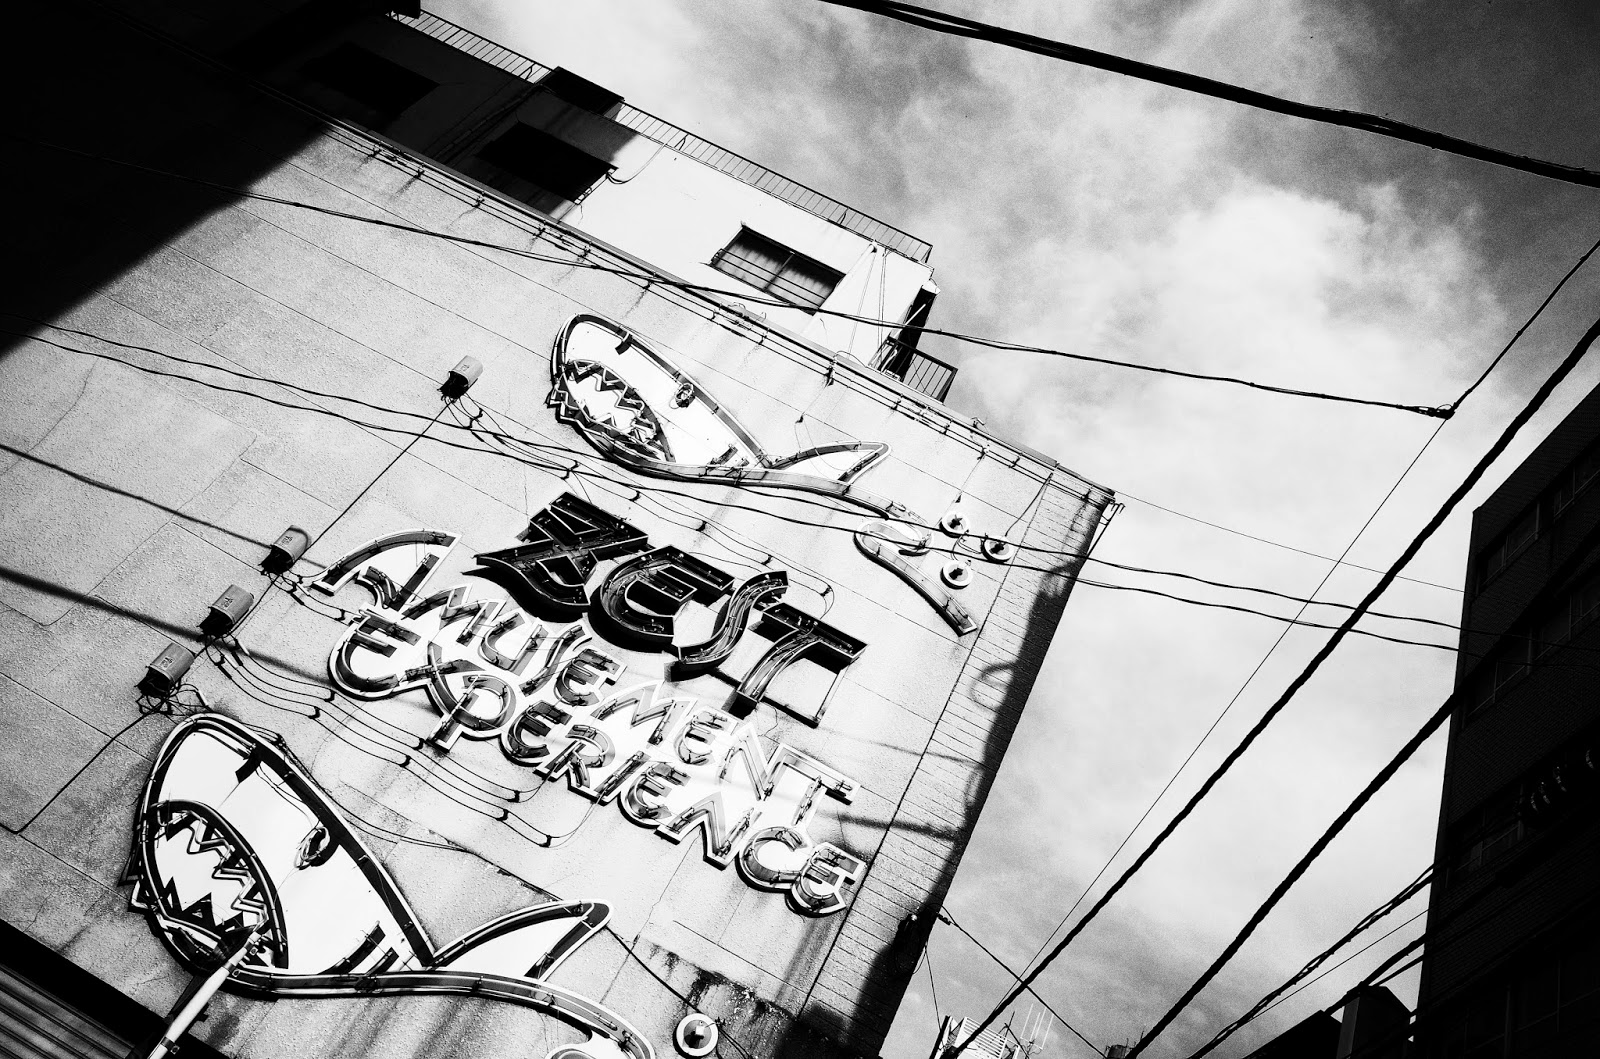
Ricoh GR, Tokyo, "Daido Mode" by Colin Steel on Steve Huff's Site

This is the beauty of modern internet technology and photography blogs. This morning I got to read about a camera I've never handled, used in a place I know well but only see once a year, view photographs that a guy I've never met took and shared on another guy I don't know (but feel like I do)'s blog.
What I mean is that I got to see the awesome images that Colin Steel made in Tokyo with the Ricoh GR, and shared on Steve Huff's site.
Image Source: http://www.stevehuffphoto.com/wp-content/uploads/2013/11/colin4.jpg

In his guest post on Steve Huff's site, Colin Steel shares a series of images he made on a quick three day trip to Tokyo. Apparently at least one day was made up of 24 hours straight wandering the streets of Tokyo, shooting with the Ricoh's high contrast monochrome setting, referred to as "Daido mode," after Daido Moriyama, famous Tokyo photographer who also happened to shoot with Ricoh cameras.

(Click Here) to read Colin's post on Steve Huff's site.

Colin writes about how he and most serious photographers usually ignore the in-camera creative presets. I used to feel the same way until one very important thing happened in the cameras I have that include presets: they started enabling most of the presets to be used in raw+jpeg shooting mode! This means that I can get a jpeg with all of the preset effects, view it on the camera display in the preset way, but have a completely unembellished raw file stored on my card to post-process in any way I see fit later on. I can see a high contrast black and white rendition while I'm shooting, then come home and use the raw file to make a low contrast color print, if I decide to. Flexibility is a great thing.

I won't go into the details of the Ricoh camera, as I honestly have not looked at them. So many cameras, so little time, you know. My two points today are: 1) it's great to be able to see wonderful photography from around the world and people I don't know through the internet, and 2) don't ignore anything on your camera. It may come to creative use if you learn how to use it, and learn about things like having the unaltered raw files available, should you change your mind later.

DMC-365.blogspot.com


Sunday, March 17, 2013

Panasonic Lumix DMC-LX7 - A Few Creative Control Examples

The Lumix LX7 is quite a little camera. With the small sensor size, which makes it possible to produce an amazingly well-featured camera with great fast optics in a very compact package, I usually shoot raw images, so that I can later control the noise levels in post-processing. Hold that that.
 
The LX7 has a plethora of built-in artistic and creative modes, as is common with many compact cameras. Here's the difference - the LX7 allows you to shoot both raw and jpeg files in these modes (except for the fully-automated iAuto mode). This gives you so much flexibility. Any of the creative control effects will be applied to the jpeg file (only), and the raw file remains untouched and ready for your post-processing as you see fit. So, I can actually use the creative controls on the LX7 without feeling that I may be missing the shot.
 
The jpeg processing on the LX7 is a little harsh in my estimation. Therefore, having the unaffected raw files really means a lot to me.
 
I recently took the LX7 on a trip to California, where I visited Pioneertown, a true town constructed by movie producers to make Westerns. It's quite a funky little place out in the desert.
 
(Click Here) to read about Pioneertown.
 
I tried a few of the creative controls, and really decided that I like "Toy" mode. Here's an example.
 
In a Pear Tree?, by Reed A. George
Panasonic Lumix DMC-LX7, Toy Setting
iso 125, f2.8, 1/125 sec
 
You can see that toy camera mode adds significant vignetting (darkening around the edges of the image), muted colors, and I think some loss of sharpness around the edges, while the center remains sharp. Kind of fun.
 
Here's one using the Impressive Art control:
 
Control, by Reed A. George
Panasonic Lumix DMC-LX7, "Impressive Art" Setting
iso 160, f1.6, 1/60 sec


Here's another setting, called "Expressive Art."

 
Desert Office, by Reed A. George
Panasonic Lumix DMC-LX7, "Expressive Art" Setting
iso 80, f2.8, 1/1600 sec
 
So far, I really like Toy mode best.
 
 
Desert Office 2, by Reed A. George
Panasonic Lumix DMC-LX7, "Toy" Setting
iso 125, f2.8, 1/1600 sec
 
All of these images are jpegs, right out of the camera. The final two I decided to shoot in square format, another great setting on the LX7. No adjustments were made to any of these.
 
And, the great thing is, I have the raw files if I want to process them differently! Lots of fun.
 
As promised, I'm nearing completion of my ebook on the LX7. I'll be announcing it soon.
 
DMC-365.blogspot.com
 
 
The best $298 (current price) you'll ever spend on photo equipment - please buy yours through this link:


Wednesday, March 6, 2013

DMC-LX7 Shot - The New Generation

 
The New Generation, by Reed A. George
Panasonic Lumix DMC-LX7
iso 400, f2, 1/60 sec
 
This is just a fun grab shot, taken in my living room. That's my kid, simultaneously working on a laptop and an iPad.
 
This is exactly why I like to have a camera handy at all times. This wasn't posed, just a moment captured over the weekend.
 
I processed this one from the raw image, and I must say I'm pretty happy with it. For iso 400 on a small sensor, I think it turned out pretty well.
 
My daughter likes it too. In fact, she took a print of it to school to put in her locker.
 
DMC-365.blogspot.com
 

Monday, February 25, 2013

Panasonic Lumix DMC-LX7 - Jpeg Settings

I have only spent a little time with the LX7 so far. I started off by shooting some Jpegs. You have lots of image options in Jpeg shooting with the LX7, under "Photo Style." I started with STD, with default settings (for contrast, sharpness, color, and noise reduction). I have to admit I was not very pleased with the look of the jpegs at these settings. So, I had an assignment - see how to optimize Jpeg settings, if indeed it's possible to get what I want.
 
Just so you know, the raw images look pretty good to me. In the past, with my DMC-LX2 and DMC-LX5, I always shot raw. I may end up in the same situation with the LX7, but let's see what contributes most to my disappointment with the default images.
 
I decided to shoot a set of images on a tripod, using iso 400, f5.6, 1/60 second (manual exposure), and manual focus. I wanted to minimize all of the other variables, so that I could focus on Jpeg processing. I also shot both STD (color) and MONO (black and white) jpegs, since I'm interesting in optimizing both.
 
Here's the scene I shot:
 
Overall Scene, by Reed A. George
Panasonic Lumix DMC-LX7
iso 400, f5.6, 1/60 sec.
 
The tight crop below shows close up what I saw with the default STD jpeg settings:
 
Crop - STD, Default Settings
 
You can see some processing artifacts, especially along the edges of the lamp shade at right, and in the shaded area of the wall, directly under the leaves.
 
Based on my experience, these artifacts could be due to one or a combination of the following variables:
  1. Jpeg compression algorithm
  2. Oversharpening
  3. Excessive noise reduction (NR)
I was hoping that it wasn't number 1; there's nothing you can do about that as a user. So, I tested Sharpness and NR, independently and in combination. First, I turned down Sharpness to the minimum (-2).
 
Crop - STD Photo Style, Sharpness -2, Default NR
 
In this, I see a distinct drop in the artifacts, and the expected reduction in sharpness. Much better. I can always sharpen in Lightroom.
 
Next, I brought sharpening back to default level, and reduced NR to the minimum (-2):
 
Crop, Default Sharpness, NR -2
 
The artifacts are back. Looks like Sharpness is the key adjustment.
 
Just for kicks, I combined minimum settings for both Sharpness and NR:
Crop, Sharpness -2, NR -2
 
 
The artifacts again disappear, but I don't think NR had much to do with it. Default Sharpness level in the LX7 creates Jpeg artifacts to a level that I find unacceptable.
 
Now let's look at the same series in black and white.
Crop - MONO, Default Settings
 
In black and white, I think the artifacts show up worse than in color. Look at the right edge of the moulding at the edge of the window.
 
The next one was shot with Sharpness set to -2:
 
Crop, Sharpness -2, Default NR
 
Much better.
 
For completeness, let's see what default Sharpness and minimized NR do:
 
Crop, Default Sharpness, NR -2
 
Artifacts back. Again, Sharpness is the setting that affects Jpeg artifacts.
 
Finally, minimizing both Sharpness and NR yields this:
 
Crop, Sharpness -2, NR -2
 
Again, the artifacts disappear, but in my opinion that's mostly due to minimizing Sharpness. NR doesn't seem to generate many artifacts.
 
So, what does this tell me? It tells me that I can drastically improve Jpeg from the default settings by reducing Sharpening. Now that I know that, I can decide whether to reduce it to -1 or -2.
 
I'm happy that I can adjust Sharpening to affect Jpeg processing. I'm also happy that it's not a combination effect, which is harder to control.
 
One more thing - I love the iAuto option on the LX series cameras. It allows you to quickly switch from any setting and let the camera make all the decisions. Let's say that you're shooting Jpeg street scenes with manual focus in black and white at iso 400. Just then, you see a person approaching with a gorgeous bouquet of red roses. Rather than trying to work through menus to get back to shooting color, you can switch the top dial to iA and shoot away. Very handy. Unfortunately, I cannot adjust sharpening in iAuto. So, that will seriously limit my use of iAuto with the LX7.
 
Lots more to come on the LX7. So far, so good.
 
DMC-365.blogspot.com

Friday, November 30, 2012

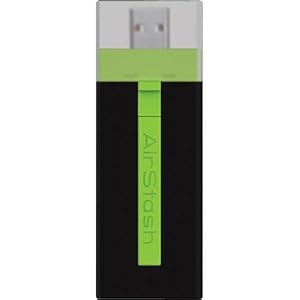
More Unfulfilled Promise - the Maxell Airstash

 
Maxell Airstash
Image Source: http://www.amazon.com/Maxell-AirStash-Expandable-Capacity-Wireless/dp/B006473T92/ref=sr_1_2?ie=UTF8&qid=1354189519&sr=8-2&keywords=maxell+airstash
 
So close, but yet so far. Let me save you some reading if you like: AIRSTASH DOES NOT ALLOW TRANSFER OF RAW FILES FROM THE IPAD.
 
My Airstash arrived yesterday, and after a few blips in upgrading the firmware, was ready to go. Very promising. The app (Airstash+) actually has a simple interface. Click the little camera icon, and you can say whether you want to import (from Airstash to iPad) or export (to the Airstash), select your images, and go. So, I did a test with ~250 images stored on the iPad (in both jpeg and raw) during a meeting. I was elated. Within 40 minutes it was done. So cool!
 
The transfer rate was not fast, but certainly acceptable. The devise design is nice - it's very small, light, not much more in your bag than a normal SD card - USB adapter.
 
Then came the final part of the test. Plugging the Airstash into my desktop, I looked at my transferred images. What? No raw files! Just jpegs. The transfer changed all of my raws into jpegs.
 
I thought there must be a setting that I missed. There isn't. In fact, there are so few settings that I scanned all of them three times in a few minutes. So, reluctantly, I called the 24/7 Maxell service line.
 
After a several minute hold, I got a real person. He immediately told me that I'd have to do some internet research, and that this functionality was on the app end, which is produced by a third party. I replied that I had read the MAXELL web page extremely carefully before making this purchase, and that it clearly indicated compatibility with raw files. After pushing back, he agreed to talk with someone else there at Maxell. He came back on the phone after consulting with the Airstash Support Manager, and informed me that the software automatically converts raw files to jpeg upon export to the Airstash. There is nothing you can do to change that. I calmly informed him that this "feature" makes the device completely unhelpful to serious photographers, and it's on its way back. He said "Okay, thank you!" and we were done.
 
A couple of you have suggested divorcing from Apple for this function. I'm afraid I may have to agree with you. I'm so hooked on the iPad interface and apps for other purposes, it is difficult to consider something else. But, it just won't seem to help me out here.
 
I thought Apple's strongest core of users came from the arts, science, and imaging worlds. How can they not see the need to give this to us photographers?
 
I'm going to take a break from this pursuit for a while. I'm not doing any more big travel until spring...
 
DMC-365.blogspot.com


Saturday, June 16, 2012

Olympus E-PL1, 14-150, and Lumix 20mm f1.7 Go On A Trip

 
Image Source: http://www.rangefinderforum.com/forums/showthread.php?p=1896778&posted=1#post1896778

User ywenz on Rangefinder Forum posted a gorgeous series of pictures from a recent trip.

(Click Here) to look at all of them. You owe it to yourself to see the other shots, in addition to the one above.

One interesting thing here is that all of the images are jpegs (not shot in raw format). There is a group out there of the opinion that Panasonic Lumix Micro 4/3 cameras don't produce acceptable jpeg images. Therefore, many (most?) shoot in raw format.

I always use raw, just in case I screw something up, like forgetting to change my white balance settings. It has happened. As I have written before, however, I don't like to spend more time than necessary post-processing my images. So, I've been trying different jpeg settings, in the hopes that when I shoot both raw and jpeg together, the jpeg will be acceptable for use, and the raw file will be there just in case.

I have posted a couple of others' ideas for ideal jpeg settings in the past. My latest post on the subject yielded settings that I'm now quite happy with.

(Click Here) to see the post with my favorite jpeg settings for the Panasonic Lumix DMC-G3, contributed by dixeyk on mu-43.com. These are now my standard jpeg settings, and are set up as a custom profile on both of my G3s. They're pretty good, in my opinion. Give them a try.

When I was primarily a Nikon shooter, I always chose very neutral jpeg settings (easy on the contrast, saturation, and sharpening), figuring that I could add all of those things back later, but cannot subtract them. The settings suggested in the post referenced above are very similar. Here's an example, pretty much right out of the camera.
Manassas Memorial, by Reed A. George
Panasonic DMC-G3, Lumix 14-140 f4-5.8 at 95mm
iso160, f5.8, 1/640 sec

I find that there's plenty of saturation here, contrast is well-controlled, and sharpness doesn't suffer.

DMC-365.blogspot.com