Showing posts with label motion. Show all posts

Friday, May 22, 2015

In Honor of our World War II Veterans - DC Mall Flyover

I recently had the opportunity to participate in a media event for the World War II Memorial Flyover, an event where dozens of war era aircraft flew in various formations over the National Mall in Washington, DC.
 
(Click Here) to read about the event, which took place on Friday, May 8, 2015.
 
On the day before the event, my associate, Rob, and I got to go to a local regional airport and witness the take-off of several of the airplanes that would take part in the event.
 
I brought along my Nikon D700, 35-70mm f2.8, and 70-300 f4.5-5.6 AF-S G lenses. All of the images below were made with the 70-300.
 
The event began with a short press conference, and then we were allowed out on the tarmac. Preparations for the day's flights were underway.
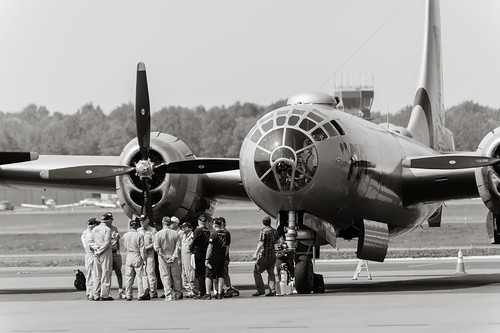
B-29 Superfortress, by Reed A. George
B-17 Crewmembers, by Reed A. George
 
 
Then, the engines started to crank.
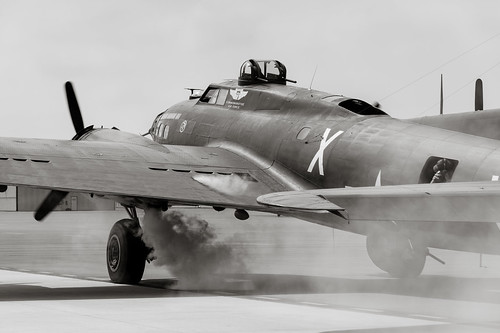
Cranking up, B-17, by Reed A. George
 
We were warned about the noise, oil, and propwash (wind) that would result when this happened, and the B-17 didn't fail to deliver. It was quite a thrill to be so close to these aircraft.
 
B-29 Cranks Up, by Reed A. George
 
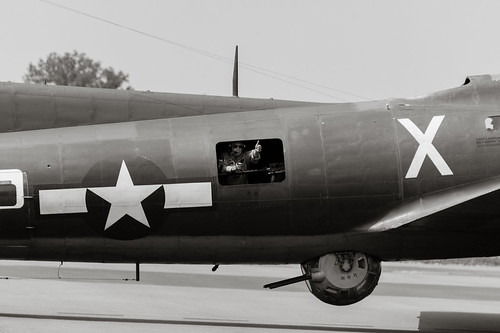
As the planes taxied for takeoff, we got some close up views of them in motion.
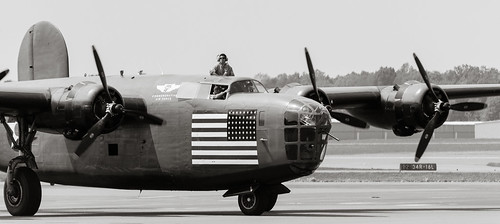
 
B-24 Liberator on Taxi, by Reed A. George
 
Here's my favorite shot from the day:
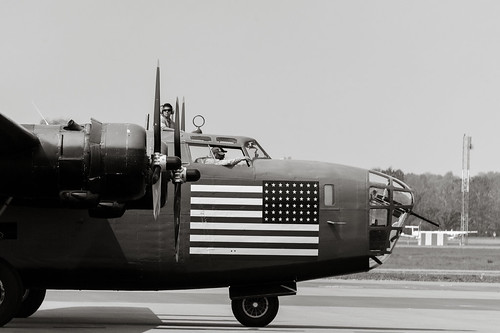
Between the Props, by Reed A. George
 
I used a gradual neutral density (ND) filter on my 70-300, to prevent the pure white skies from overexposure. It's a subtle effect, but I think it helped. Sure would have been nice to have a cloud or two.
 
Once all of the aircraft were lined up for takeoff, the staff lifted the barrier tape and let those of us with media passes out closer to the runway. At this point, having captured decent sharp images of all of the airplanes on the ground, I started thinking about what made this event unique. It wasn't the aircraft alone. I had photographed some of the crew, which I cannot see on a normal trip to my local Air & Space Museum (yes, I know I'm lucky, not everyone has the Udvar-Hazy Museum ten miles from their home). The real unique point, though, was to see these old beasts in flight. Asking Rob to be sure and capture sharp images of them taking off, I decided to try some panning, in an attempt to show the motion in my images.
 
I consider myself to be pretty good at panning, matching the angular speed of my moving camera to that of the object I'm tracking. Doing that with these big aircraft turned out to be really challenging. I set the 70-300's VR to "Active," which is supposed to be designed for panning. Every shot came out blurry. Not just most, all of them. Finally, turning VR off completely, I was able to capture one decent panning shot of the B-29. Here it is.
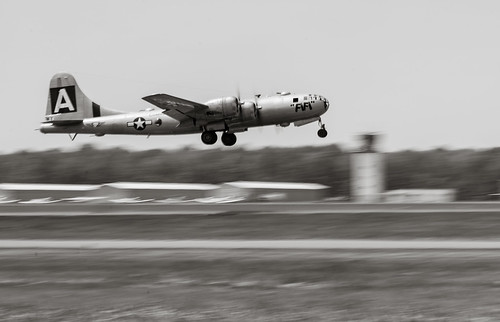
Superfortress Takes Off, by Reed A. George
 
So, I worked hard for it, but feel that I captured most of the feeling of the event that I was after. What an incredible opportunity.
 
I hope that many of our remaining World War II veterans were able to see or watch the live feed of this event. It's really something to see these 70 year old airplanes still in prime running (flying) condition.
 
DMC-365.blogspot.com

Saturday, April 25, 2015

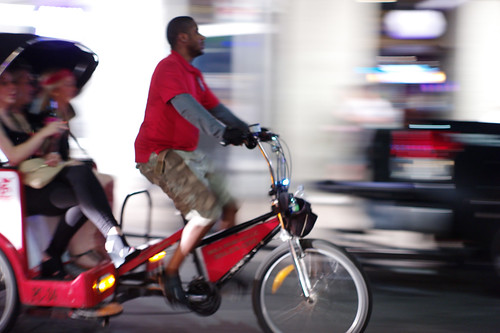
Another Panning Example With the Leica M9

 
Bike Taxi, New Orleans, by Reed A. George
Leica M9, Summilux 50mm f1.4
iso 800, 1/15 sec.
 
As in yesterday's post, I used the panning technique to show a moving subject at night.
 
In this case, I didn't match the camera motion to the subject's speed as well as I did in the shot posted yesterday. However, this picture says more about being in New Orleans. Motorcycles can be seen virtually anywhere; bike taxis are less common. But, there are plenty of them in New Orleans.
 
So, as a travel photo in which I wantedd to say something about the place, this one works better.
 
DMC-365.blogspot.com

Friday, April 24, 2015

Panning at Night

Panning is a technique in which you set your camera to a relatively slow shutter speed and follow the motion of a moving subject. If you follow at exactly the right speed, your subject comes out sharp. If your shutter speed is slow enough, everything but the subject is blurred due to the motion of the camera. It gives a great sense of motion to the image.
 
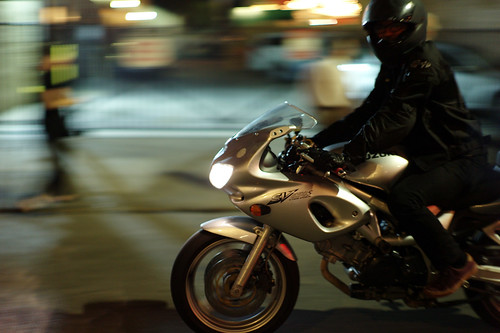
Here's a panning shot I made of a passing motorcycle in New Orleans:
 
Panning a Motorcycle at Night, by Reed A. George
Leica M9, summilux 50mm f1.4 Lens
iso 800, 1/15 sec.
 
In this case, the 1/15 second shutter speed was slow enough to give decent motion blur to the motorcycle's surroundings. Based on the fact that you can read the lettering on the motorcycle, I must have gotten the camera motion just right.
 
DMC-365.blogspot.com

Thursday, August 7, 2014

Bike Riding with the Fuji Instax Neo

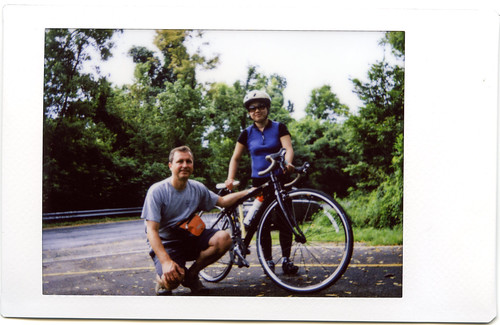
My wife and I went on an all-too-rare bike ride together last weekend. I took the Fuji Neo along.
Before the Ride, by Reed A. George
Fuji Instax Neo Instant Camera
 
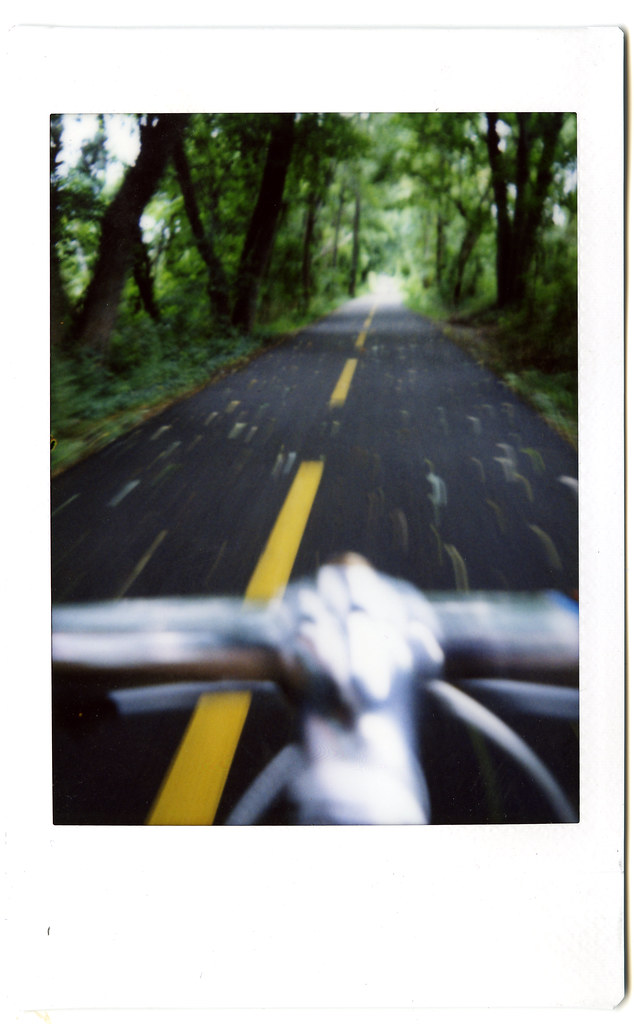
I carried the Neo around my neck the whole ride. It's very light, so that didn't present a problem at all. I decided to try and capture some motion blur in one of the more wooded sections of the trail. First, I tried the B setting, and overexposed to the point that the image was useless. For my second try, I simply turned off the flash, which resulted in a longer exposure. Here's what I got:
 
Daylight Motion Blur, by Reed A. George
Fuji Instax Neo Instant Camera
 
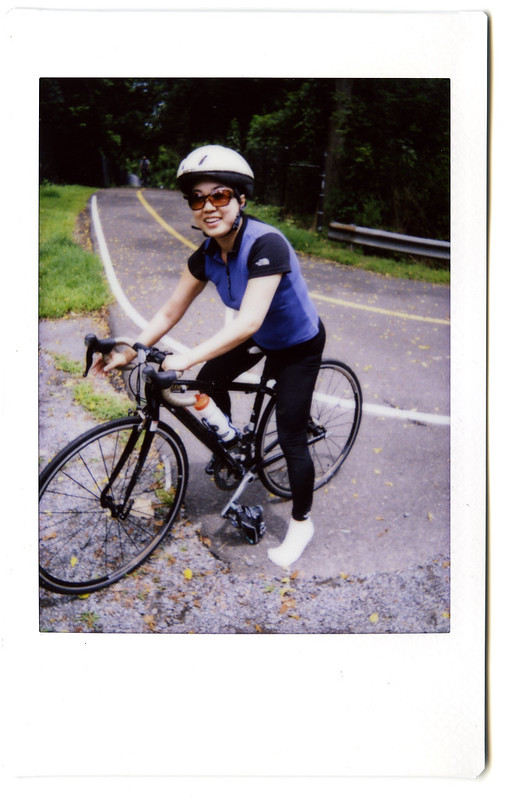
My wife had some challenges with her biking shoe clips, namely getting them to clip in and then unclip. Here she demonstrates the emergency evacuation procedure, which consists of pulling your foot out of the shoe, leaving it attached to the pedal. No kidding, these shoes were the biggest safety hazard of the ride.
 
Pedal Clip Challenges, by Reed A. George

Fuji Instax Neo Instant Camera

 
I'm really enjoying the little Fuji Neo. I'm hopeful that Instax film for it will be around a while, even while Fuji discontinues it's older pack film. There seems to be a lot of focus on Instax, and I seem them popping up in various places. If you're looking for a fun photographic diversion, give one a try. The Neo happens to have a lot more creative settings than the other models, including B (time exposure), exposure compensation, and the abilty to turn the flash off when you want. Buy yours from my Amazon link below and support my blog!
 
DMC-365.blogspot.com


Thursday, July 10, 2014

Whirling Disks and Rear Curtain Sync

Rear curtain flash sync is a function on many cameras. The way it works is that instead of triggering your flash when your shutter opens (generally for a much longer time than the length of the flash light pulse itself), it opens the shutter, then triggers the flash right before the shutter closes.
 
Why would you want this? Well, if you're using a slow shutter speed, you'll get motion blur or light trails from anything that's moving fast. With normal (front curtain) sync, the flash goes off, the shutter stays open, and you get trails that are made after the flash. With rear curtain synch, the trails are made first, then you get flash and light the rest of the scene at the end of the exposure. The classic example is a moving car, where you get an image of a car that's already gone by you, with fantastic blur behind it. Using front curtain sync, you'd get the car before it passes by, and light streak in front of the car, not nearly as cool.
 
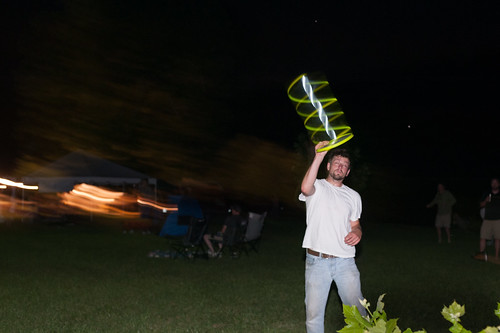
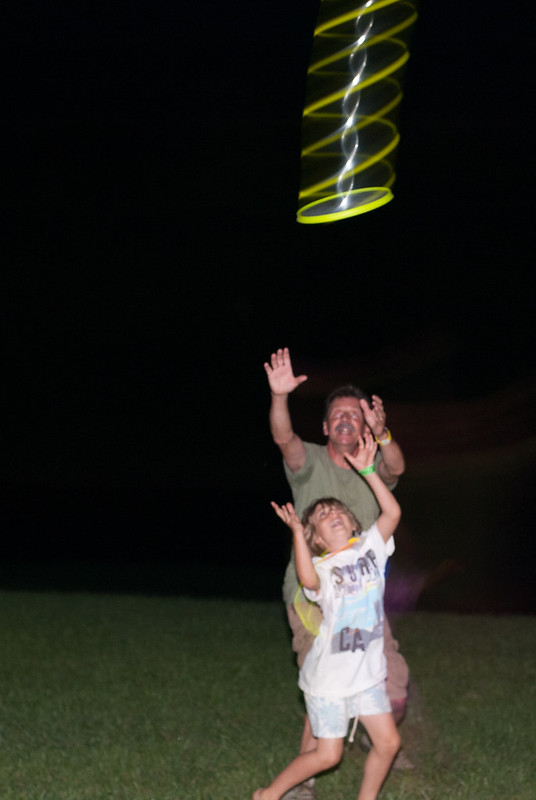
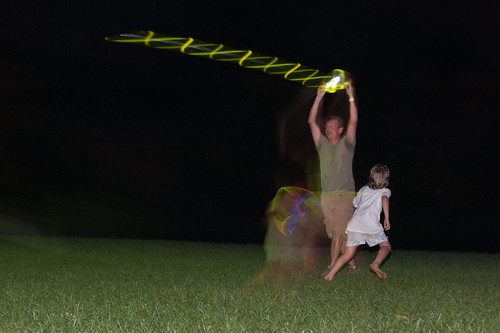
Well, I find it's pretty difficult to find applications other than moving cars for this cool technique. At the River and Roots music festival, I found one. These guys were playing what I would normally call "Frisbee," but with a disk that has its own light in it. They were playing in the dark. I thought, hmm. I bet that disk would make a great light streak. So, I tried it. Amazing! It made this really cool nested helix shape as it flew by. Next step, try rear curtain sync to see if I could capture the streaks and the player. Here's how that looks:
 
I like this shot a lot, but I wanted the streaks to be longer, and I didn't like the distracting lights in the background (at left).
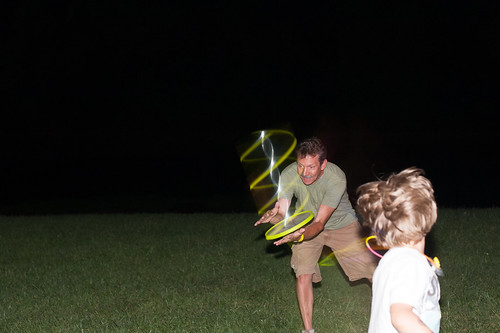
First, the background lights. One of the other players was near the river, which was completely dark. Goodbye background distractions:
Getting the timing just right was tough, but I was getting the hang of it.
So, how to lengthen the light trails? Longer exposure, of course. So, I went to a full second exposure, with the flash at the end. Since the ambient scene was so dark, I didn't even have to change my f-stop or flash settings. This is exactly the effect I was looking for:
Whirling Disk, by Reed A. George
Nikon D700, Nikkor AF-D 50mm f1.4 Lens
iso 1600, f4, 1 second exposure, rear curtain sync flash
 
Great fun. I don't think any other photographer at the festival captured a shot just like this.
 
DMC-365.blogspot.com


Saturday, June 28, 2014

Panasonic Lumix DMC-GX7 Electronic Shutter - Cool Motion Artifact

The Lumix DMC-GX7 has an electronic shutter option. Making the camera completely silent, a new user may wonder when you wouldn't want to use the electronic shutter. A little reading will tell you it's not compatible with certain lighting types, specifically a particular fluorescent light, and flash.
 
Because it accomplishes silence by activating selected pixels in a time sequence, obviating the need for a mechanical shutter, photographing subjects in motion can produce strange artifacts.
 
I reminded myself of this yesterday, by taking this picture:
 
Silent Shutter Motion Artifact, by Reed A. George
Panasonic Lumix DMC-GX7, Electronic Shutter
 
 
So, while the silent shutter is very handy, especially in quiet situations, be careful in situations involving motion, fluorescent lights, and those needing flash.
 
DMC-365.blogspot.com


Monday, February 10, 2014

Rolleicord / Rolleikin Portraits - Buddhist Monk

I've written about the Rolleikin attachment for my Rolleicord TLR, which allows me to shoot 35mm film in it. With the 75mm f3.5 Tessar and 35mm film in portrait orientation, the camera is quite useful for shooting portraits.
 
(Click Here) to read a little about the Rolleicord and Rolleikin.
 
I've started a new project, with a focus on contemplation and meditation. For some time now, I've been attending meditation class at our local Buddhist temple, led by Achaan Edward. He has just moved to a new temple, and I'm exploring both the inward concepts of meditation and the external setting of his new location, in the beautiful Virginia hills.
 
For one session, I decided to photograph Achaan Edward meditating, with the Rolleicord. Here are my favorite results, all shot on Kodak TMax 400 film:
 
For the shot above, I used a reflector on the floor to help even out the glow from sunlight coming in the side window.
Achaan Edward, by Reed A. George
 
As far as using the Rolleicord goes, I have some things to improve. Many of my images from this roll were not so sharp. Based on the fact that nothing in the affected images was sharp, I'm tending to think it was motion blur. I was shooting at ~1/50 of a second, handheld. A tripod was in order. Also, the shutter release mechanism on the Rolleicord is different from my Rolleiflexes. Instead of a simple button, the Rolleicord uses a lever to both load and release the shutter. I think I probably tend to move the camera when using this unfamiliar mechanism. So, a remote release may be useful, even when I'm shooting handheld.
 
The ground glass on the Rolleicord is a little dim. With my aging eyes, it's also a little hard to find the right focus point. But, I think most of my problems were associated with camera motion.
 
All that said, I'm quite pleased with these particular images. I believe they'll be up on the temple's new webpage quite soon.
 
DMC-365.blogspot.com


Saturday, November 2, 2013

Another Autumn Leaves Series, With Motion

This will mark my third small series of fall leaves in motion. As I said before, I did push myself to keep pursuing the idea, tweaking it as I went, to see how far I could push it. Of course, it could go further, but I think the following three images represent something of an accomplishment for me.
 
These shots were all made with the new Panasonic Lumix DMC-GX7 and 14-42mm f3.5-5.6 Series II kit lens. What I feel I've learned so far in this exercise is to play with the level of realism and abstraction, which I actually think I came close to in my previous mini-series (on November 1). I really like those previous images, but did push a little further.
 
This time, I paid more attention to color. The shots from the previous post are pretty bland, color-wise. I think these below pull together my intention in terms of both the level of abstraction and in fall color. I know these won't be attractive to everyone, but I am somewhat satisfied with where the exercise took me. Now you can judge them for yourself.
 
Color and Motion 1, by Reed A. George
Panasonic Lumix DMC-GX7, 14-42mm f3.5-5.6 Series II Kit Lens
iso 200, f22, 0.4 sec.
 
Color and Motion 2, by Reed A. George
Panasonic Lumix DMC-GX7, 14-42mm f3.5-5.6 Series II Kit Lens
iso 200, f22, 0.2 sec.
 
Number 2, above, is probably a little too swirled to stand on its own, in my opinion. In the context of the other two, I think it works.
 
Color and Motion 3, by Reed A. George
Panasonic Lumix DMC-GX7, 14-42mm f3.5-5.6 Series II Kit Lens
iso 200, f22, 1/8 sec.
 
If I had to pick one (I don't have to), I'd pick number 3. I love the color. I think it's right at the edge of complete abstraction, but it still says "autumn" to me. But, I think the three in this series hang together pretty well.
 
One thing I'm learning right now is to give my images time before being done with them. I've been playing with this project quite a lot, and living with the images, thinking about them. I think I'll probably print these three, and see if I'm done. At some point, the leaves will all be down, and I'll be finished by definition.
 
One thing I think is that I could crop all three of these to square images. All of them could lose some empty space on the left side. It would change the character a lot, moving the swirl center away from the center of the frame. I'll give that a try before calling it done.
 
DMC-365.blogspot.com


Friday, November 1, 2013

Pulled Skyward - Autumn Leaves With a Twist (Lumix DMC-GX7)

I've been feeling that I'm at a creative plateau for quite some time. I'm trying some things that are new, if not to the photographic world, at least to my portfolio.
 
Autumn leaves are not so impressive in my part of the world this year, at least not yet. So, I decided to try adding some motion to those same old fall pictures I take every year. On October 30, I posted a set of five images of leaves with motion, starting with simple lines, then moving on to rotations.
 
I really enjoyed looking at those images. I could hear the photographic mentor in my head saying:
 
Good. Nice start. Now go spend some time with it. See how far you can take it.
 
So, I went out for another session. As I was walking out to the small stand of trees that are my subject, I started thinking about the degrees of freedom I could play with in motion while the shutter is open. I came up with several: f-stop, shutter speed, lateral (x,y) motion, angle (of the sensor, in-plane rotation), and angle of view (zoom). So, I played with them all.
 
Here are three images that show one theme that came out. I call it "Pulled Skyward." The threads of white (there was no fog; it was a perfectly clear day) remind of a spirit being pulled up through the trees.
 
Pulled Skyward 1, by Reed A. George
Panasonic Lumix DMC-GX7, 14-42mm Series II Kit Zoom
iso 200, f22, 0.4s sec.
This first one is very nearly completely abstract. For me, abstract means that you can't really tell what the actual subject was. And, for me, it's a little too abstract to stand on its own. Hopefully the next two will give it some context, and help it to remain in the collection.
Pulled Skyward 2, by Reed A. George
Panasonic Lumix DMC-GX7, 14-42mm Series II Kit Zoom
iso 200, f20, 0.4s sec.

Number two clearly shows that we're looking up into the treetops. The white streaks show nicely.
Pulled Skyward 3, by Reed A. George
Panasonic Lumix DMC-GX7, 14-42mm Series II Kit Zoom
iso 200, f20, 0.4s sec.
 
Number 3 is my favorite of this set. I feel like I am being pulled up through the trees. The white streaks are just prominent enough to connect me to the treetops. However, I do feel that all three go together well.
 
If you know my photography, hopefully you'll recognize that this is a real departure for me. I'm somewhat of a photographic realist. I enjoy razor sharp images of interesting subjects, or street scenes where you can see multiple things going on. These are much more symbolic than my normal work.
 
It's good to stretch the mind.
 
I have a different set of images from this session, with a different color palette. I'm still working on those.
 
To those of you looking for how technically well the new DMC-GX7 and Series II kit zoom work, how sharp they are, sorry. I feel drawn in this direction at the moment, and the sharp, realistic images will have to come later.
 
DMC-365.blogspot.com


Monday, October 14, 2013

Accidental Degas (Impressionism) on THEME blog

Image Source: http://www.the.me/the-accidental-degas/?utm_source=feedburner

I love this. On the photography daily blog THEME, the author describes how they got the image above by accident - using an iPhone to photograph in low light at a gala dinner party.

It appears to me that noise reduction software in the iPhone provided the impressionist smearing. The colors are just magnificent.

(Click Here) to read about it, and see the image compared to a real Edgar Degas painting on THEME.

It is so easy to get hung up in technical perfection. Sometimes the impression is more important than the details. It was shown by the impressionists, who really weren't accepted at the time by more realistic painters. This picture proves that it translates to photography as well.

DMC-365.blogspot.com


Friday, January 11, 2013

Bhupinder2002 at mu-43.com Shoots Olympus 45mm f1.8 With 10-Stop Neutral Density Filter for Motion Effect


I've posted about using neutral density filters in the past. For me, the most common uses are to:
  1. Reduce the light coming into the lens to allow me to shoot at wide apertures (for shallow depth of field) in bright light
  2. Reduce light to allow the use of longer shutter speeds, which provides the ability to blur motion.
I usually carry a 3-stop filter, which allows me to move from say f8 in daylight, as some reasonable shutter speed, to f2.8. That makes a real difference in depth of field, for instance if I want to take a portrait in bright light, and blur the background.
 
Bhupinder2002 has posted some shots using a 10-stop neutral density filter on a 45mm f1.8 lens with the Olympus OM-D. This provides for a much larger change in settings, including allowing very long shutter speeds in broad daylight. Hence the moody motion of the water in the image above. It's a cool effect.
 
(Click Here) to see all of the images Bhupinder2002 posted.
 
DMC-365.blogspot.com


Friday, June 1, 2012

Kirk Tuck (of Visual Science Lab) Talks Up The Electronic Viewfinder (EVF)

Kirk Tuck on EVFs
Image Source:
http://theonlinephotographer.typepad.com/the_online_photographer/2012/05/kirks-take-electronic-viewfinders.html?utm_source=feedburner&utm_medium=feed&utm_campaign=Feed%3A+typepad%2FZSjz+%28The+Online+Photographer%29

Kirk Tuck has written a piece on The Online Photographer, with some witty-but-practical thoughts about how electronic viewfinders (EVFs) compare and contrast to optical viewfinders (OVFs).

(Click Here) to read Kirk's post on The Online Photographer.

Kirk talks up the following features of EVFs:
  1. "Pre-chimping" (this term belongs to Kirk :) ). This means being able to see how the camera's settings and electronics will treat an image BEFORE you shoot it. Not possible with an OVF, it can be achieved with live view on an SLR, but not with the camera to your eye.
  2. Focus Peaking - I am not familiar with what Kirk describes, about the camera highlighting items that are in focus in your image. I'm thinking Lumix cameras don't do this? Please comment if you can shed any light on this subject.
  3. The ability to quickly check an exposure in the EVF after it's taken, without having to take the camera away from your eye.
I certainly appreciate number 3, even though it makes people think I'm crazy when I've got the camera to my eye reviewing an image, not necessarily pointing it at my subject any more. My wife has said - "Why are you taking pictures of the sidewalk?"

On the downside, Kirk talks about the delay of the EVF making it more difficult to "lead" a moving subject (or at least different from the OVF), having to turn "Gain Up" (something I think is the default setting in Panasonic cameras) to see your subject in a dark setting, such as when you're planning to use studio flash, and the fact that EVFs typically represent an image in higher contrast than the true image, making the quick-check less effective.

On that final point, Kirk suggests that raw shooters can set their jpeg settings to low contrast, so that the image in the EVF more closely approximates what will be in the raw file. Nice tip.

I agree with Kirk on many points here. I love the "gain up" behavior of the Lumix EVF, which allows me to see what's going on in a dark scene by increasing the gain in the EVF (bringing up the light levels). I would add that this also allows visualization of the depth of field, if you're using a lens that closes the aperture down before the shutter is released. This is the case with legacy lenses on adapters. This is a feature that makes EVFs a major advantage. Basically, even though the aperture is closed way down (reducing the light getting to the sensor), the EVF adjusts the gain to brighten the image going to your eye. So, you get enough light to see what's going on, and the lens is closed down, so you can see the true depth of field.

Contrast this to the old depth of field preview in an SLR (which makes the image in the OVF so dark you can't see anything), or the conventional rangefinder camera (which has no provision for depth of field preview).
That said, I still really love to look through an OVF. It just looks more "real." It makes me feel like I'm still there, present in the scene. The EVF doesn't do that.

I know that even though this is a Lumix blog, I've been referring to Fujifilm quite a lot. I bring it up here because I wonder just how well their hybrid viewfinder (which allows you to switch between EVF and OVF) gives the benefits and minimizes the disadvantages of both finders. I imagine the hybrid design is pretty well-covered by Fujifuilm with patent protection, but I'd sure like to see it appear on other cameras (especially Panasonic).

Thanks again, Kirk, for a thought-provoking piece!

DMC-365.blogspot.com
 
DMC-365.blogspot.com

 

Sunday, May 27, 2012

A Fun Triptych (Series of Three Pictures)

Just thought I would share this little triptych from a quick venture into Washington, DC this morning:
Triptych, by Reed A. George
Panasonic Lumix DMC-G3, Carl Zeiss 25mm f2.8 Biogon

I shot this at about f8. I like how you can see the seconds count down in the crossing signal: 20, 19, 18...

DMC-365.blogspot.com


Sunday, April 29, 2012

New Fun "Salon" Contest on mu-43.com

 
First Train Departs, by Reed A. George
Panasonic Lumix DMC-G1, Pana-Leica 45mm f2.8 Macro-Elmarit
iso100, f7.1, 1/6 sec
 
There is a fun contest being hosted at mu-43.com. The current theme is "Motion."
 
(Click Here) for the contest announcement and instructions for entering.
 
My entry is the image above, of the first train leaving Gora Station in Hakone, Japan. This is the Japan Tozan Railway, which follows single-track switchbacks up the mountain from Hakone Yumoto Station.
 
(Click Here) for more of my images and information about the railway.
 
DMC-365.blogspot.com